Preparing for Review
Overview
This section explains the prerequisites for using this feature. The procedure consists of three main steps:
- Link Lightning Review with Next Design.
- Prepare a review file template.
- Create the review file (before conducting the review).
For instructions on using Lightning Review, please refer to the "Lightning Review User Manual".
Linking the Review Folder to Next Design Projects
Review comments are saved in a review file (.revx format).
When conducting reviews from Next Design, you need to set the folder where the review files will be saved (the review folder) in advance.
Create a review folder and link it.
-
Click the [Link Settings] button in the [Review] menu.

-
In the dialog box that appears, click the [...] button under [Review Folder Path].
-
Specify the folder where the review files will be stored.
This setting enables the following functions:
- Use of template files:
A "Templates" folder will be created directly under the review folder to store templates. - Analysis of review comments:
Analyzes the review comments in the review files stored in the review folder. For details, please refer to "Analysis of Review Comments".
- This folder contains files that associate the review folder with the Next Design project, so please do not delete it.
- This file contains the relative path from the project to be reviewed to the review folder. Therefore, by sharing this file, the same association can be set up among different users.
Notes on Use by Multiple Teams/Members
You can separate the operation depending on the usage case, as follows:
-
If you want to share the review file settings within the team:
All files, including the ".LR" folder, should be managed by the configuration management tool.- Example: Place it in the folder where the repository is cloned.
- If you are using Git, "LRMerge" will work, making it convenient to use.
-
When you want to separate review file settings by team
- This applies when multiple teams use one Next Design project.
Example: Team A and Team B work together, but Team A and Team B have different review and analysis methods.
Since there is only one ".LR" folder, in normal operation, even when used by multiple teams, only one record of settings can be maintained. - [Workaround] If you are using a version control tool that deploys repositories to individual PCs, such as Git or Subversion,
By not registering the ".LR" folder in the version control tool, you can separate the settings files for each user.
Specifically, see below.Even if a member of Team A changes the settings, it will not affect members of Team B.- For Git: Add one of the following to your Git repository's .gitignore file:
* _projectsetting.json
.LR/ - For Subversion: Do not register the contents of the ".LR" folder.
- For Git: Add one of the following to your Git repository's .gitignore file:
- This applies when multiple teams use one Next Design project.
Creating a Review File Template
The review file, where review findings are recorded, includes information on the type of findings to be analyzed and the participating members.
To save time by avoiding repeated input, you can create a template in advance.
By creating a review file template in advance following the steps below, you can start the review smoothly.
Lightning Review - Preparing a Template
Store the created template in the "Templates" folder in the folder associated with your Next Design project.
It's convenient to prepare templates by review target or process unit.
Creating a Review File
Before conducting the review, create a review file and import the Next Design model information. By utilizing a pre-prepared review file template, you can start reviewing deliverables without any hassle.
- Select the model to be reviewed on Next Design and click the [Start Review] button in the [Review] menu.
- From the template selection screen, select the review template to use and click [OK].
- Set the save location for the review file and click [Save].
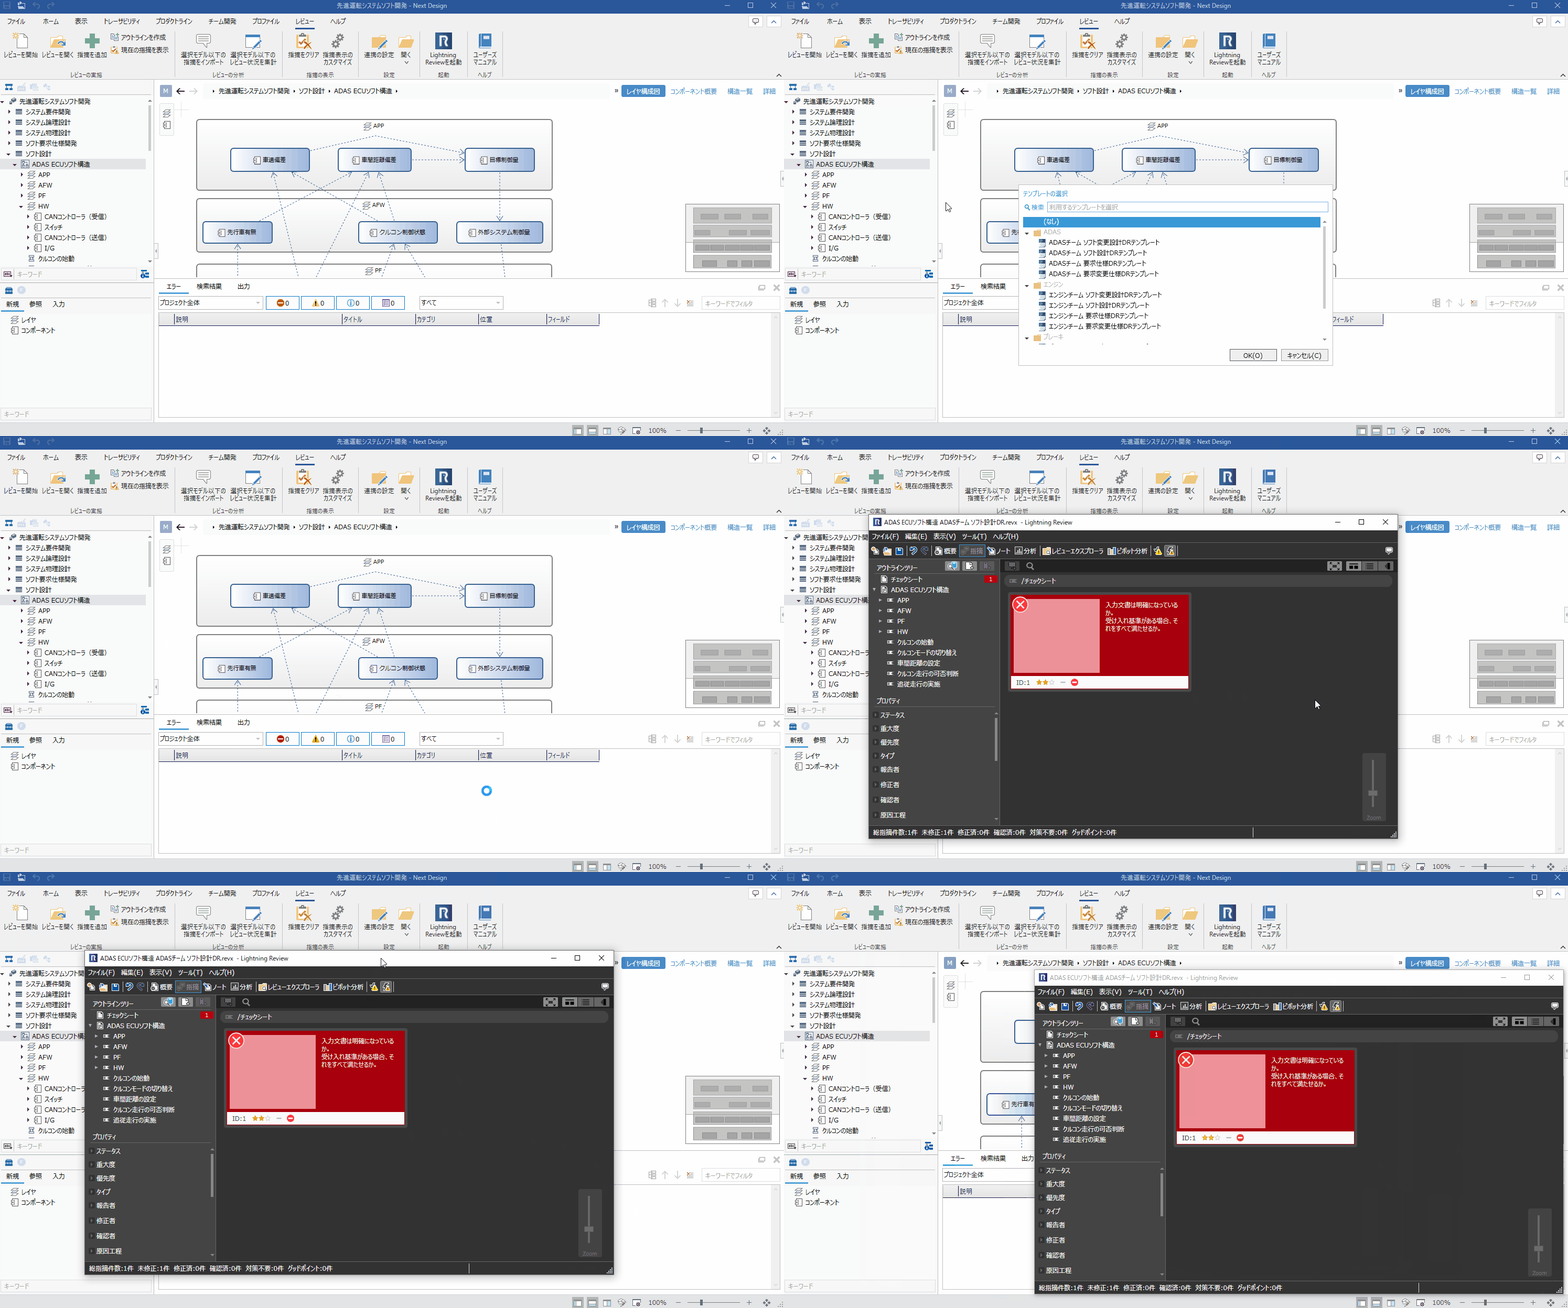
The above operation automatically registers the Next Design model as a review file and creates a review file with outline analysis.
A review file is created for each selected model.
You can manage the issues of one Next Design model by dividing them into multiple review files.
Notes on Outlines
-
When you add an issue from the Next Design review tab, it is registered in the corresponding document or outline in Lightning Review.
Here, in the following cases, the document (or outline) will be added to the bottom level of the Lightning Review outline tree:- It is associated with the same Next Design model.
- The path to the target document or outline matches.
-
As a behavior of Next Design, if you reopen the project file in the following cases, the model will be in an unloaded state:
- It is split into multiple model files.
- The model loading setting is set to "Manual Load".
If you perform outline analysis on the model from Next Design in this state, the outline in Lightning Review will display as (Unloaded).
To generate the outline correctly, load the model beforehand or set the loading setting to "Automatic Load" and then perform outline analysis.
Adding Outlines
To perform outline analysis on the models under the selected node and add the outline to the review file, please follow these steps:
- Open the review file from [Open Review File].
- Select the node in Next Design and click [Create Outline].
