Define fields for an entity
Overview
Next Design allows you to define fields for each entity.
A field is an individual input item for a model. In object-oriented design, the attributes of a class correspond to the fields of an entity. You can define multiple fields for each entity, which is the template for a model.
The following describes the steps to define fields for an entity in the following order:
- Field data type
- Add a field
- Delete a field
- Edit field settings
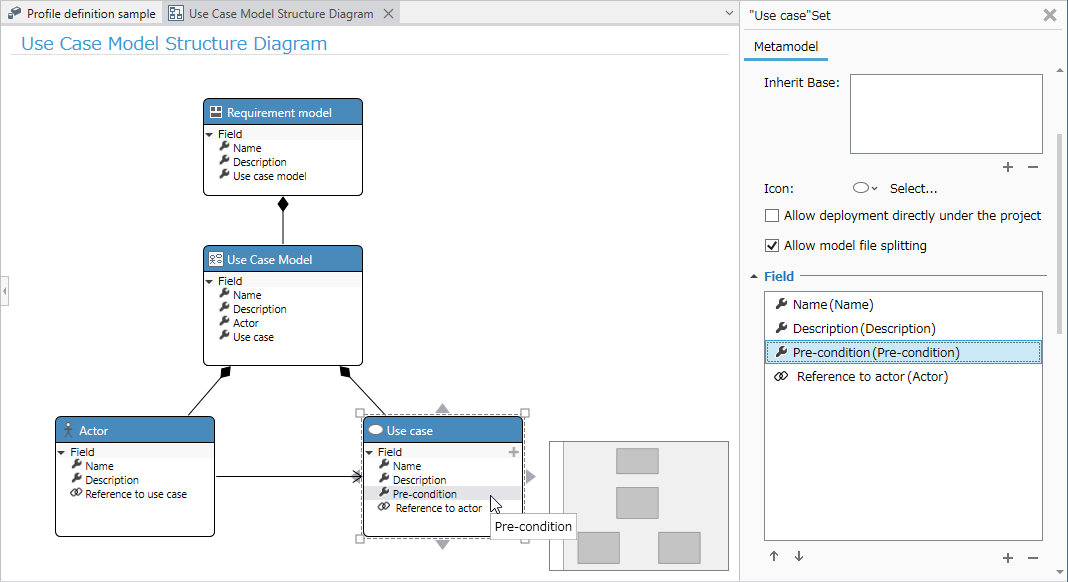
Field definition image
Field data type
The following data types can be used for entity fields.
| Data Type | Description |
|---|---|
| String | Allows you to enter text characters Maximum size: 2GB |
| Integer | Allows you to enter positive and negative integers Value range: -2,147,483,648 to 2,147,483,647 |
| Real | Allows you to enter positive and negative real numbers Approximate value range: -1.7E+308 to 1.7E+308 |
| Boolean | Allows you to enter boolean values (checked/unchecked) |
| Rich Text Edit Tool | Allows you to enter content including formatted text, tables, images, hyperlinks, etc. |
| Enum Type | Allows you to enter values of the specified enumeration type |
| Class | Allows you to hold multiple related models |
- The data type of a field cannot be changed after the field is added.
Adding a field
There are several ways to add a field to an entity:
- Adding a field in a class diagram
- Adding a field in the Profile Navigator
- Adding a field in the Inspector
- Adding a new field while modeling in a form
Adding a field in a class diagram
To add a field to an entity using a class diagram, follow these steps:
- Move the pointer to the field display area of the entity and click the [+] icon that appears in the upper right corner of the field display area.
- Clicking this will display the [Add New Fields] dialog. Enter the settings and specify [Data Type].
- If you want to specify a default type such as [String] as the data type
- Select the data type from the options.
- When specifying an existing entity as the data type
- Click the [...] button to the right of [Data Type].
- Clicking this opens a finder to search for an entity.
- Search for an entity from the list in the finder and click it to enter that entity in [Data Type].
- Select the additional items [Multiplicity] and [Field Type] from the options.
- Enter other settings and then press the [OK] button.
- The added field will then be displayed in the list of fields that the entity has.
For details on the settings for fields, see "Editing field settings" below.
Adding a field in the profile navigator
To add a field to an entity using the profile navigator, follow these steps:
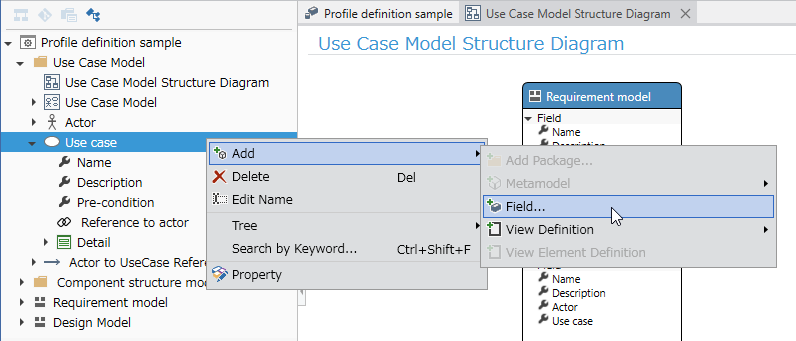
- In the Profile Navigator tree, select the entity to which you want to add a field.
- Do one of the following to display the [Add New Fields] dialog.
- Right-click the selected entity and click [Add] > [Fields] from the context menu.
- Click [Profile] > [Metamodel] > [Fields] from the ribbon.
- The input in the [Add New Fields] dialog is the same as in "Adding Fields in Class Diagram" above.
- After entering the settings, press the [OK] button, and the added field will be displayed directly under the entity.
Adding Fields in Inspector
To add a field to an entity using the Inspector, follow the steps below.

- In the class diagram or profile navigator, select the entity to which you want to add a field.
- Select [Metamodel] from the tabs at the top of the Inspector.
- Click the [+] icon displayed in the lower right of the field list in the [Fields] group in the Inspector to display the [Add New Fields] dialog.
- The input in the [Add New Fields] dialog is the same as in "Adding Fields in Class Diagram" above.
- After entering the settings, press the [OK] button to add the added field to the field list.
You can also add fields using the above procedure when the Inspector is displayed during modeling.
Adding a new field while modeling in a form
To add a new field while modeling in a form, follow the steps below.

- Display the form in the model editor and select the model (or the field of that model) to which you want to add a field.
- Do one of the following to display the [Add New Fields] dialog.
- Right-click the selected model and click [Profile] > [Add New Field] from the context menu.
- Click [Profile] > [Metamodel] > [Filelds] from the ribbon.
- Click [Profile] > [Form] > [Add New Fields] from the ribbon.
- Click [Form] > [Form] > [Add New Fields] from the ribbon.
- The input in the [Add New Fields] dialog is the same as in "Adding a field in a class diagram" above.
- After entering the settings, press the [OK] button. The added field will be added to the metamodel and the form at the same time.
Delete a field
There are several ways to delete a field from an entity:
- Delete a field in the class diagram
- Delete a field in the profile navigator
- Delete a field in the inspector
Delete a field in the class diagram
To delete a field from an entity using a class diagram, follow these steps:
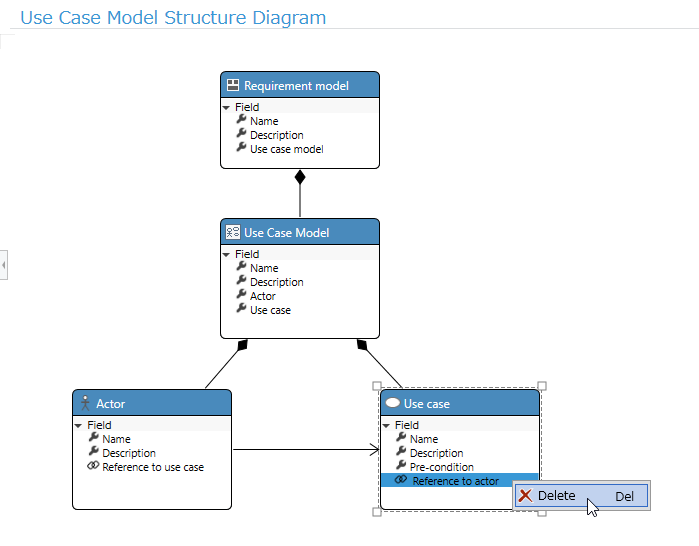
- Select the target field in the class diagram and execute [Delete] from the context menu or press the delete key.
Delete a field in the profile navigator
To delete a field from an entity using the profile navigator, follow these steps:
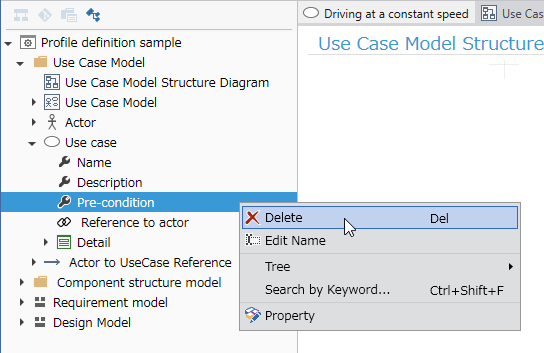
- Select the target field and execute [Delete] from the context menu or press the delete key.
Delete Fields in Inspector
To delete an entity field using the Inspector, follow the steps below.
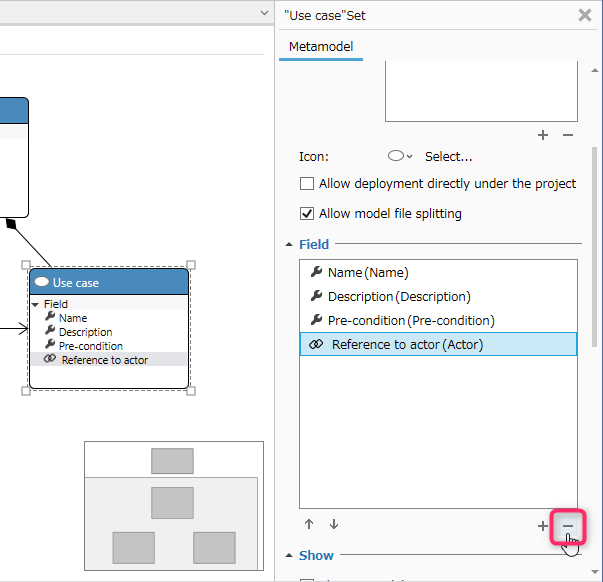
- Select [Metamodel] from the tab at the top of the Inspector.
- Select the target field from the field list and click the [-] icon displayed in the bottom right of the field list.
You can also delete a field in the Inspector by following the steps below.
- When modeling, display the Inspector and select [Metamodel] from the tab at the top of the Inspector.
- Remove the field from the field list as in the previous step.
Edit field settings
To edit the settings of an existing field, use the Inspector as follows:
- Click [View] > [Pane] > [Inspector] from the ribbon to display the Inspector.
- Do one of the following to select the entity (or model) that has the target field.
- Select the entity in the Profile Navigator.
- Select the entity in the Class Diagram.
- Select the model in the Model Navigator.
- Select the model in the Model Editor.
- Make sure that [Metamodel] is selected from the tab at the top of the Inspector, or click to select it.
- Move the pointer over the target field in the field list in the [Fields] group in the Inspector and click the edit icon that appears on the right side to display the [Field Settings] dialog.
- Change the settings in the [Field Settings] dialog and press the [OK] button to reflect the changes.
- For details on field settings, see Reference > Profile Settings and Modeling Changes.