Model structure definition
Overview
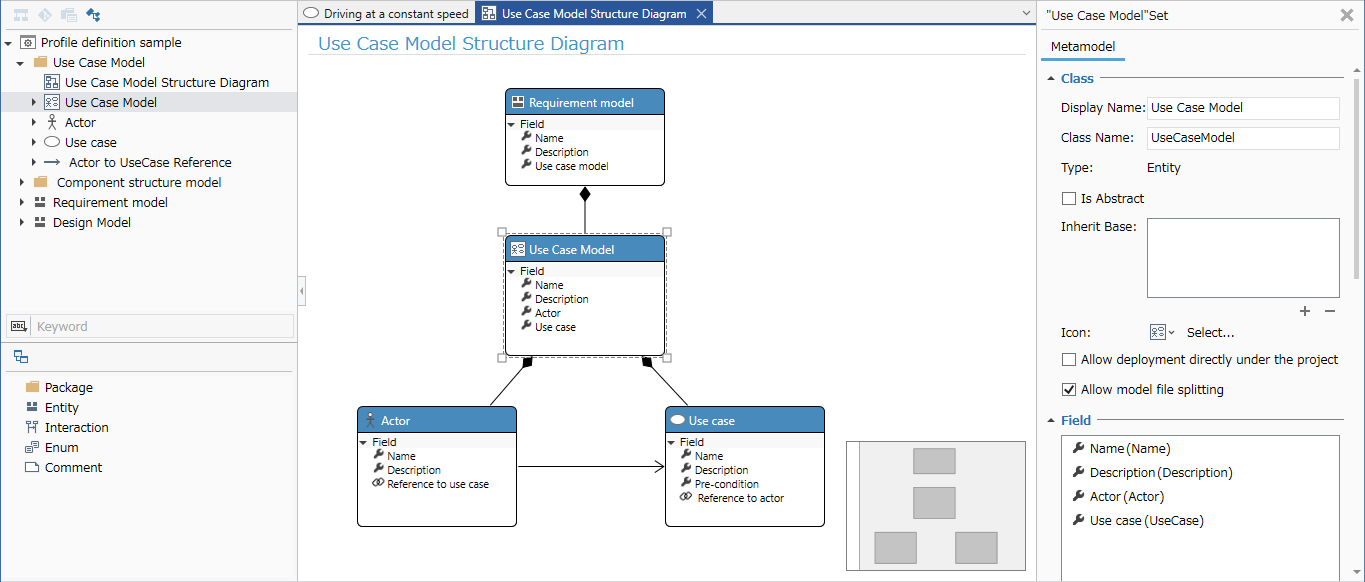
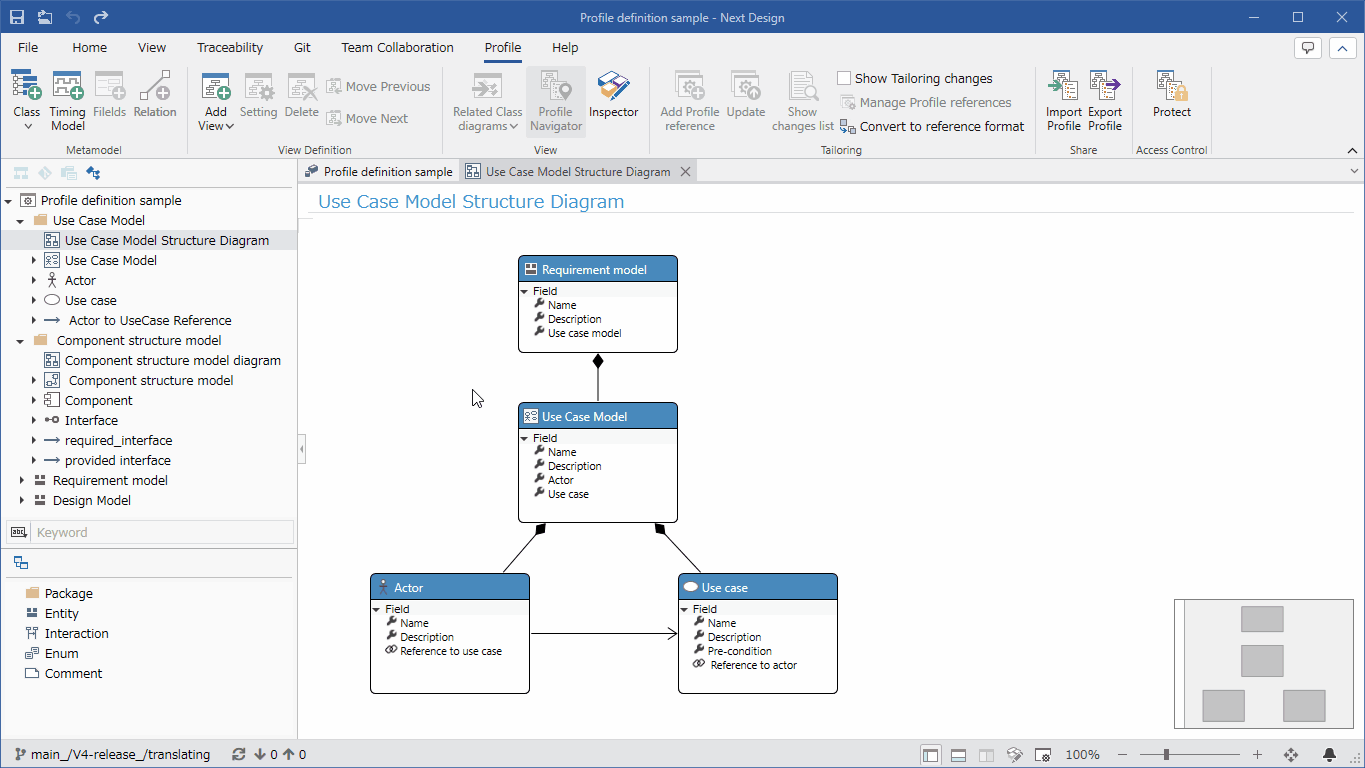
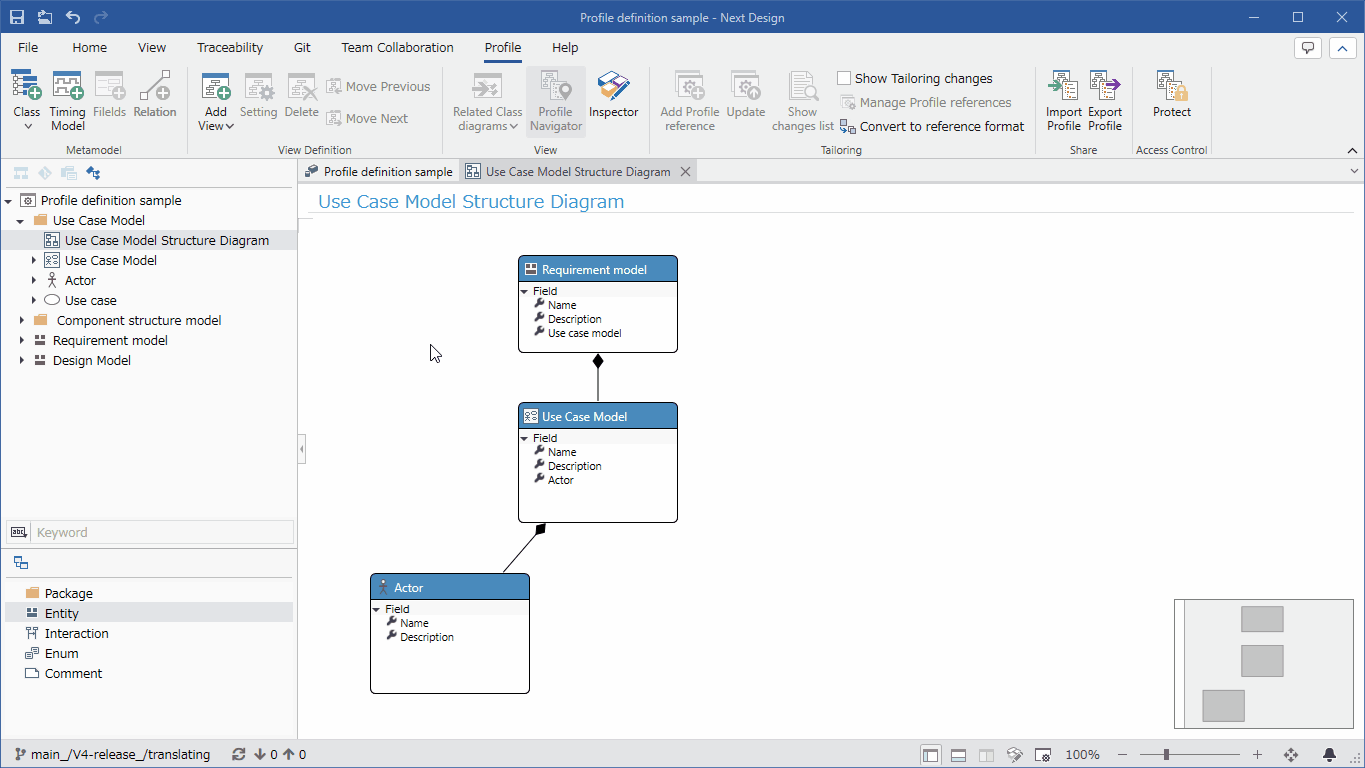
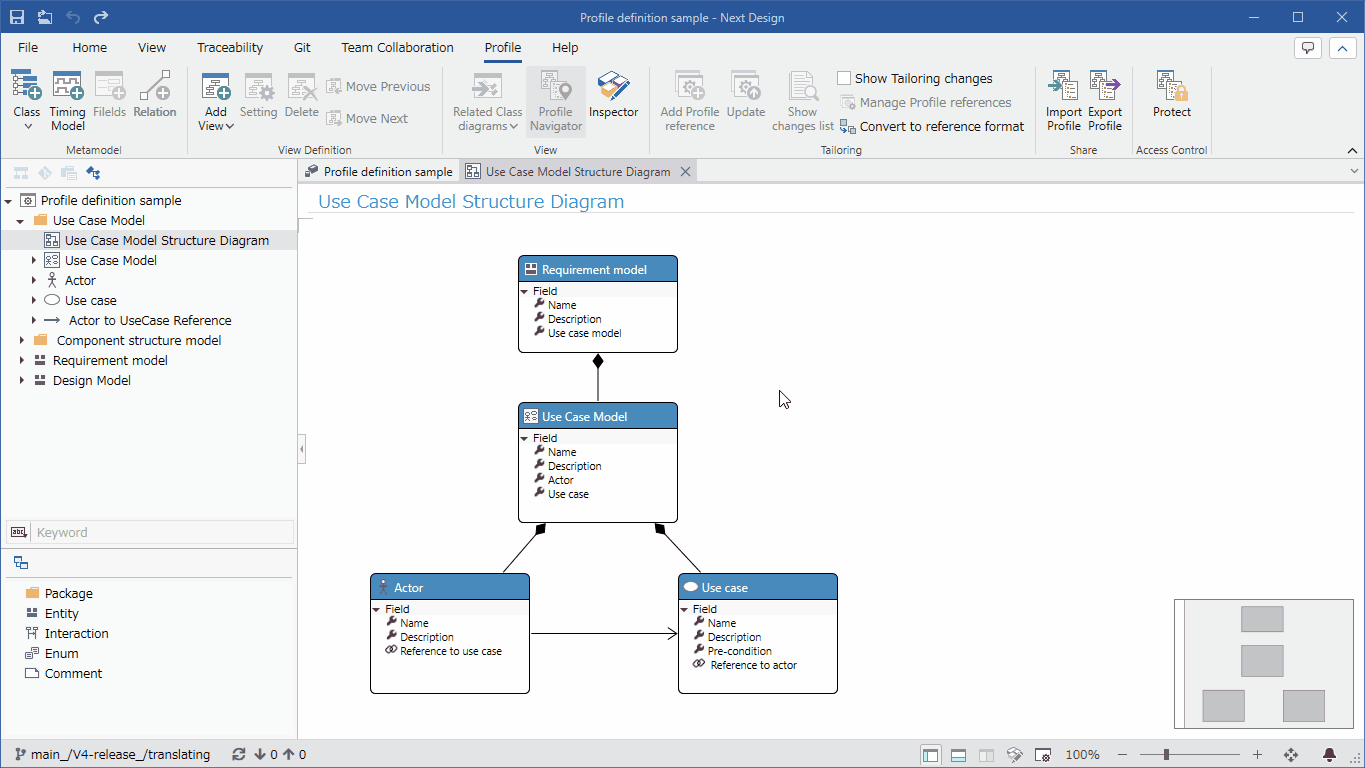
When defining a Metamodel, the first thing to do is define the model structure. In Next Design, you can define the model structure in the form of a UML class diagram. You can define the model structure by defining the entities and interactions that represent the design items and their parent-child relationships in the metamodel using a class diagram.
Entity is a model template. In object-oriented design, an entity corresponds to a class and a model corresponds to an instance. Interaction is a model template that represents the interaction (behavior) between models. UML sequence diagrams can be expressed with interactions.
The following describes the steps to define the structure of a model using a class diagram in the following order:
- Prepare a class diagram for structure definition
- Add entities
- Delete entities
- Change settings for each entity
- Define the hierarchical structure of entities
- Add/delete interactions
- Classify and define by package
Image of model structure definition using a class diagram
Prepare a class diagram for structure definition
Switch to the metamodel editing screen
To start defining a metamodel, first switch to the metamodel editing screen. The steps are as follows.
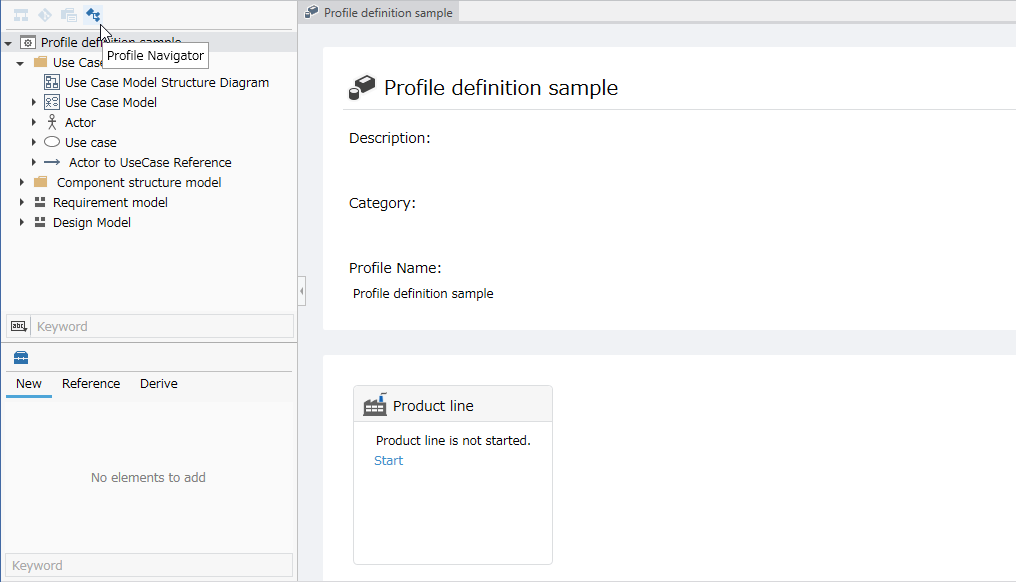
- Switch to [Profile Navigator] using the selector at the top of the Navigator.
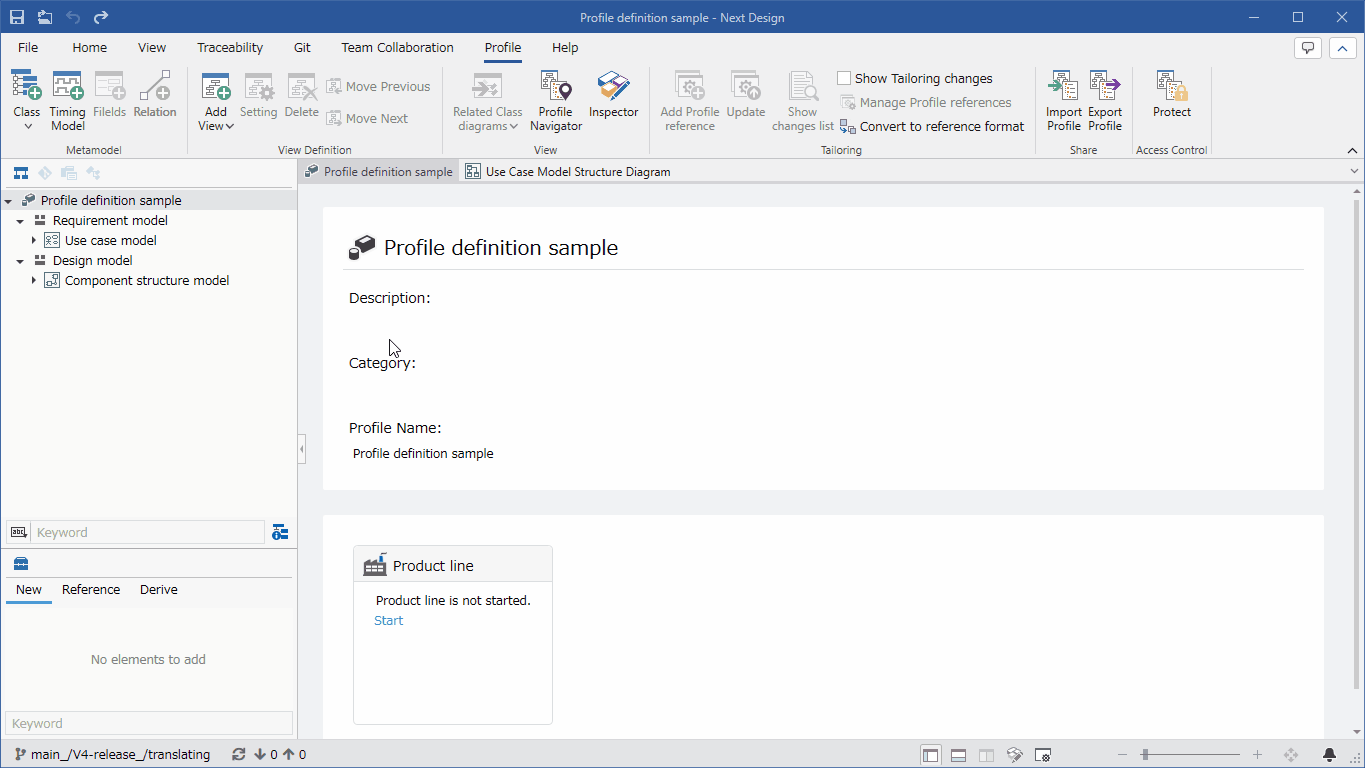
Add a class diagram to a metamodel
To add a class diagram to a metamodel, use the Profile Navigator as follows:
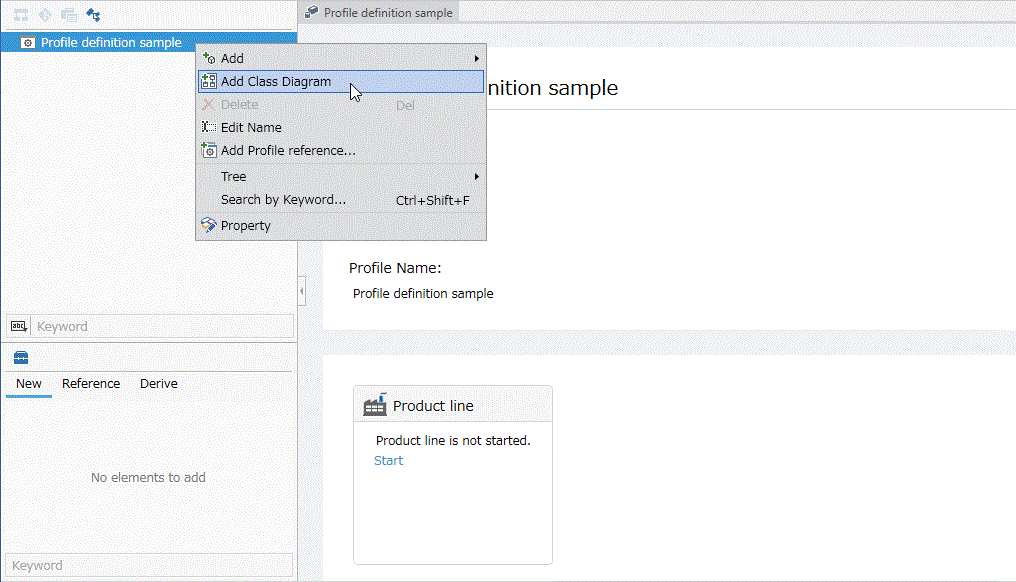
- Right-click the root node displayed at the top of the Profile Navigator or a package created during profiling, and select [Add Class Diagram] from the context menu.
- When you enter the name of the added class diagram, it will be displayed in the center of the screen and become editable.
- You can create multiple class diagrams in a metamodel. You can define separate class diagrams for each type of model, or define detailed class diagrams by extracting parts of them, such as an overall diagram and a detailed diagram.
Displaying multiple class diagrams at the same time
To edit multiple class diagrams while switching between them, display them in multiple tabs.
To display class diagrams in multiple tabs, follow the steps below.
- Select the class diagram you want to edit from the Profile Navigator and execute the [Show in new tab] command from the context menu. (You can also select multiple class diagrams and execute this command.)
- The selected class diagram is displayed in a new tab.
- Class diagrams can be displayed as docked or floating windows.
For information on how to display docked or floating windows, see Model Editing > Model Editing Basics > Opening and Editing Multiple Models Simultaneously.
Adding an entity
There are several ways to add an entity, as follows:
- Add a new entity to the metamodel
- Add an existing entity to a class diagram (redisplay an entity that is not in the class diagram)
- Add a new entity while modeling (change the metamodel simultaneously in the model editing screen)
Add a new entity to the metamodel
To add a new entity to the metamodel using a class diagram, drag and drop [Entity] from the class toolbox to add it, and enter a name.

Add existing entities to a class diagram
To add an entity already defined in the metamodel to a class diagram, follow the steps below.
- Drag and drop the defined entity displayed in the profile navigator to the class diagram to add it.
Add new entities while modeling
You can also proceed with modeling by adding undefined entities to the metamodel one by one while modeling on the model editing screen. The procedure is as follows.
- Right-click the parent model in the Model Navigator and execute [Add Model] > [New Entity] from the context menu.
- Enter the required information in the [New Entity] dialog and press the [OK] button.
- The above operation adds a new entity to the metamodel, and at the same time, a model with the same name as the entity's display name is also added to the Model Navigator.
- A new entity added to the metamodel will be displayed in the Profile Navigator, but will not automatically appear in the class diagram. If necessary, manually add it to the class diagram by following the above "Adding an existing entity to a class diagram".
Define the entity hierarchy
To specify the model hierarchy in the metamodel, create an ownership relationship between the parent-child entities. The procedure is as follows.
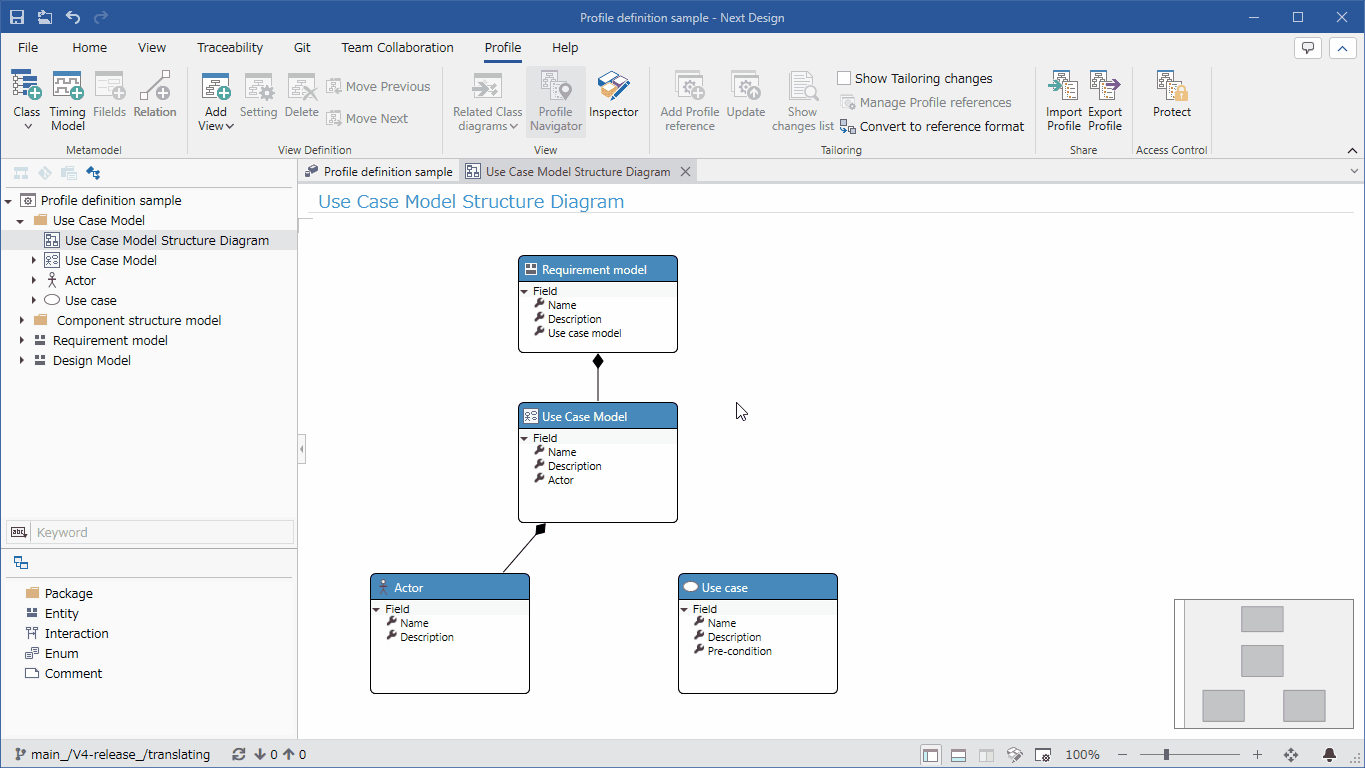
- Move the pointer to the parent entity in the class diagram, drag the [▲] icon displayed on its four sides, and drop it on the child entity.
- When you drop it, a pop-up will appear with options for the type of association, so click [Embedded] to select it.
- This defines the parent-child relationship between the entities, and you can add child entities as components of the parent entity during modeling.
- If you specify the same entity as the reference source as the reference destination, you can define an entity with a nested structure.
Change the settings for each entity
To change the icon of an entity or change the entity's treatment to an abstract class, select the entity in the class diagram or profile navigator, and then use the inspector to change it.
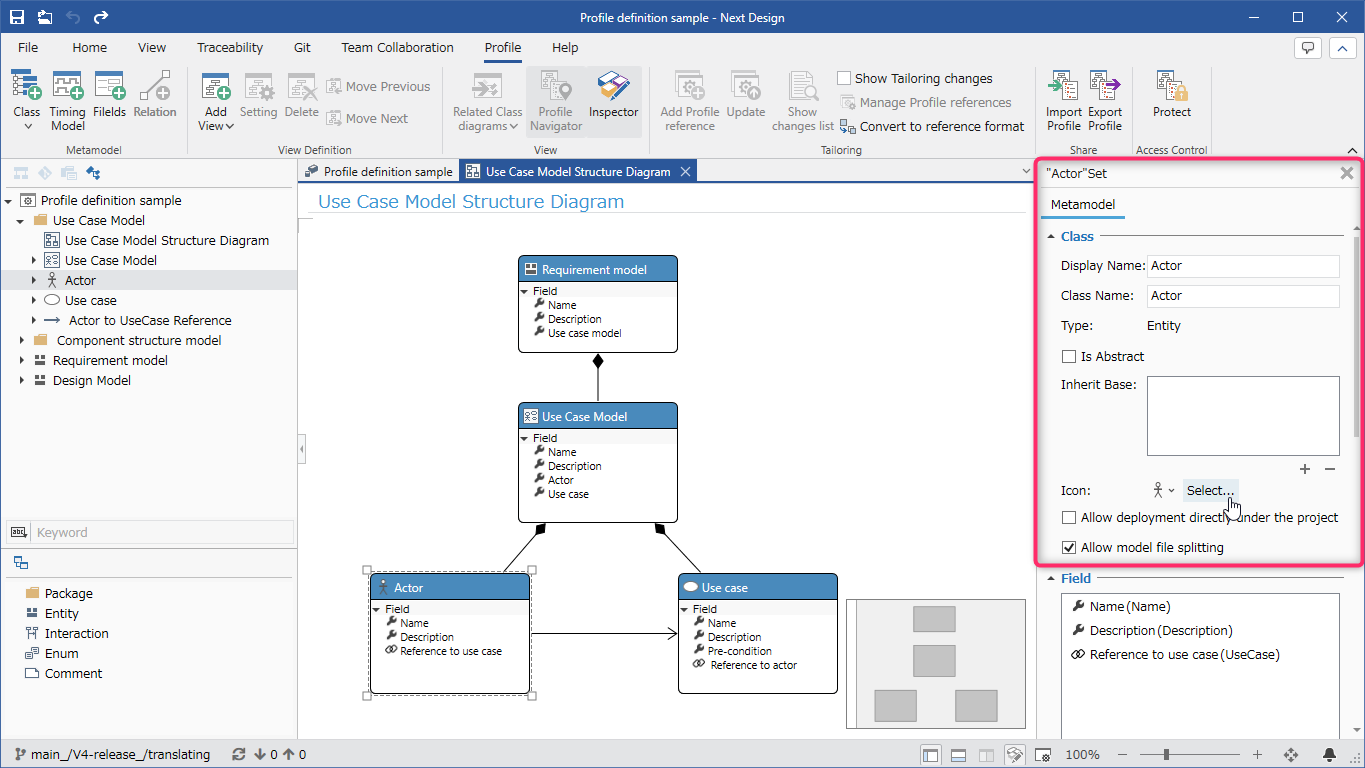
- For details on the settings for entities, see Reference > Profile Settings and Modeling Changes.
- In addition to the standard icons, you can also use your own icons.
- For details, see How To > Profile Definition > View Definition > Using Your Own Icons.
Deleting an Entity
There are several ways to delete an entity:
- Delete an entity from the metamodel
- Delete an entity from a class diagram (hide it from the class diagram without deleting it from the metamodel)
Delete an entity from the metamodel
To delete an entity from the metamodel using a class diagram, follow these steps:

- Select the target entity in the class diagram and execute [Delete From Model] from the context menu.
- If there are models that reference the entity or other entities that are related to it, a warning message will be displayed. If you are sure you want to delete those models and relationships as well, press [Delete] to proceed.
- This will delete the target entity from the class diagram, as well as from the metamodel, and the target entity will also be deleted from the profile navigator.
- If you select the target entity and press the delete key, it will only be deleted from the class diagram, not from the metamodel, and will remain in the profile navigator, just like [Delete From Diagram] in the context menu.
You can also delete an entity from the metamodel by following the steps below.
- Select the target entity in the profile navigator and execute [Delete] from the context menu or press the delete key.
Delete an entity from a class diagram
To delete an entity from a class diagram and hide it, follow the steps below.
- Select the target entity in the class diagram and execute [Delete From Diagram] from the context menu or press the delete key.
- This will delete it from the class diagram, but not from the metamodel, and the target entity will remain in the profile navigator. To display it again in the class diagram, add it manually to the class diagram by following the steps in "Adding an existing entity to a class diagram" above.
Adding and deleting interactions
To add a new interaction to the metamodel, drag and drop [Interaction] from the class toolbox and enter a name, just like adding an entity.
- For information on adding entities, see "Adding an entity" above.
To remove an interaction from a metamodel, delete it in the same way as you delete an entity.
- For information on deleting entities, see "Deleting Entities" above.
Classify and define by package
To classify metamodel definitions by model type or according to design process, add packages to the metamodel to classify the components of the metamodel. The procedure is as follows.
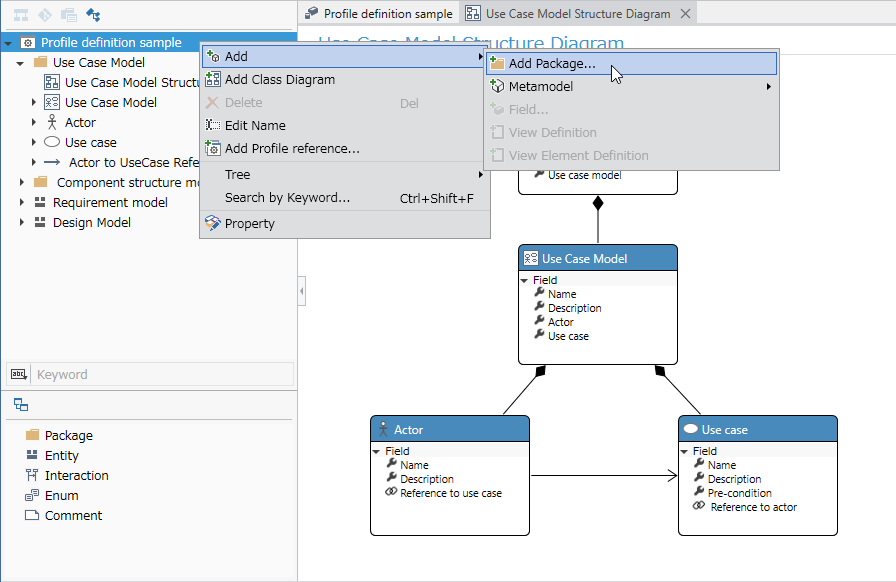
- Right-click the root node displayed at the top of the profile navigator or a package created during profiling, and select [Add] > [Package] from the context menu.
- Execute [Rename] from the context menu of the added package, or press the f2 key and enter the name of the package.
- After adding the package, move existing components into the package by dragging and dropping them in the profile navigator.