Basic Model Editing
Overview
Next Design allows you to edit models while switching between different model representation formats (Views).
Model editing is primarily done using the main editor in the center of the screen and the sub-editors that can be displayed side-by-side. Using the main and sub-editors, you can edit different models side-by-side, or edit the same model in different views.
In addition, the Model Navigator allows you to add or modify models while viewing the model structure in a tree format.
The following explains the basic operations of model editing in Next Design in the following order.
- Editing in the Main Editor
- Editing using Sub-Editors
- Editing in the Model Navigator
Editing in the Main Editor
Selecting a Model
To select a model to edit in the Main Editor, follow these steps:
- Expand the tree in the Model Navigator to find the model you want to edit.
- Click the model in the Model Navigator. The model will then appear in the Main Editor, allowing you to edit it.
- If the Main Editor is not displayed, click [Home] > [View] > [Editor] on the ribbon to switch screens.
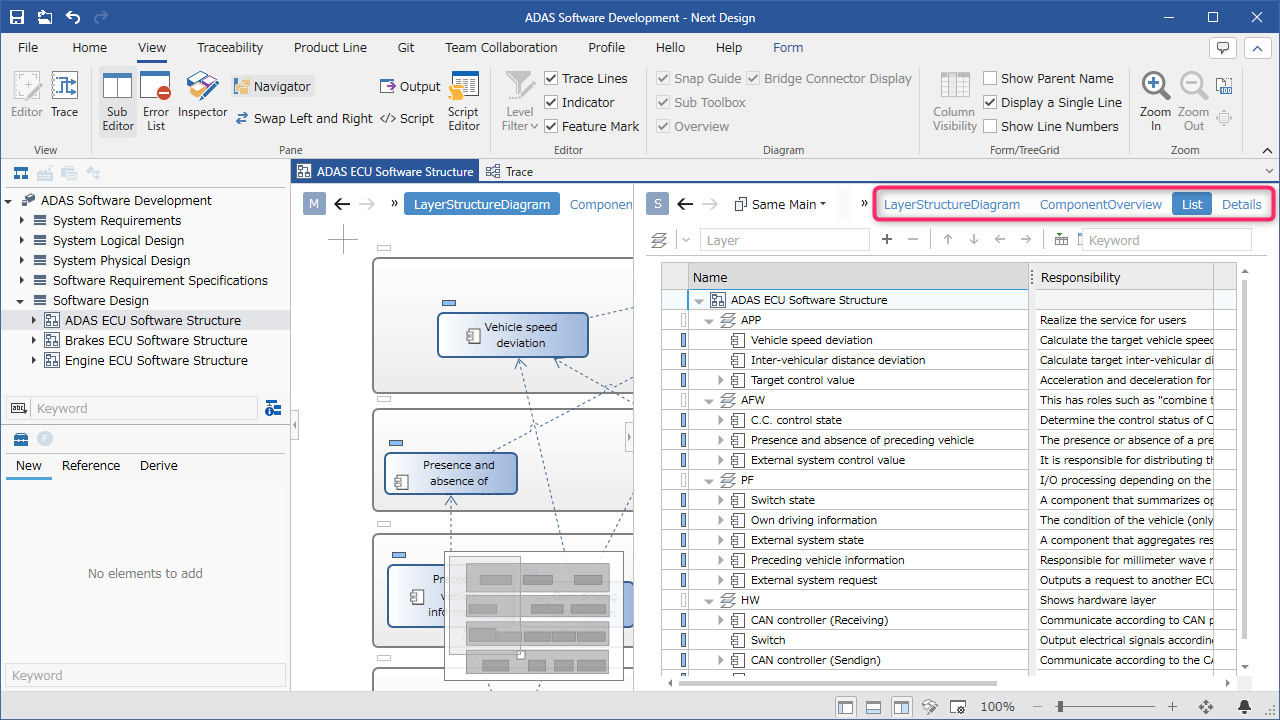
Switching Views
To switch views of a model, follow these steps:
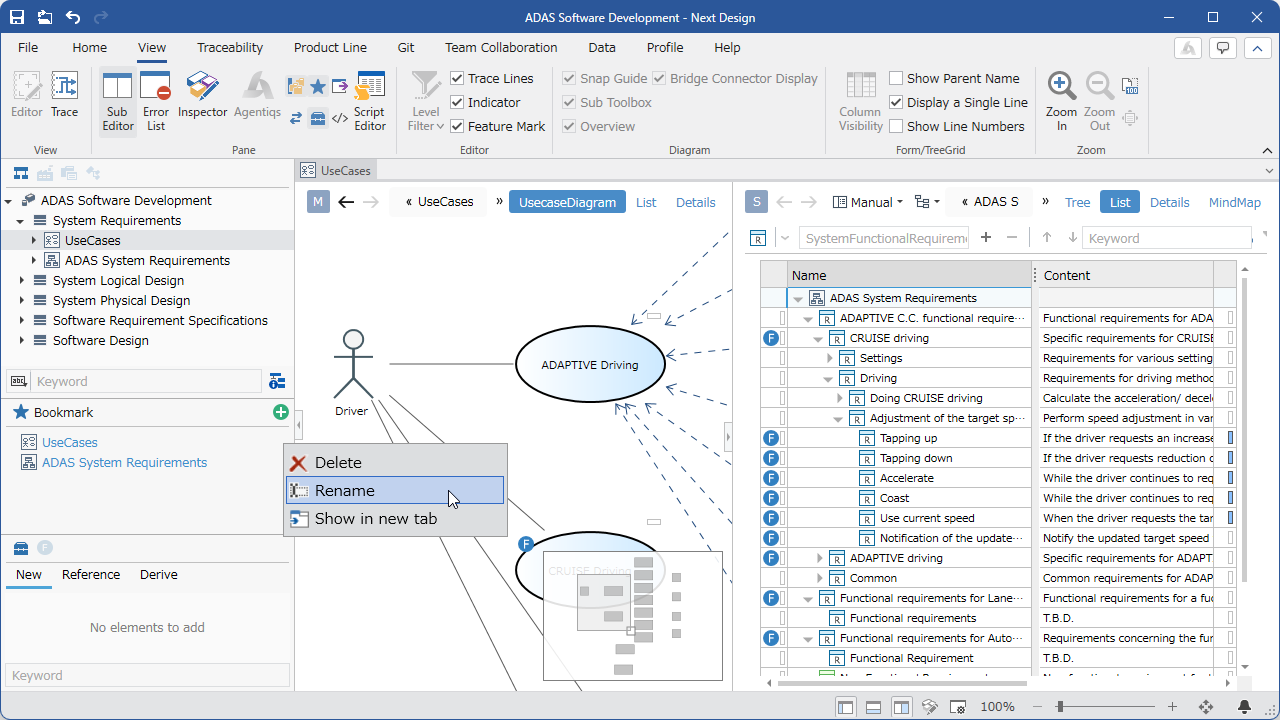
- When the model to be edited is displayed in the editor, buttons to switch the model's representation (View) will appear in the upper right corner of the editing area.
- Click these buttons to switch views.
(In the example above, three views are selected: Use Case Diagram/List/Detail) - When you edit the model in one view, it is automatically reflected in the other views.
- The views available for model editing vary depending on the model type (Entity).
- Available views can be customized in the profile.
To view the information displayed at the top of the editor, such as the path bar, in a wider width, you can collapse the view list.
The operation method is as follows:
How to Use
- If more than one view is displayed in the list, clicking the [≫] button will collapse the view list.
- If the view is collapsed, clicking the [≪] button will uncollapse the view list.
- When the view is collapsed, hovering over the view switching button will display all views.
Adding a Model from the Toolbox
To add a model in a diagram view, follow these steps:

-
The toolbox below the Model Navigator displays the types of models that can be added.
-
Select the type of model you want to add, and drag and drop it from the toolbox onto the view to add the model to the diagram.
-
For details, see the explanation for each view type.
- You can also add models from the sub-toolbox displayed to the left of the editor's editing area.
Deleting a Model
To delete a model in the editor, follow these steps:
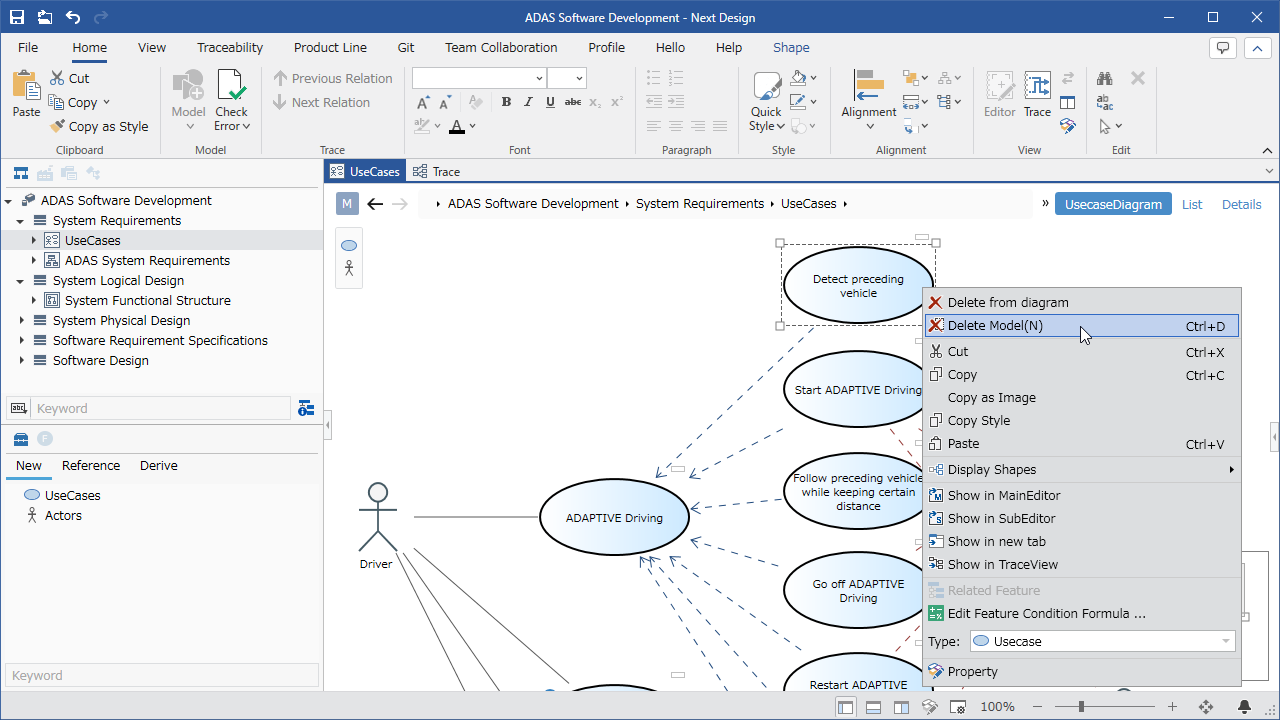
-
Select the model to delete in the editor.
-
Do one of the following:
- Click the [Delete Model] command in the context menu.
- Press the delete key.
- The model is deleted from the editor.
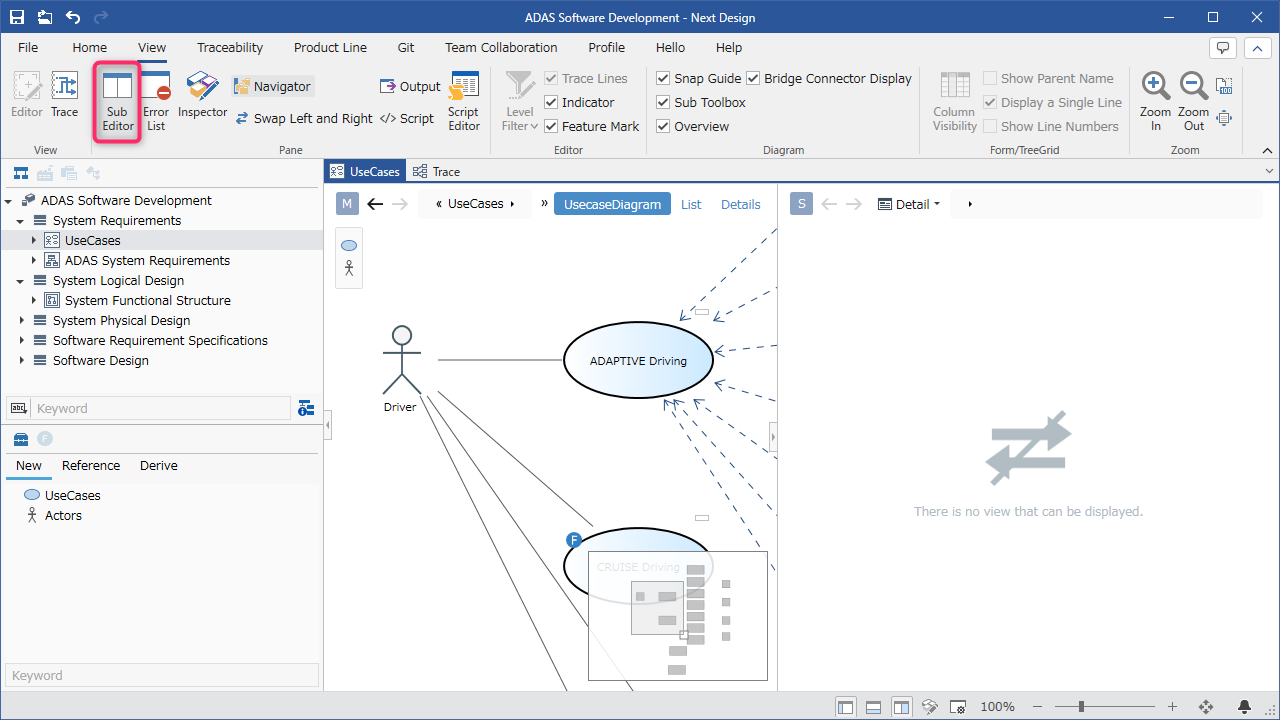
Editing with Sub-Editors Side-by-Side
Displaying Sub-Editors
To display sub-editors, follow these steps:
:::note: Instructions
- Click [View] > [Pane] > [Sub Editor] on the ribbon.
- Clicking toggles the display/hide function.
:::
Switching the Model to Edit
- Switching via [Display Mode] To switch the model displayed and edited in the sub-editor, follow these steps:
:::note: Instructions
- Select one of the options in the table below from the [Display Mode] dropdown list at the top of the sub-editor.
- If you selected [Manual] in the display mode, or if there are multiple models corresponding to [Input (Deep Blue)] and [Output], select the model to display from the dropdown list that appears to the right of [Display Mode].
:::
| Display Mode | Model to display |
|---|---|
| Manual | Any model specified in the sub-editor |
| Detail | The model selected in the main editor |
| Details (Type) | The model specified for the lifeline or message type selected in the sequence diagram |
| Input (Deep Blue) | The model used for input of trace information |
| Output | The model used for output of trace information |
| Same as Main | The model edited in the main editor |
- Switching from the Model Navigator
To switch the model displayed and edited in the sub-editor from the Model Navigator, follow these steps:
- Select the model in the Model Navigator by clicking and holding the mouse. (Releasing the click will switch the display in the main editor.)
- Drag and drop it to the top of the sub-editor.
- Switching the sub-editor display using this operation will display the model from the Model Navigator in the sub-editor while keeping the model selected in the main editor as is.
- For information on the unique uses of the sub-editor, please refer to Modeling > Cross-Process Modeling > Design Method in Next Design.
Switching Views
To switch the view in the sub-editor, click the view selection displayed in the upper right corner of the editing area, just like in the main editor.
Editing in the Model Navigator
Adding Models
To add a model in the Model Navigator, follow these steps:
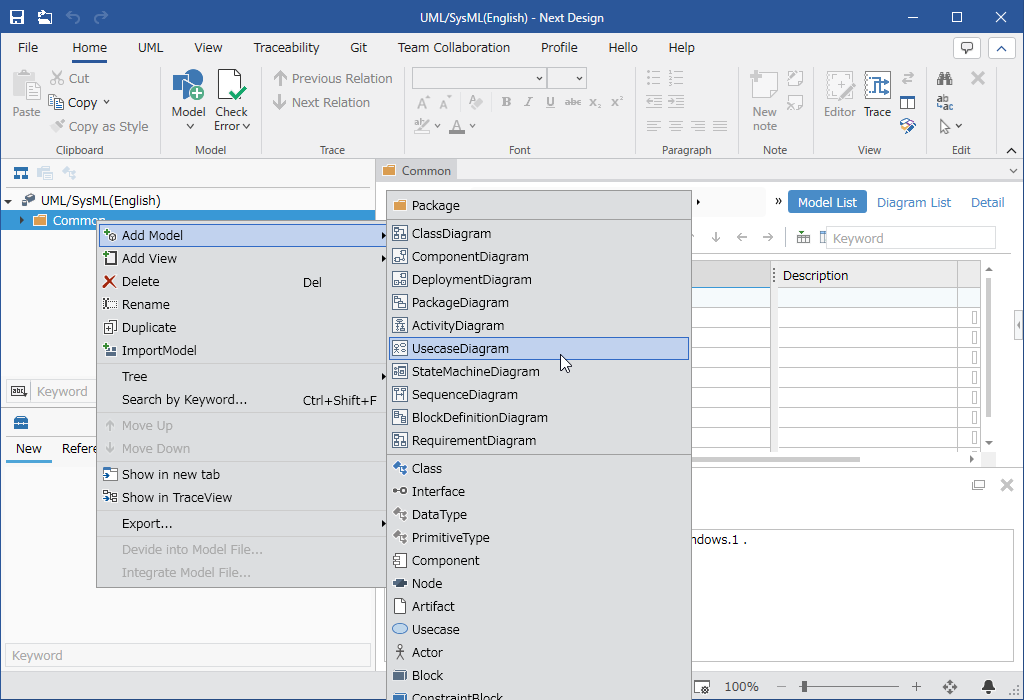
- Right-click the model in the Model Navigator to open the context menu.
- Under the [Add Model] command in the context menu, the types of models (Entity) that can be added will be displayed.
- Click the type of model you want to add from among them, and the model will be added as a child of the target model.
- The entities that can be added vary depending on the parent entity in the hierarchical structure and are defined in the profile.
Duplicating a Model
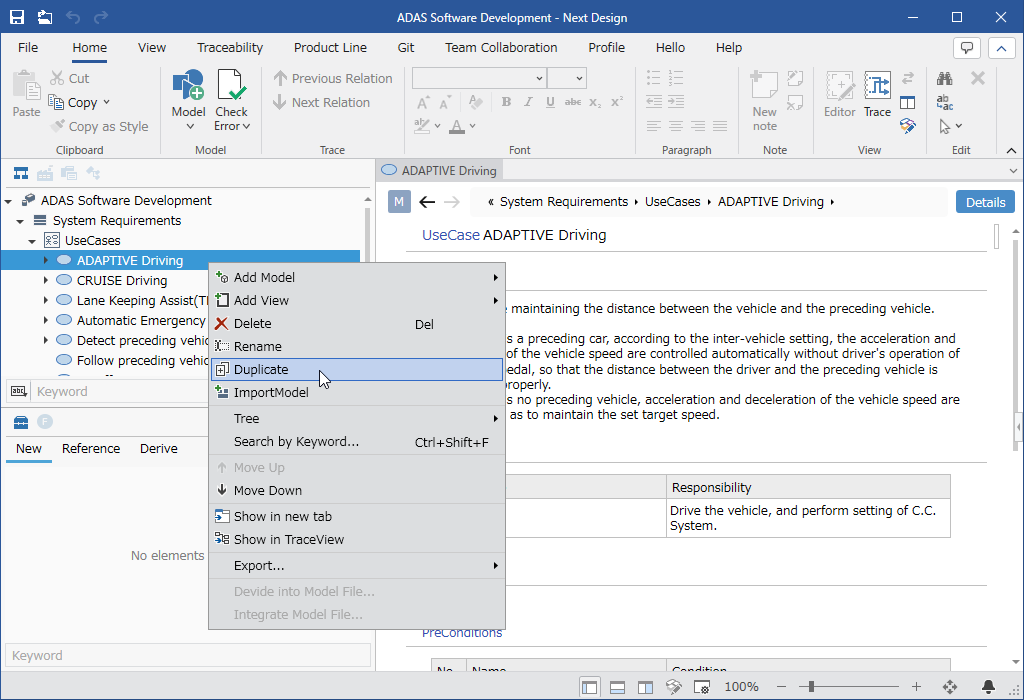
To add a model with the same structure by duplicating an existing model and its descendants, follow these steps:
-
Select the model to duplicate in the Model Navigator.
-
Click the [Clone] command in the context menu.
-
The duplicated model will be added immediately after the selected model.
-
The following will be duplicated based on the model being duplicated:
-
Field input values 1
-
Descendant models owned by the target model
-
Associates to which the target model is the source
-
If the target is included in the model being duplicated, the target will be the model being duplicated
-
If the target is not included in the model being duplicated, the target will be the same as the target of the original model
-
Model order relationships in the owner and reference fields of the target model 2
-
Editing information in each view (such as shape position in the ER diagram)
-
The following will not be duplicated:
-
Feature assignments and feature conditional expressions
-
Associates to which the target model is the target
-
Model colors set in the form and tree grid
- If the model cannot be added due to multiplicity constraints, the message "Cannot duplicate because multiplicity constraints are exceeded." will be displayed, and the model will not be duplicated.
Moving Models
To change the order of models or change the hierarchical structure in the Model Navigator, follow these steps:

- To change the order of models, drag and drop the target model on the tree.
- To move a model to a different parent and change the hierarchical structure, drag and drop the target model onto a different parent on the tree.
- Models at the same hierarchical level are categorized and displayed by entity, so you cannot move them between different entities. The order of entities can be customized in the profile.
- When moving an entity that changes the hierarchical structure (moving to a different parent), you can only move an entity if it can be added to the destination parent entity.
Open, view, and edit multiple models simultaneously
Display in multi-tabs
To edit multiple models while switching between them, display them in multi-tabs.
To display in multi-tabs, follow these steps:
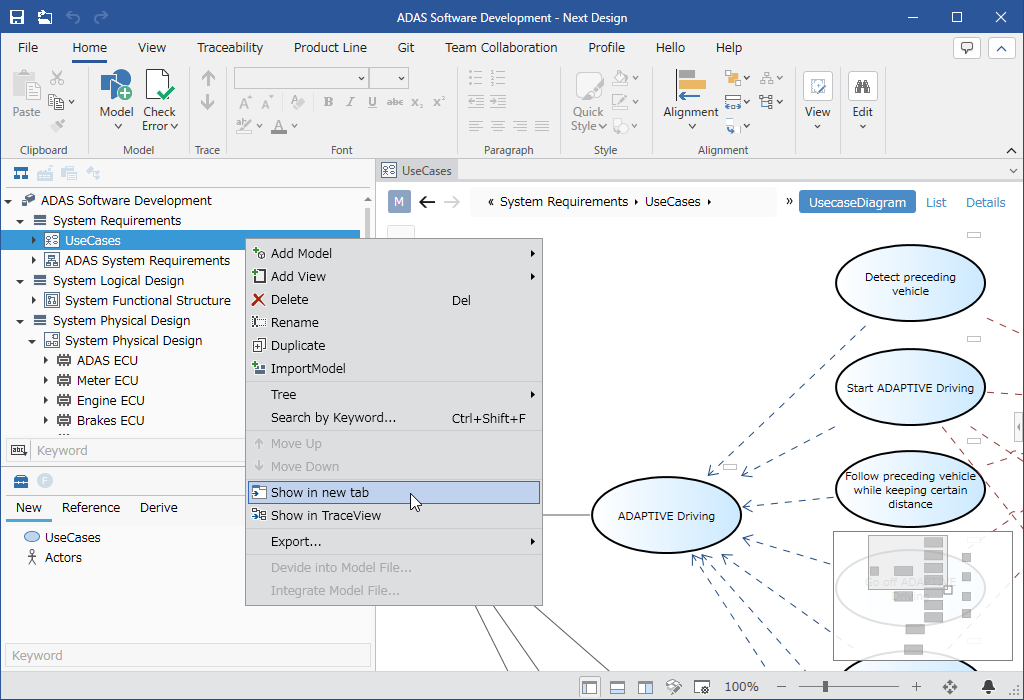
- Select the model you want to edit from the Model Navigator/Editor, and execute the [Show in new tab] command from the context menu.
(You can also select multiple models and execute this command.) - The selected models will be displayed in a new tab.
You can also display tabs in a new tab using the following methods:
You can also display tabs by selecting a model and dragging and dropping it into the tab area.
This operation can be performed in the Model Navigator/the following forms:
- Document Form
- Tree Grid Form
- The tab displayed on the far left when you open a project is called a fixed tab. The following operations are not possible with fixed tabs:
- Display in a floating window
- Display in docked mode
- Change the order of tabs
- Close tabs
- When you open a project, the tab state from the last time you closed it will be restored.
- Fixed tabs will become the active tabs.
- Up to 30 tabs, including fixed tabs, can be restored.
Displaying in Docked Mode
You can edit multiple tabs side-by-side on one screen.
To display in docked mode, follow these steps:
:::note: Instructions
- Drag the tab into the model editor area.
- A guide for the docking area will appear; drop it into the area where you want to dock.
- The tab will be docked to the area where it was dropped.
:::
Displaying in a Floating Window
By displaying in a floating window, you can position the model at any location.
Multiple floating windows can be displayed, and multi-tab display and docking are also possible within those windows.
To display in a floating window, follow these steps:
:::note: Instructions
- Drag the tab and drop it at the desired location.
- The tab will be displayed in a floating window.
:::
Common Operations
Duplicating a Model in the Editor
To duplicate a model that is not displayed in the Model Navigator, follow these steps:

- Select the model to duplicate in the editor.
- Click the [Clone] command in the context menu.
- The duplicated model will be added immediately after the selected model.
- For information and precautions regarding duplication, see Editing in the Model Navigator > Duplicating a Model.
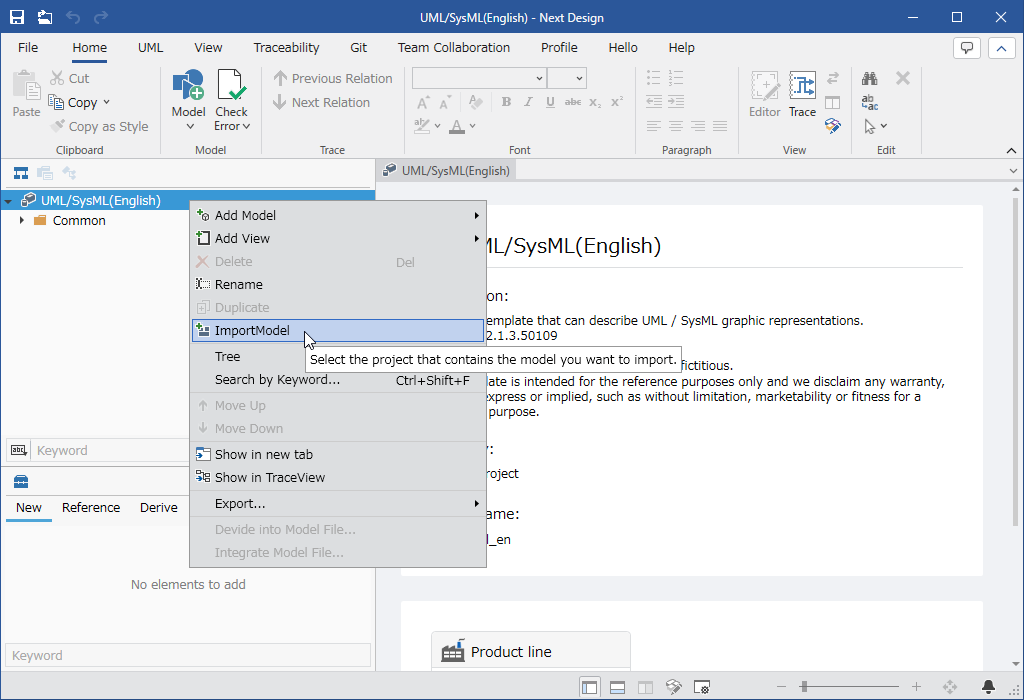
Importing a Model
To import a model from another project into your own project, follow these steps:
:::note: Instructions
- Select the root project or model in the Model Navigator.
- Click the [ImportModel] command in the context menu.
- In the [Import Model] dialog, select the project file (.nproj) and click the [Open] button.
- The imported model will be added under the root project.
:::
- If a metamodel corresponding to the model to be imported does not exist in your project, the import process for that model will be skipped and the import will continue.
- When you select a model in the Model Navigator and import it, models that the selected model can own will be imported under its level, and other models will be imported under the root project.
- To import a model file exported from another project, see Modeling > Team Development > Distributed Development with Teams > Registering Model Files.
Bookmarks
The bookmark function allows you to register combinations of model views displayed in the main editor and model/display mode/view displayed in the sub-editor, and recall them quickly when needed.
Registering a Bookmark
To register the current editor state as a bookmark, use one of the following methods:
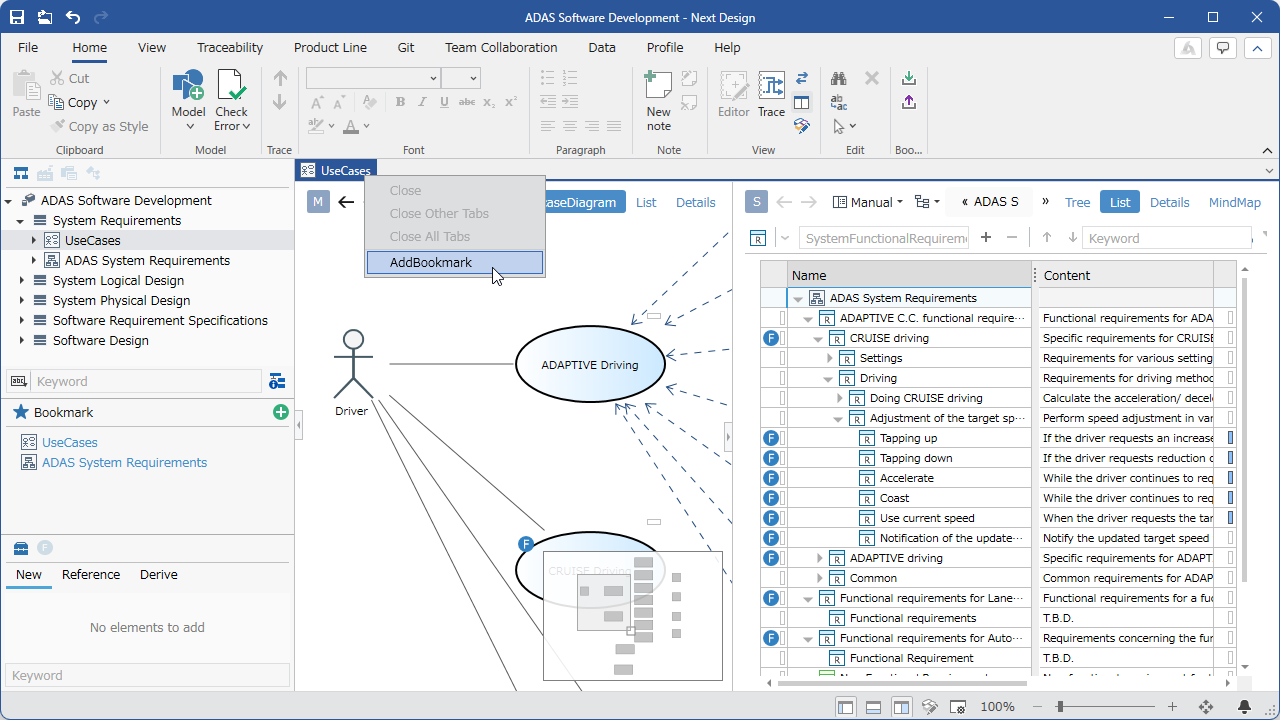
- Display the model view you want to register as a bookmark in the editor.
- Right-click the editor tab to open the context menu.
- Click the [AddBookmark] command. 4. The bookmark will be registered in the bookmark list.
- You can also register bookmarks using the [Add Current Editor to Bookmarks] button at the top of the bookmark pane.
- When registering bookmarks, sequential numbers will be automatically assigned according to the number of bookmarks registered (e.g., "Bookmark (1)", "Bookmark (2)").
Displaying the Bookmark List
You can view a list of registered bookmarks in the bookmark pane at the top of the Model Navigator.
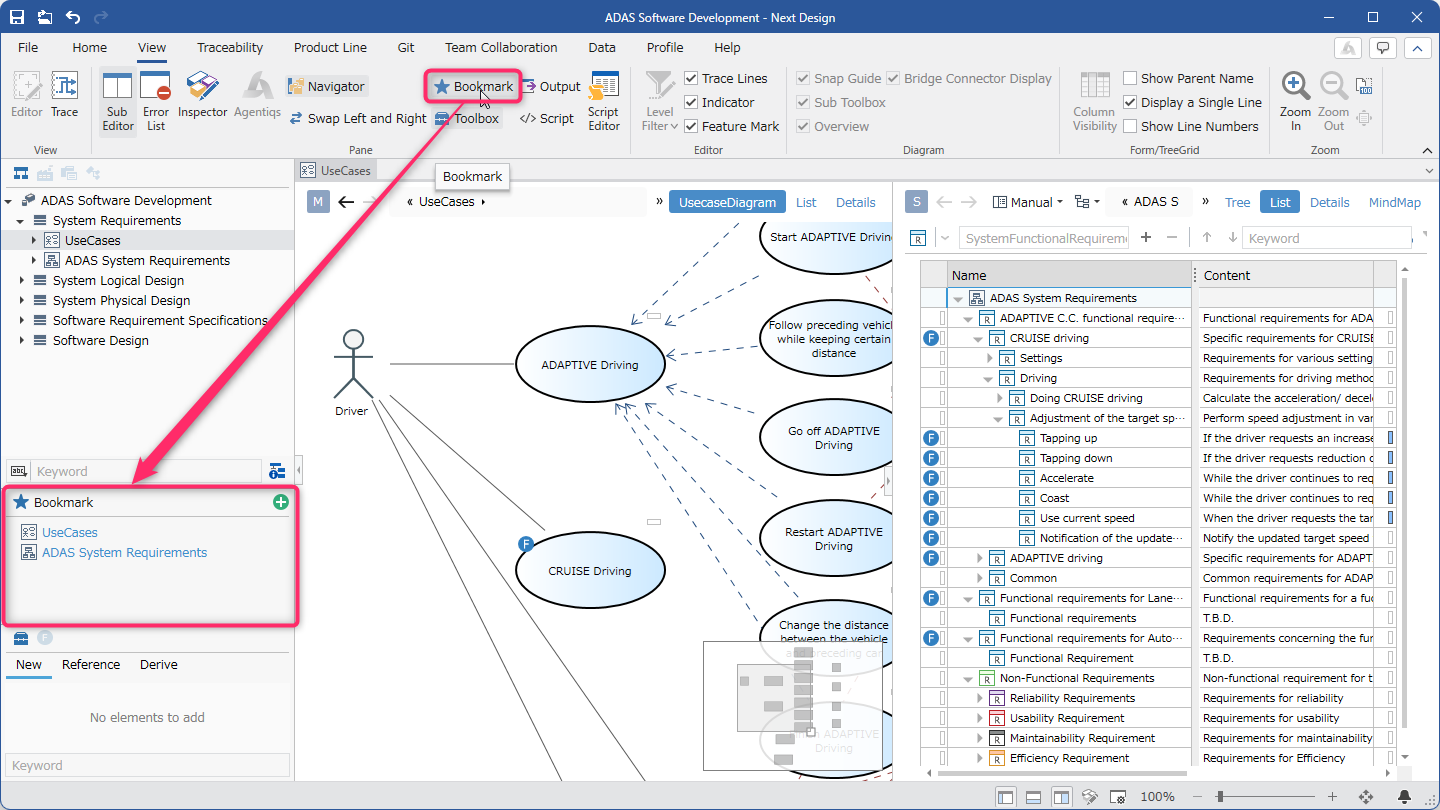
- Check the bookmark pane at the top of the Model Navigator.
- Registered bookmarks will be displayed in a list.
- If the bookmark pane is not displayed, you can switch its display using the [View] > [Pane] > [Bookmark] toggle button on the ribbon.
- Hovering over each bookmark will display the registered model name and view name.
Applying Bookmarks
To apply a registered bookmark to the editor, follow these steps:

- Display the bookmark list in the bookmark pane.
- Click the bookmark you want to apply.
- The registered model and view will be displayed in the editor.
- Hovering over a bookmark and selecting [Show in new tab] from the (⋮) button will open the bookmark in a new tab while maintaining the current editor state.
- You can also open a bookmark in a new tab by clicking it while holding down the Ctrl key.
- If a model registered in your bookmarks has been deleted, a dialog box will show which elements are missing, and the bookmark will not be applied.
Editing Bookmarks
You can rename, rearrange, and delete registered bookmarks.
- Hover your mouse over the bookmark you want to edit in the bookmark list.
- Click [Rename] from the (⋮) button that appears on the far right.
- Enter the new name and confirm.
- Drag the bookmark you want to rearrange in the bookmark list.
- Drop it in the desired position.
-
Hover your mouse over the bookmark you want to delete in the bookmark list.
-
Click the [Delete] button (⋮) displayed on the far right.
Exporting/Importing Bookmarks
You can export bookmark information to a file or import bookmark information exported by other users.

:::note: Instructions (Export)
- Click [Home] > [Bookmark] > [Export] on the ribbon.
- Specify the save location folder and file name and save.
- Bookmark information will be exported to a file.
:::
:::note: Instructions (Import)
- Click [Home] > [Bookmark] > [Import] on the ribbon.
- Select and open the bookmark file to import.
- The imported bookmarks will be added to the bookmark list.
:::
- If you attempt to import bookmark information from a different project, an error dialog will appear and the import will fail.
About Saving Bookmarks
Bookmark information is automatically saved when you close a project and restored the next time you open it.
- Bookmark information is saved as
bookmarks.jsonin the.ndfolder within the same folder as the project file.
- If you store multiple project files in the same folder, the bookmark information will be overwritten by the information from the last updated project.
Footnotes
-
For fields with initial values, if the value of the internal field is null, the initial value will be set during duplication.
Internal field values that are null are set only when the model is created if there are no initial values, or via the extension API. ↩ -
Since "associations to which the target model is related" are not duplicated, empty indices are shifted forward. ↩