Editing a form
Overview
Next Design's document form allows you to describe the details of your model in documents and tables, just like traditional design documents.
In this book, this document form is simply called Form.
The following describes the editing operations in a form in the following order:
- Editing text
- Editing grids and lists
- Editing rich text
- Setting colors for models
Editing text
To edit text in an editor, not limited to forms, follow the steps below.
- To start editing text, do one of the following:
- Double-click the item to be edited
- Select the item to be edited and press the f2 key
- Start typing with the item to be edited selected
- To create a new line in the middle of text, press the shift+enter keys.
- The items that can be edited in a form and the representation format of each item (text/list/grid, etc.) are defined in the profile.
Editing a grid or list
To edit a grid or list in a form, follow the steps below.
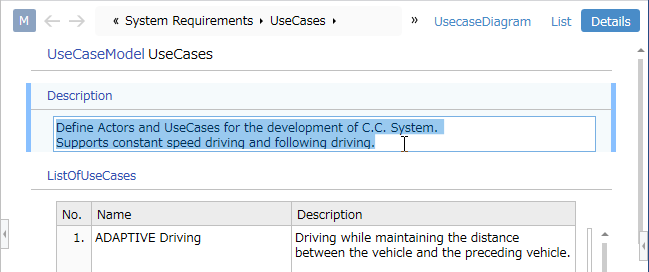
- When editing an existing item in a grid or list, start editing with the same operation as for text.
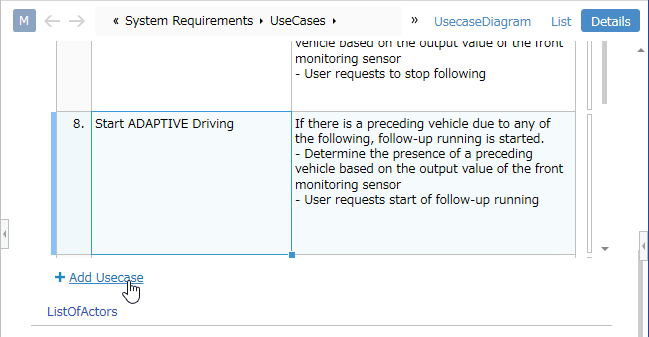
- When adding a row to a grid or an item to a list, do one of the following:
- Click the [+] icon link that appears when you move the pointer over an item.
- Press the enter key while the item is selected.
- To change the order of grid rows or list items, do one of the following:
- Select the item and drag and drop it.
- Select the item and press the alt+up or down keys.
- To delete grid rows or list items, do one of the following:
- Right-click the item and execute the [Delete] command from the context menu.
- Select the item and press the delete key.
- To maintain the grid column width after adjusting it, follow the instructions in the following manual for [Changing the default column width].
- [Docs > Profile Definition > View Definition > Form View Definition > Arrange Related Models in Grid Format](../../profile-definition-guide/view-definition/form-view-definition#Arrange Related Models in Grid Format)
Edit Rich Text
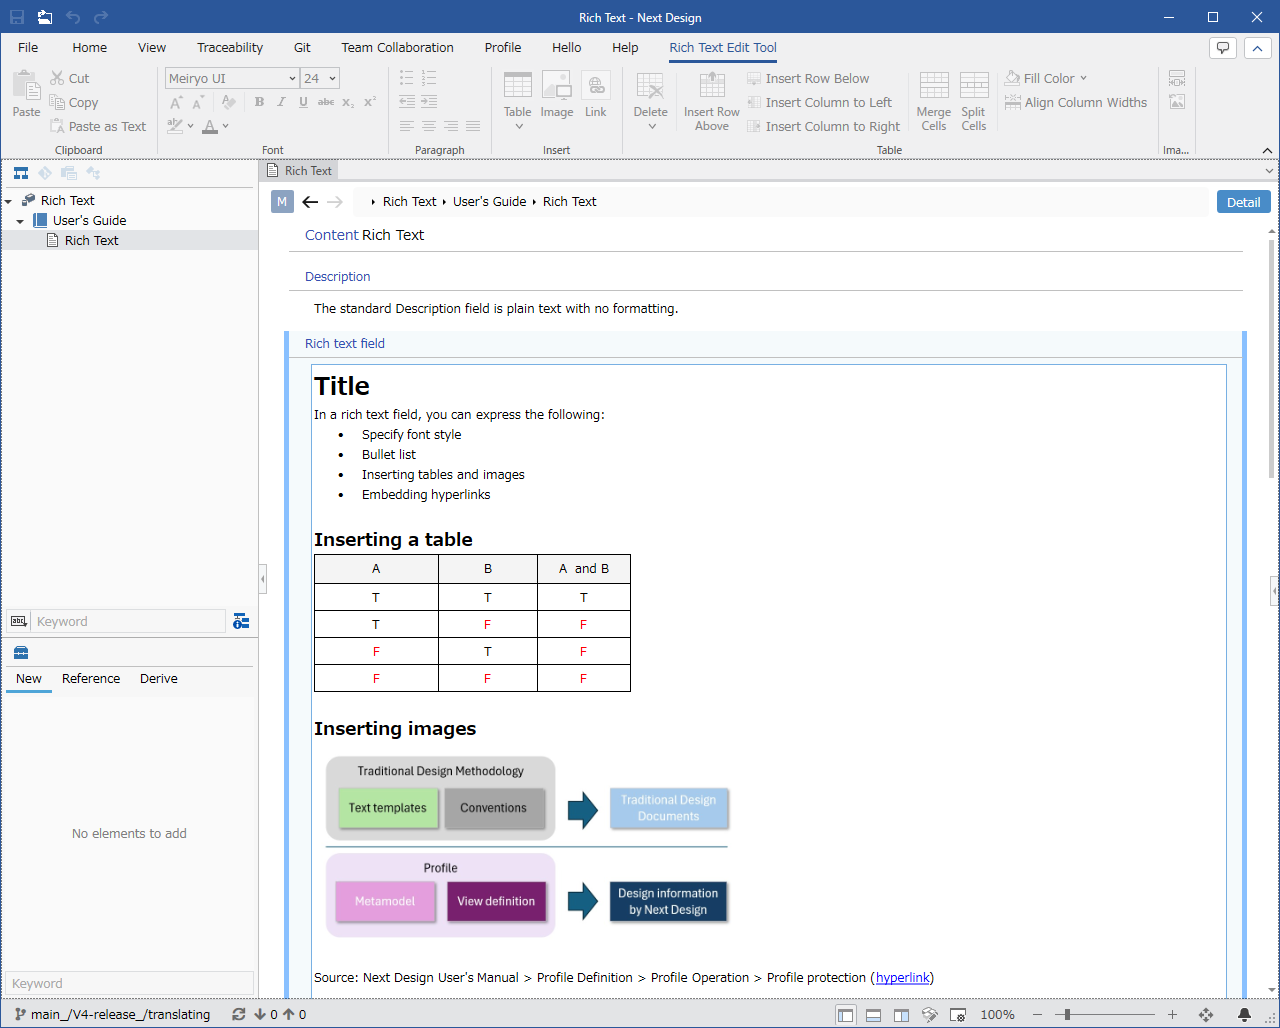
For rich text type fields, you can set styles such as text color, insert figures and tables, and embed hyperlinks.
To edit a rich text type field, follow the steps below.
- Start editing by doing one of the following:
- Double-click the item to be edited
- Select the item to be edited and press the f2 key
- Start typing with the item to be edited selected
- To break a line or paragraph when entering text, use the following keys.
- shift+enter: Inserts a line break in the middle of a line.
- alt+enter: Separates a paragraph and starts a new one.
- Use the commands displayed in the [Rich Text Edit Tool] tab on the ribbon to insert formatting, tables, images, etc.
- To finish editing and confirm the content, press the enter key.
Insert an image
You can insert an image by doing one of the following:
- Click [Rich Text Edit Tool] > [Insert] > [Image] on the ribbon and select the image file you want to insert.
- With the image stored in the clipboard, press the ctrl+v keys or execute the [Paste] command on the context menu.
- The image formats that can be inserted are as follows.
- bmp, dib, jpg, jpeg, png, gif, tif, tiff, emf, wmf
- If the image you want to insert exceeds the display width of the rich text field, the image will be resized to fit the display width before being inserted.
Adjust image size
You can adjust the image size to fit the display width of the rich text field by doing one of the following:
- Select the image you want to resize and click [Rich Text Edit Tool] > [Picture] > [Fit Width to Display Size] on the ribbon.
- Select the image you want to resize and execute the [Fit Width to Display Size] command on the context menu.
You can return the image size you changed to the original size by doing one of the following:
- Select the image you want to return to the original size and click [Rich Text Edit Tool] > [Picture] > [Reset Size] on the ribbon.
- Select the image you want to return to the original size and execute the [Reset Size] command on the context menu.
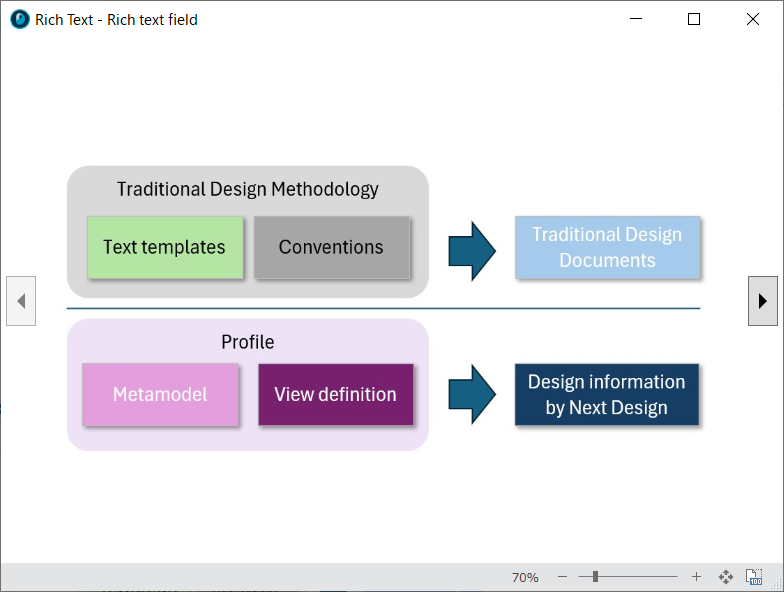
Checking the inserted image
You can check the inserted image in the [Image display window].
The [Image display window] can be displayed by hovering the mouse over the rich text field and clicking the [Display image in window] button that appears in the upper right corner of the rich text field.
- Hover the mouse over the rich text field.
- Click the [Display image in window] button that appears in the upper right corner of the rich text field.

Setting a color for a model
To set a color for a specific model in the form and highlight it, follow the steps below.
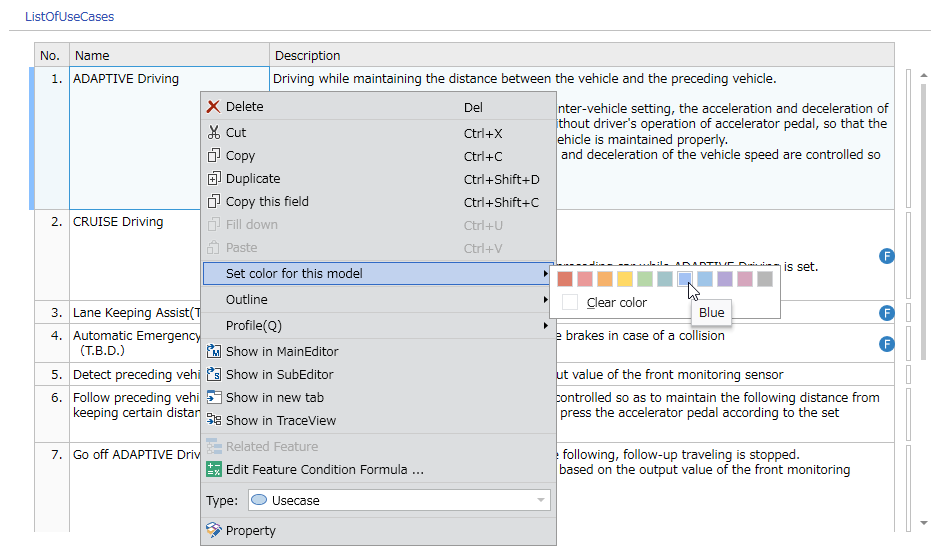
- Select a model in the form.
- Click the color you want to set from [Set color for this model] in the context menu.
If you select a field in a model, the color will be set for the model that owns that field.