Create New Project
Overview
Next Design allows you to start modeling immediately by creating a new project using pre-prepared profiles or installed templates.
The following explains how to create a new project and begin model editing in the following order:
- Create a new project
- Prepare your first model
Creating a New Project
The following explains how to create a new project in the following order:
- Using a profile
- Using a template
Using a Profile
To use a profile, you can choose between "copying the profile and importing it into the project" and "referencing and reusing a published profile," depending on your profile management method. The following preparations are required for each method.
For information on profile formats, please refer to "3. Using Published Profiles in Each Project" in Profile Definition > Profile Operation > Profile Operation Flow.
- "Copy and Import Profile into Project" Format
Obtain the profile to be used (.nprof file), or confirm the file location path of the profile. - "Reference and Reuse Published Profile" Format
Publish the profile to be used. For details, please refer to "How to Publish Profiles for Reuse by Composing Them" in [Profile Definition > Profile Operation > Publish Profiles](../../profile-definition-guide/profile-operation/publish-profile#How to Publish Profiles for Reuse by Composing Them).
Then, to create a new project, follow these steps from the Next Design start page.
:::note: Instructions: "Copy Profile and Import into Project" Method
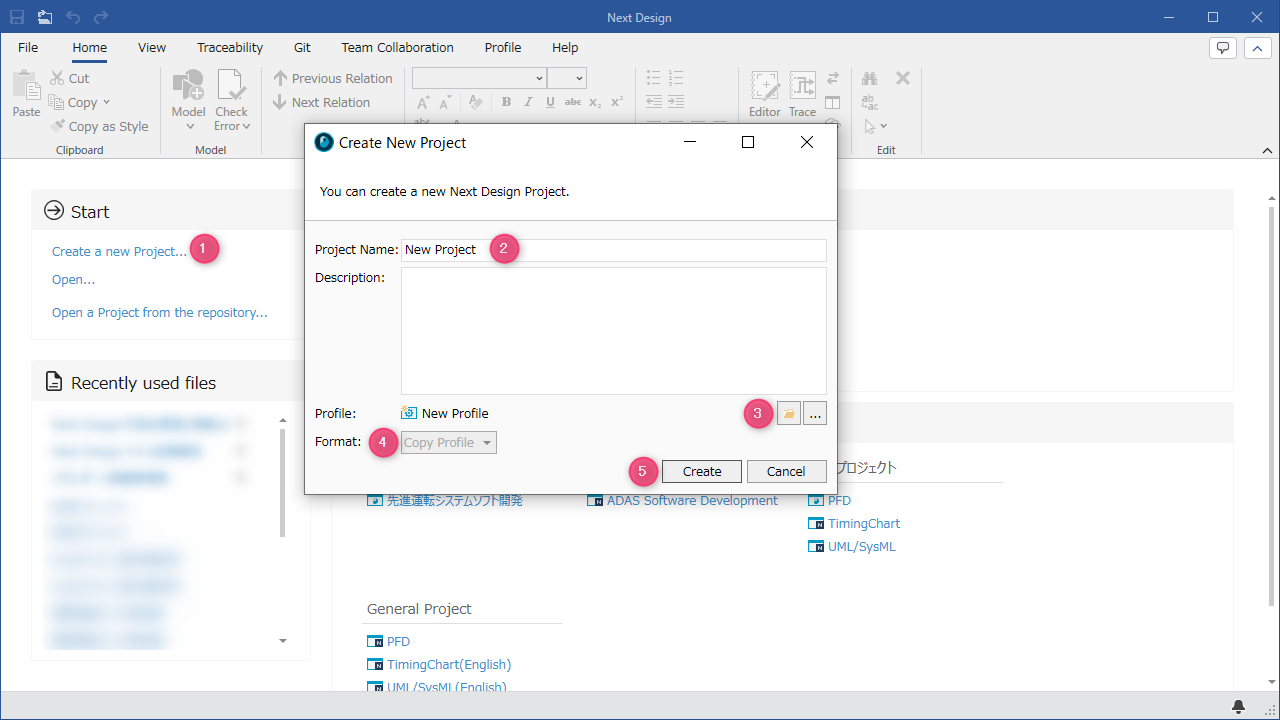
- Click the [Start] > [Create New Project] link to display the [Create New Project] dialog box.
- Enter the [Project Name] and, if necessary, enter the [Overview].
- Specify the profile to be used for one of the following operations.
- To specify the profile file (.nprof file) directly, click the [Folder] button under [Profile].
- You can also specify from a published profile. In this case, click the [...] button under [Profile].
- Specify [Copy Profile] for [Mime Type].
- Click the [Create] button to create a new project and begin editing.
:::
- Click the [Start] > [Create New Project] link to display the [Create New Project] dialog.
- Enter the [Project Name] and, if necessary, enter the [Overview].
- Click the [...] button under [Profile] and specify the profile to use.
- Specify [Reference Profile] for [Mime Type].
- Click the [Create] button to create a new project and begin editing.
-
A profile is required to create a model. To create a new profile, see Quickstart > Profile Definition.
-
You can also create a new project with the same profile by exporting the profile from an existing project.
For details, please refer to [Profile Definition > Profile Operation > Profile Modularization](../../profile-definition-guide/profile-operation/modularization-profile#Exporting Profiles).
Using Templates
If you have installed the template extension on your Next Design, you can also create a new project using a template.
To create a new project using a template, follow these steps:
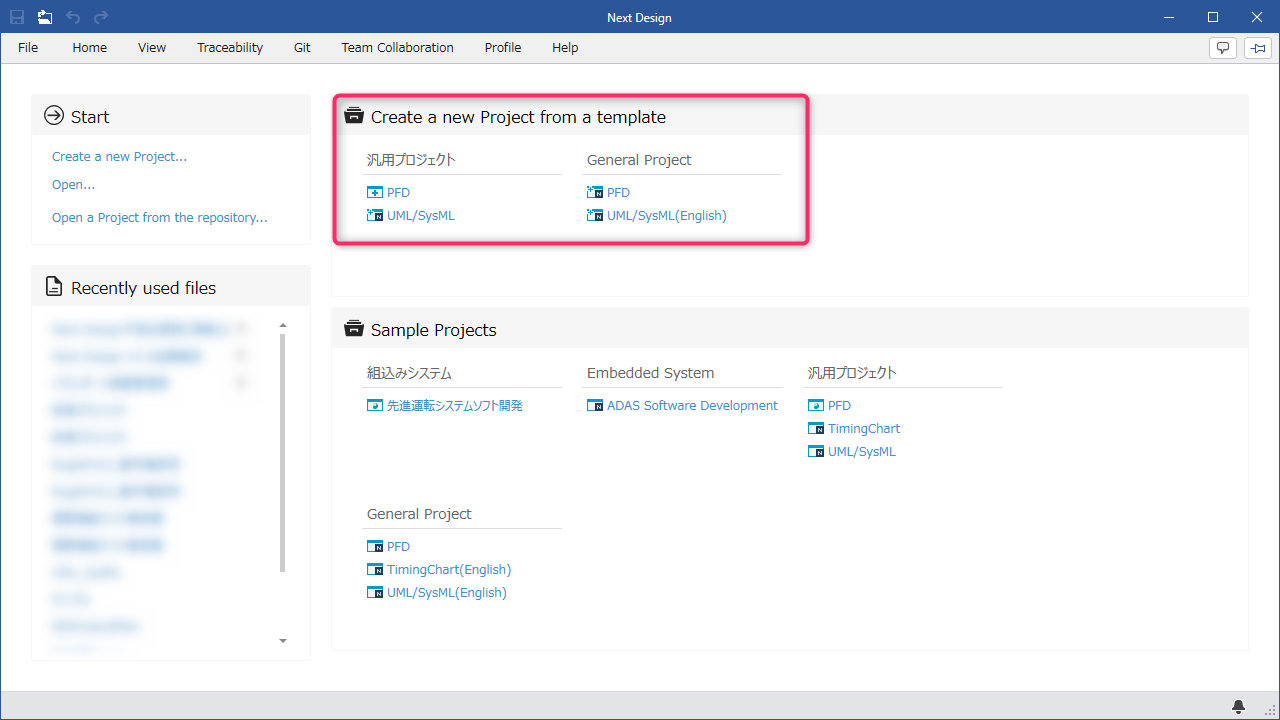
- When you launch Next Design, a list of available templates will be displayed under [Create a new Project from a template] on the start page.
- Hovering over a template name will display a description of the template.
- Clicking the desired template name will create a new project based on the template, allowing you to begin editing.
-
For information on how to install extensions, please refer to one of the following:
-
To create a template, see Save a Project > Template a Project.
Preparing Your First Model
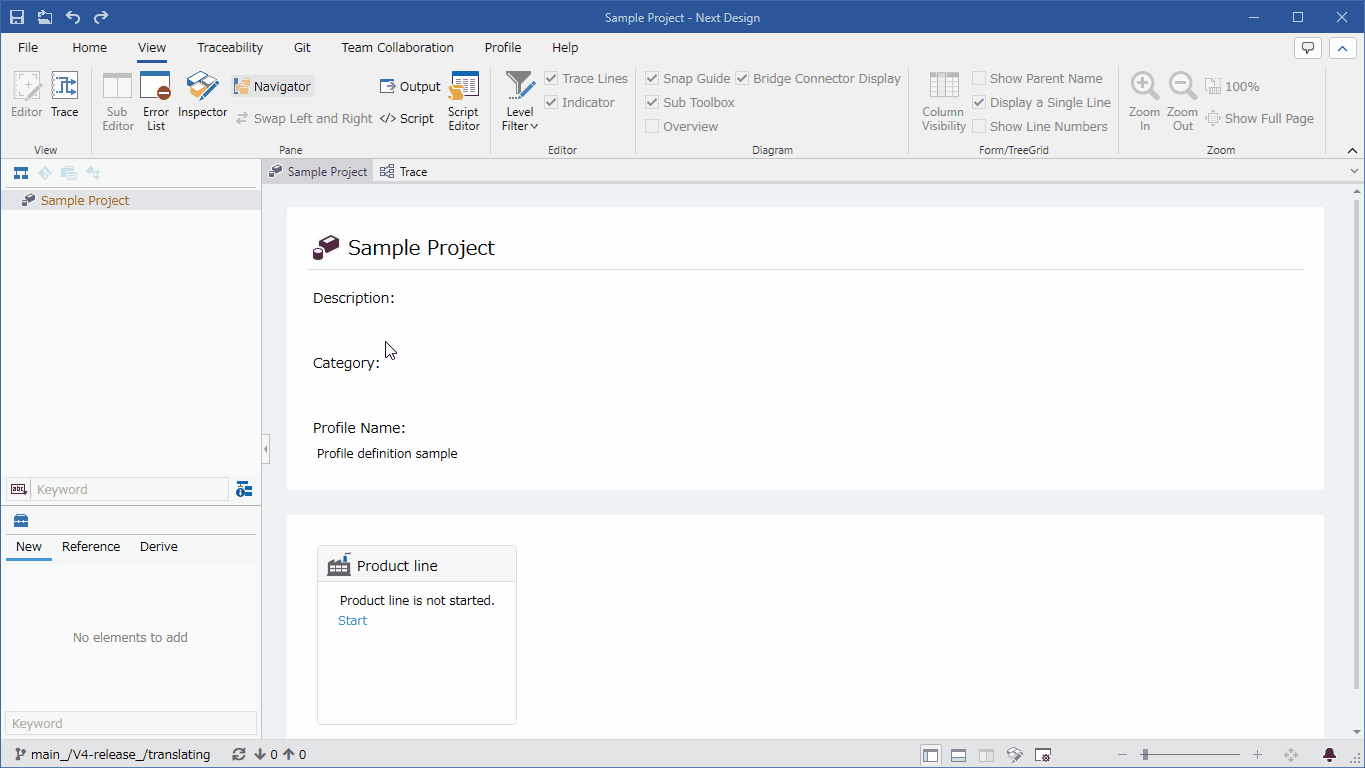
Immediately after creating a new project, only one project will be displayed at the top of the Model Navigator.
To begin editing models, add your first model from the Model Navigator using the following steps:
-
Right-click the project in the Model Navigator and click the entity you want to add from the context menu [Add Model].
-
One model will be added under the project. Selecting this model will allow you to edit it.
- The entities that can be added directly under a project vary depending on the profile.