Quick Start
Overview
Installing the MarkdownEditor package adds the Markdown Editor to the list of views you can add.
Add a view definition and configure the necessary settings in the inspector to preview the Markdown as you edit it.
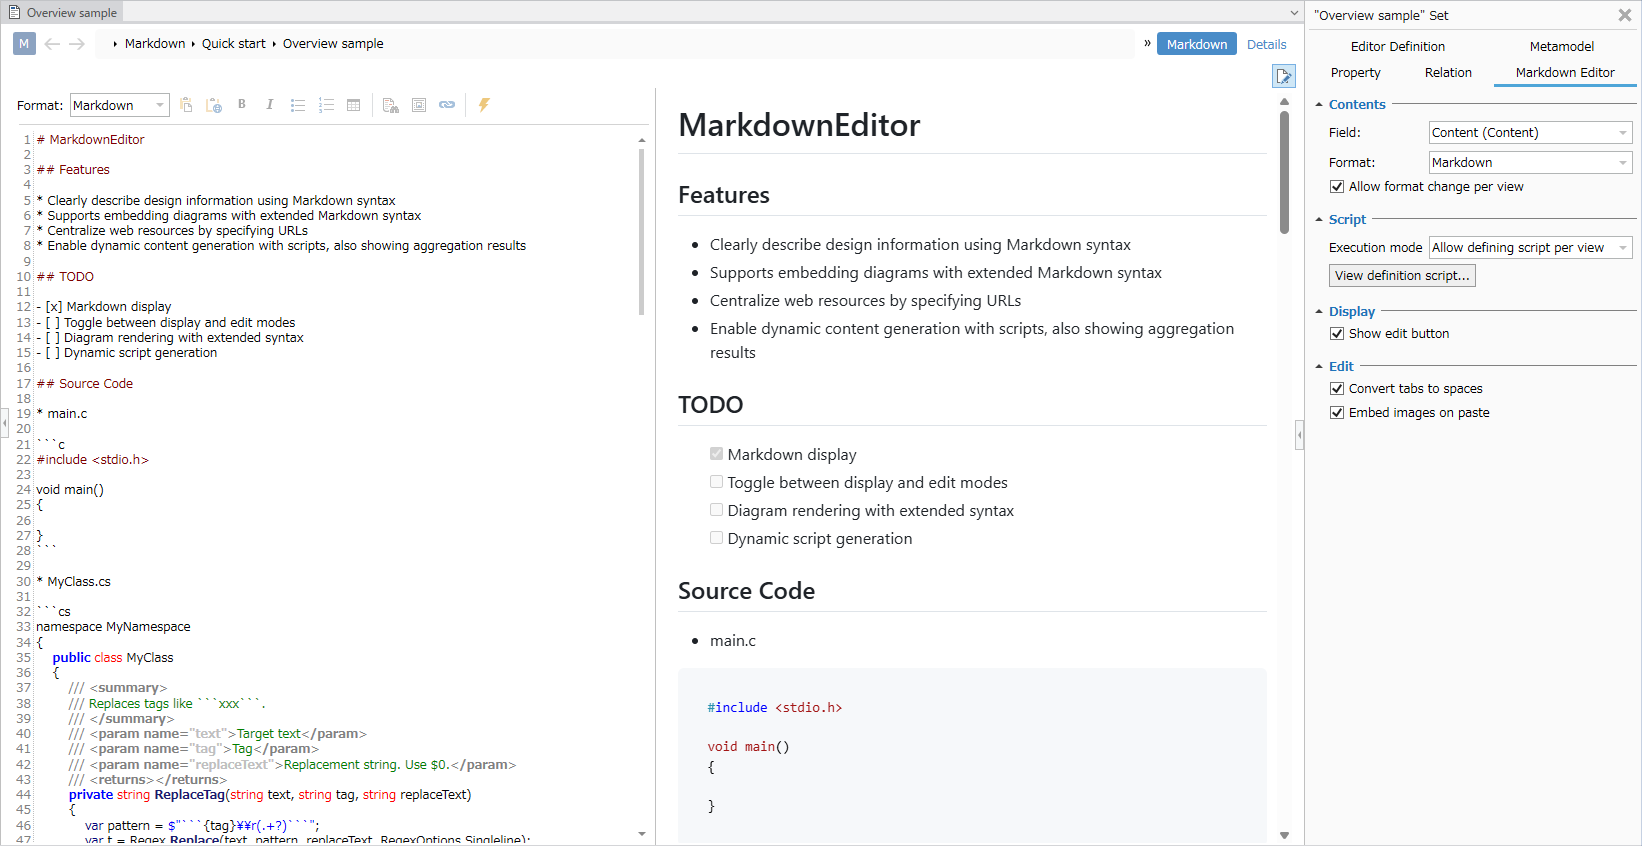
Adding a View Definition
To use the Markdown Editor, add a view definition to the target model using the following steps:
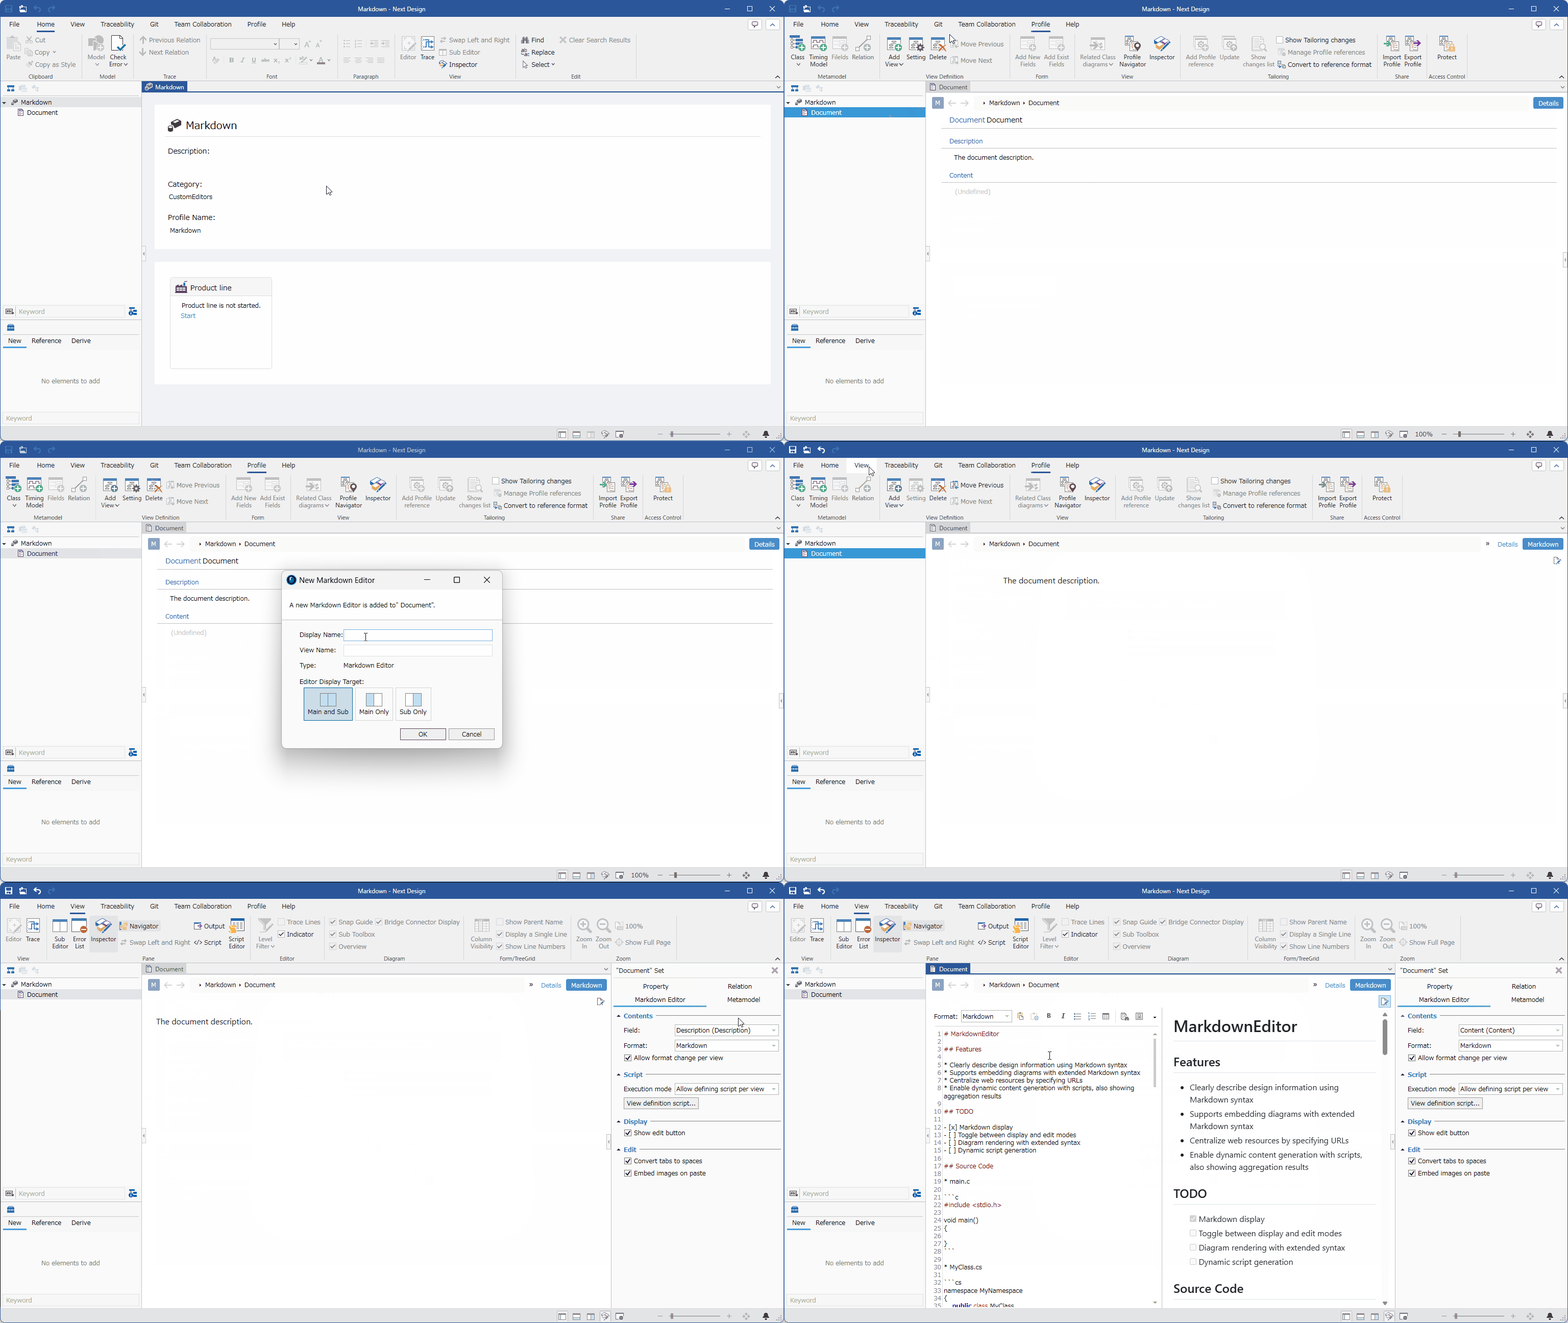
- Select the target model in the Model Navigator.
- Click Profile > View Definition > Add View on the ribbon, and then click Markdown Editor under Custom Editors. The New Markdown Editor dialog box appears.
- Enter a Display Name and View Name and click OK. The view will be added and displayed in the upper right corner of the Model Editor.
- Click View > Pane > Inspector on the ribbon to display the Inspector and switch to the Markdown Editor tab.
- Specify the fields in which you want to write the Markdown editor content in the Fields settings. The Markdown editor (preview display area) will appear in the Model Editor view.
- Click the Edit toggle button in the upper right corner of the Markdown editor to display the editing area where you can write the content in the left half of the editor.
- The Markdown Editor supports the following description formats.
- Markdown: Markdown notation format
- Html: HTML format
- Url: Web page URL format
- To change the Markdown editor's notation format, open the Markdown Editor tab in the Inspector and change the Mime Type.
Editing Content
Markdown editor content can be edited not only from the Markdown Editor editing area, but also from other views.
- Editing content from the Markdown Editor editing area
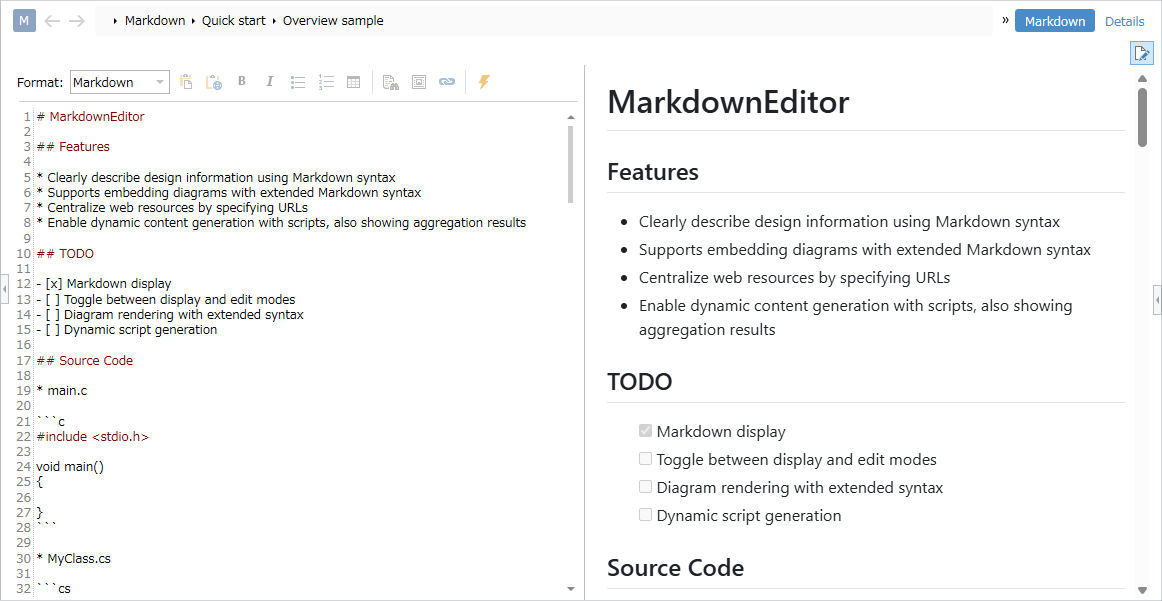
- To use the Bold and Italic buttons on the toolbar, select text.
- Editing content from other views
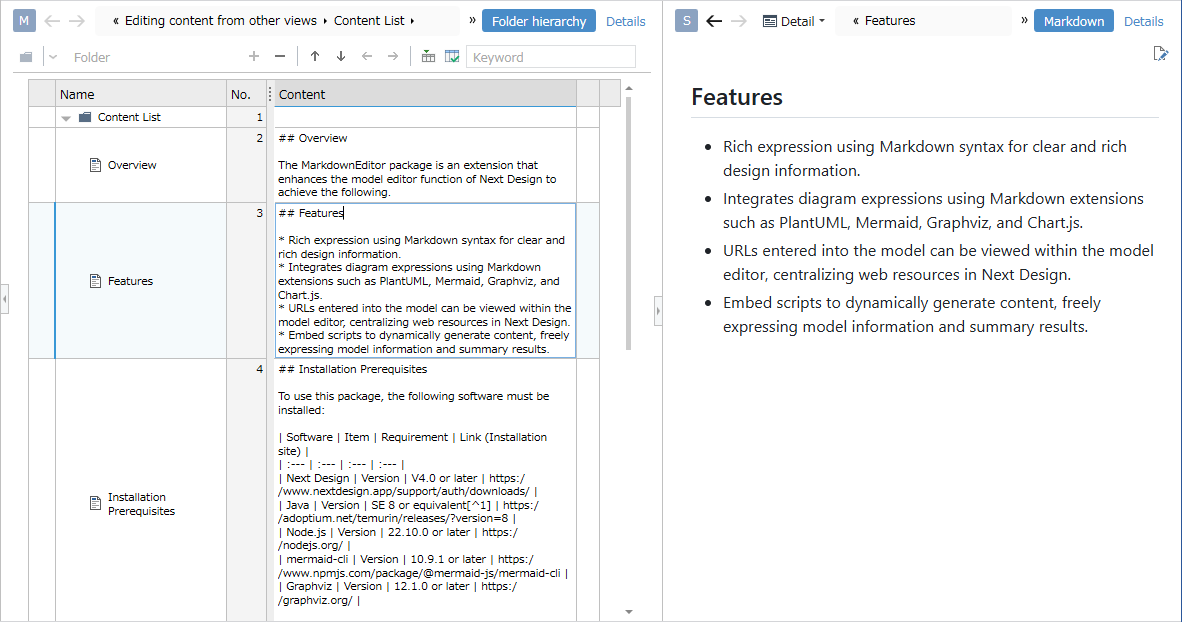
Useful tips
Specifying a relative path to an image file
When referencing an image file outside the project, you can specify a path relative to the project file.

Pasting image data
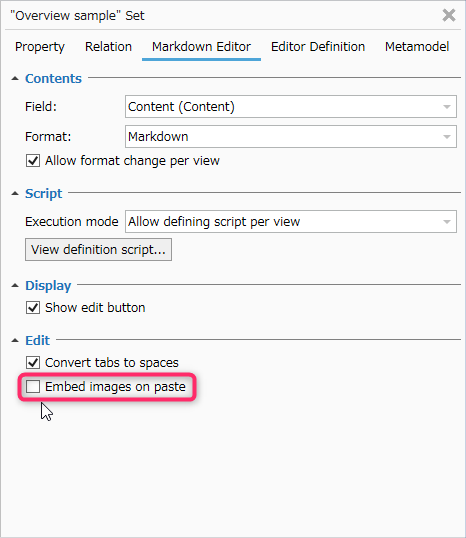
You can embed image data copied to the clipboard as part of a field value by pasting it into the editing area of the Markdown editor.
<img src="{EmbedImage0}" width="90%"/>
If you uncheck the "Embed images when pasting" checkbox in the "Markdown Editor" tab of the Inspector, you can also save the image as an external file by entering a file path to save it when pasting.
Paste as a Markdown table from Excel
Paste data copied from an Excel sheet to the clipboard into the editing area of the Markdown editor. It will be automatically converted to a Markdown table and pasted.
| Design item | Value range | Default value |
| ----------- | ----------- | ------------- |
| flag        | true,false  | true          |
| message     | String      | ""            |
- Word tables are pasted as text.
- PowerPoint tables are pasted as images. Selecting and copying cells within a table will not paste them.
Insert a link to a model by dragging and dropping the model
You can insert a link to the relevant model using one of the following methods.
- Click the [Insert Model Link] button on the toolbar at the top of the editing area to select the model.
- Drag and drop the model into the editing area of the Markdown editor.
Click the inserted link in the Markdown editor preview to jump to the corresponding model.
[Model Name](modelid://daa34b4f-4d6e-47f4-b5a6-39e3699bc7f0)