Quick Start
Overview
Installing the FTA package adds the following screen components, enabling you to create FT diagrams in Next Design.
-
[Profile] > [Components] > [FTA] is added to the ribbon.
-
You can add FTA models from the Model Navigator.
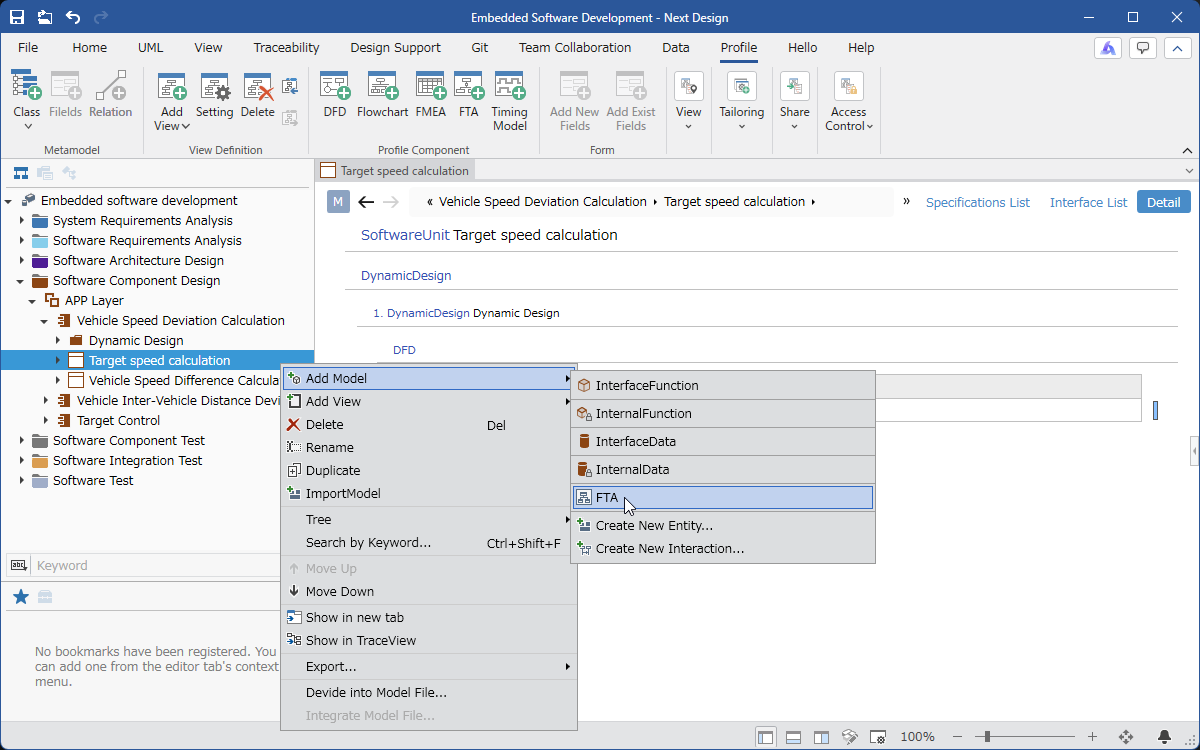
The following describes how to begin creating FT diagrams using the FTA package, in the following order:
- Install the FTA package
- Start FTA in your current project
Installing the FTA Package
As preparation for creating FT diagrams, install the FTA package using the following steps.
- Install the [FTA] package from [DENSO CREATE OFFICIAL] according to the following manual.
- After installation, restart Next Design to make the FTA package available.
Starting FTA in Your Current Project
By adding an FTA metamodel and defining ownership relationships between the added metamodel and the entities creating the FT diagram, you can create an FT diagram.
To add an FTA metamodel, follow these steps:
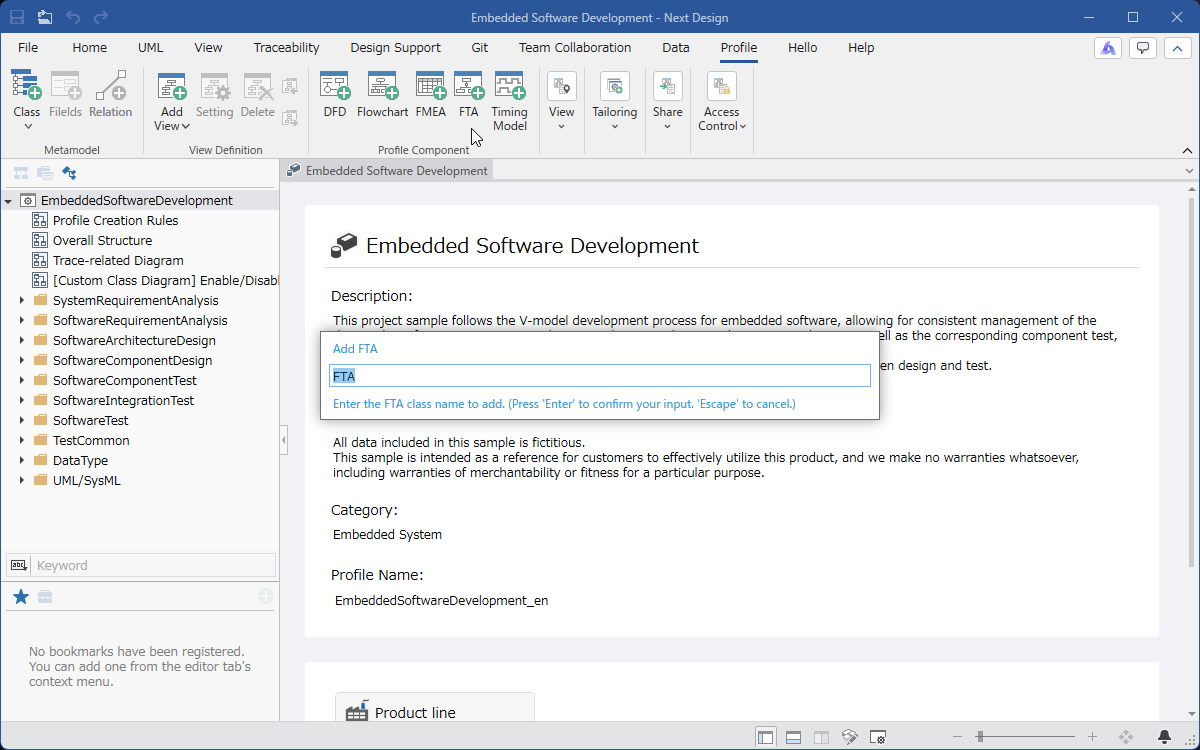
-
In the [Profile Navigator], select the package to add.
-
Click the [Profile] > [Parts] > [FTA] button on the ribbon.
-
The FTA metamodel will be added under the selected package.
- The FTA metamodel can be added to any package.
This allows you to add FT diagrams to multiple design models within a single project.
- Profiles added via the ribbon [Profile] > [Parts] > [FTA] cannot be converted to reference format.
To add an FTA profile in reference format, use the ribbon [Profile] > [Tailoring] > [Add Profile Reference].
To define ownership relationships, follow these steps:
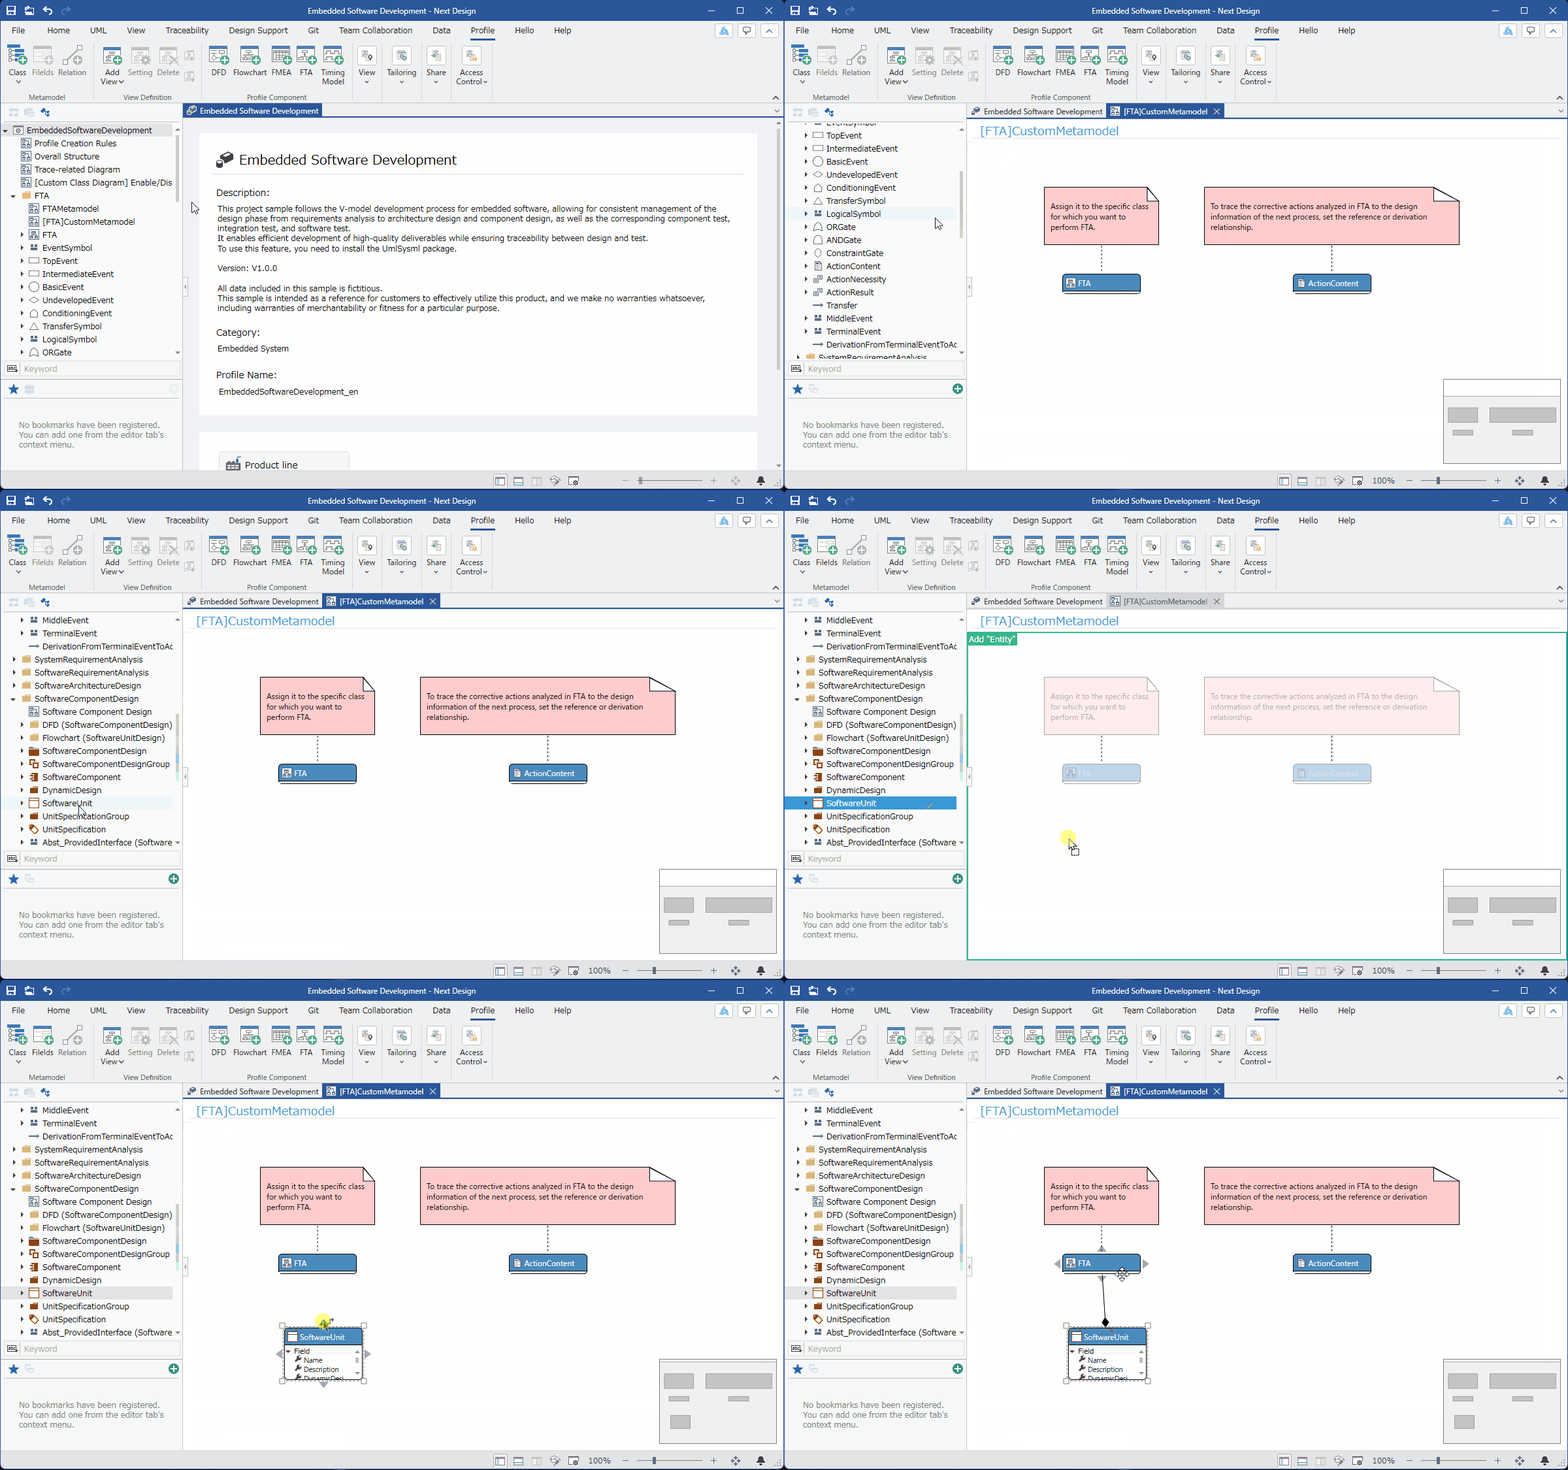
-
Display the class diagram of the [[FTA] Custom Metamodel] within the added [FTA] package.
-
From the [Profile Navigator], drag and drop the entities you want to create an FT diagram for into the class diagram.
-
In the class diagram, move the pointer to the added entity, drag the [▲] icons that appear in all four directions, and drop them onto the [FTA] entity.
-
After dropping, a pop-up window with related type options will appear; click to select [Embedded].