AI Support Using the Agentiqs Pane
This section explains how to display and use the DC Agentiqs chat window on Next Design.
This chat window is called the Agentiqs Pane.
- Display the Agentiqs Pane
- Specify an Agent
- Add a Context
- Reload the Agentiqs Pane
- Design Support by AI Agents
The Agentiqs Pane can only be operated on the project displaying the Agentiqs Pane.
Displaying the Agentiqs Pane
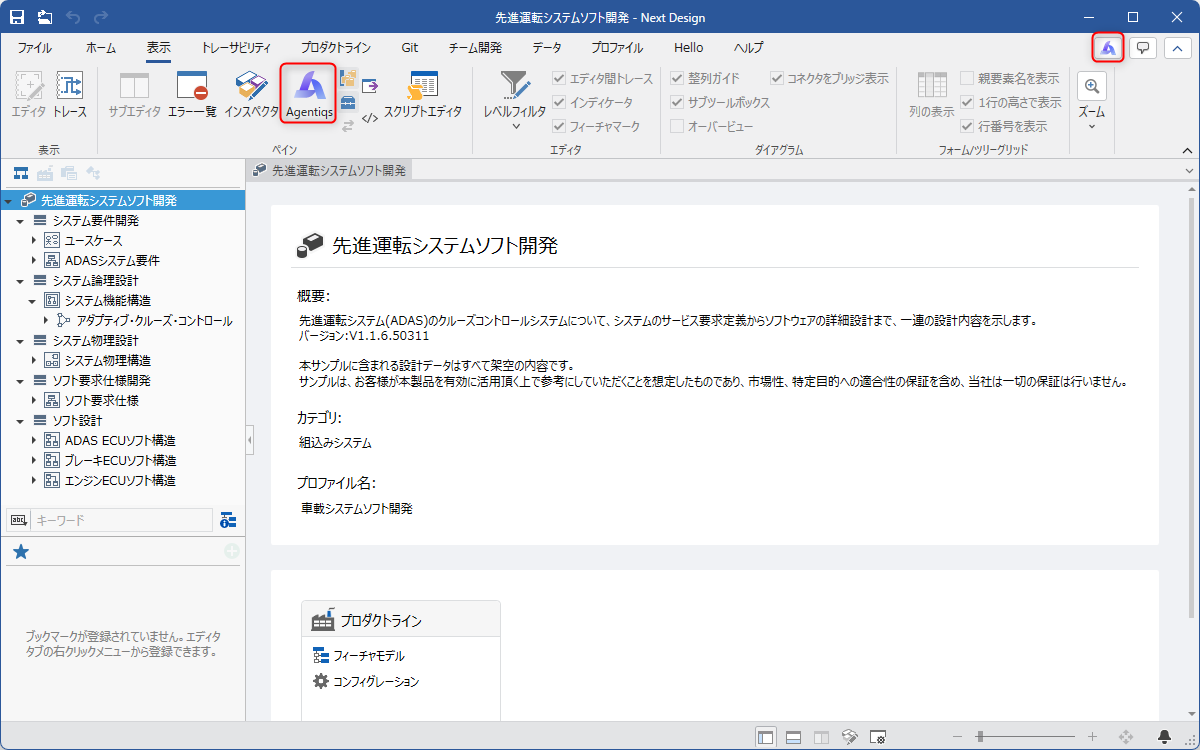
After installing DC Agentiqs, an icon will be added as shown in the following screen.
Click the icon to display the Agentiqs Pane.
Specifying an Agent
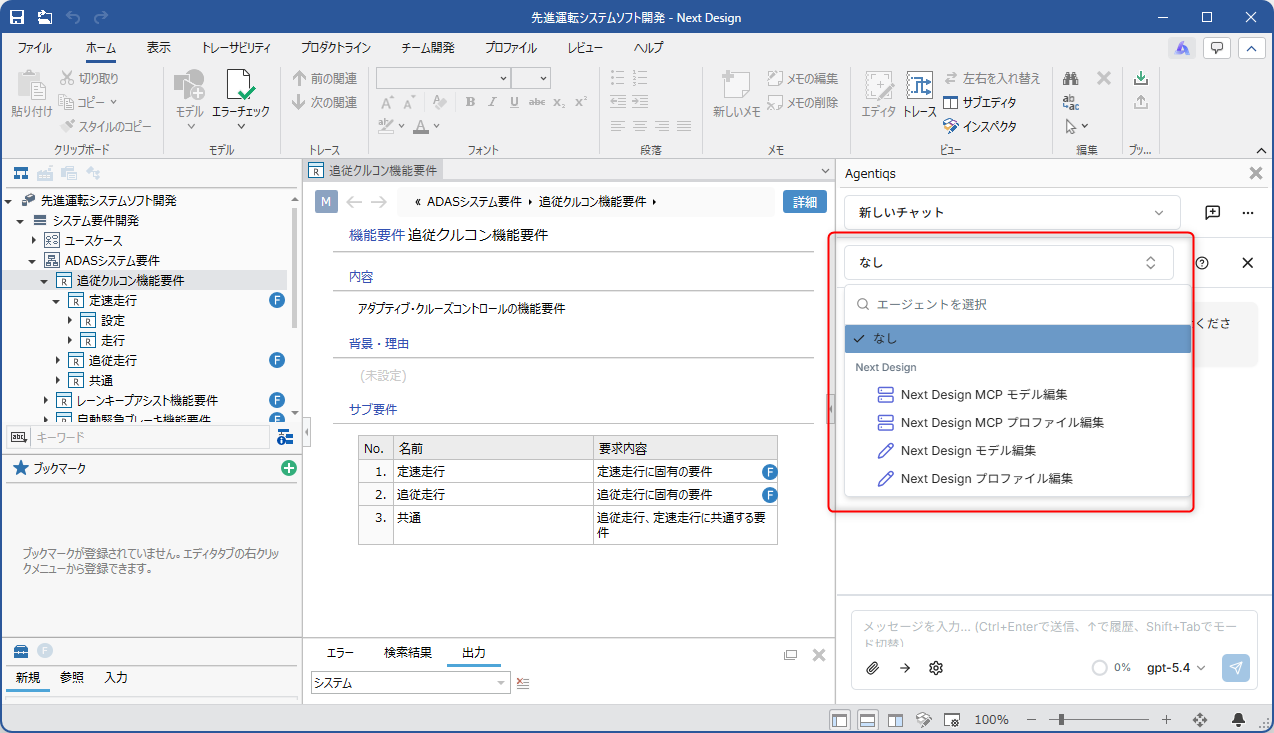
Specify the agent to use in the Agentiqs pane.
Adding a Context
There are several ways to add a context to the Agentiqs pane:
- Add with a button
- Add with drag and drop
Adding with a Button
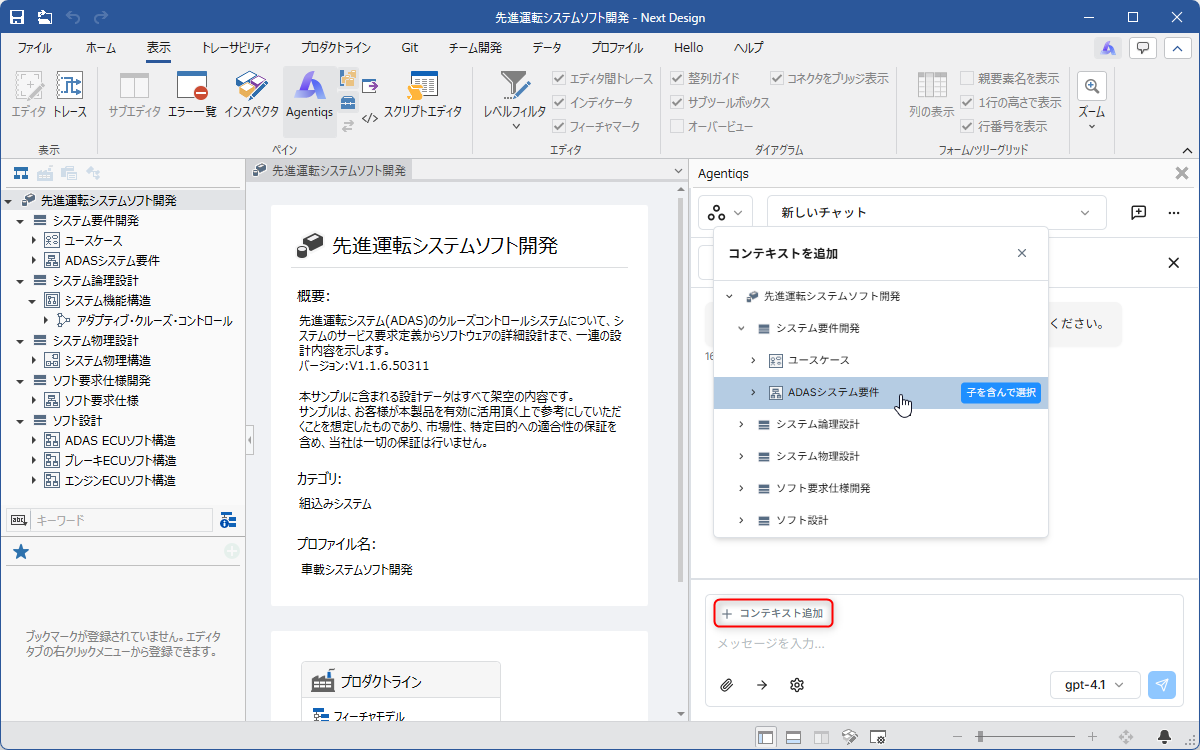
You can add a context by clicking the [Add Context] button in the Agentiqs pane.
-
Click the [Add Context] button in the Agentiqs pane.
-
Click the model to add from the model tree.
- Clicking the [Select Including Children] button will add the selected model and its children.
Adding via Drag and Drop
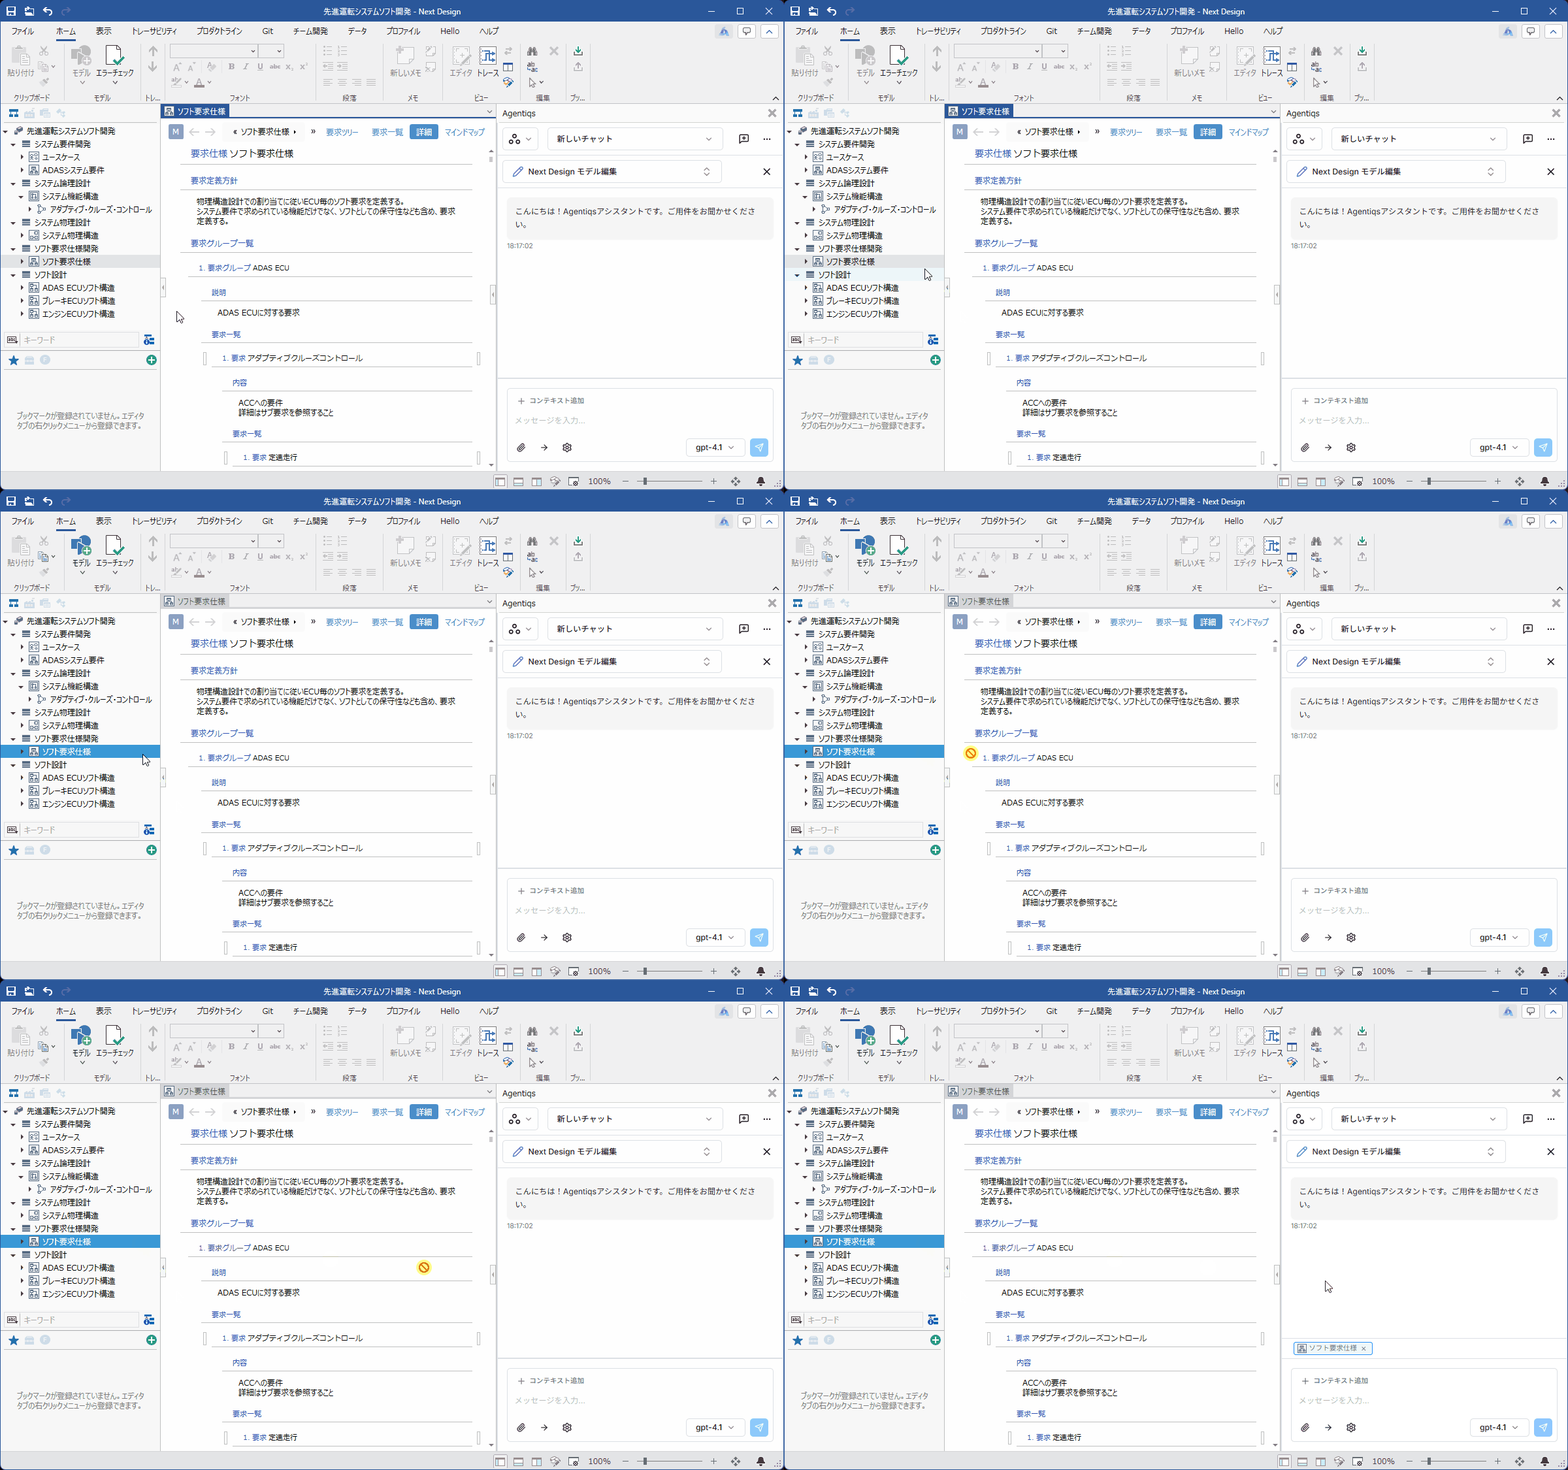
You can add a context by selecting an element from the navigator or editor and dragging and dropping it into the Agentiqs pane.
To add the dropped element and its children, hold down the [Ctrl] key while dropping.
The following elements can be added:
| Drag Source | Element |
|---|---|
| Model Navigator | Model |
| Package | |
| Profile Navigator | Class Diagram |
| Package | |
| Metamodel | |
| Fields | |
| View Definition | |
| Product line navigator | Feature Model |
| Feature | |
| Configuration | |
| Product | |
| Editor | Model in Form Editor |
| Model in Tree Grid | |
| Trace | Model in Trace Tree |
| Other | External Image |
| External File |
Reloading the Agentiqs Pane
To reload the Agentiqs pane, follow these steps:
Reloading will reflect changes to the DC Agentiqs settings in the Agentiqs pane while the Next Design is displayed.
-
Move focus to the Agentiqs pane.
-
Reload the Agentiqs pane using one of the following methods:
- Hide the Agentiqs pane, then show it again.
- Press the shortcut key [F5].
- Press the shortcut key [Ctrl + R].
AI Agent-Based Design Support
For instructions on using the following features included in the Next Design AI Toolkit, please refer to the following page.
- Basic Usage of Next Design MCP
- How to Import Existing Design Assets
- What You Can Do with Extension Development Support
For information on how to use this feature, please refer to "How To Content".