C2: Adding Domain-Specific Design Information
Overview
This package's profile defines the design information used in general embedded software development.
Based on this, you can add fields to classes to hold domain-specific design information, or add custom classes to the metamodel to hold related information required in your company's processes.
This allows you to centrally manage the design information needed in your own workplace using Next Design.
Adding Fields to Hold Design Information
This section explains how to add fields to hold design information using the following example.
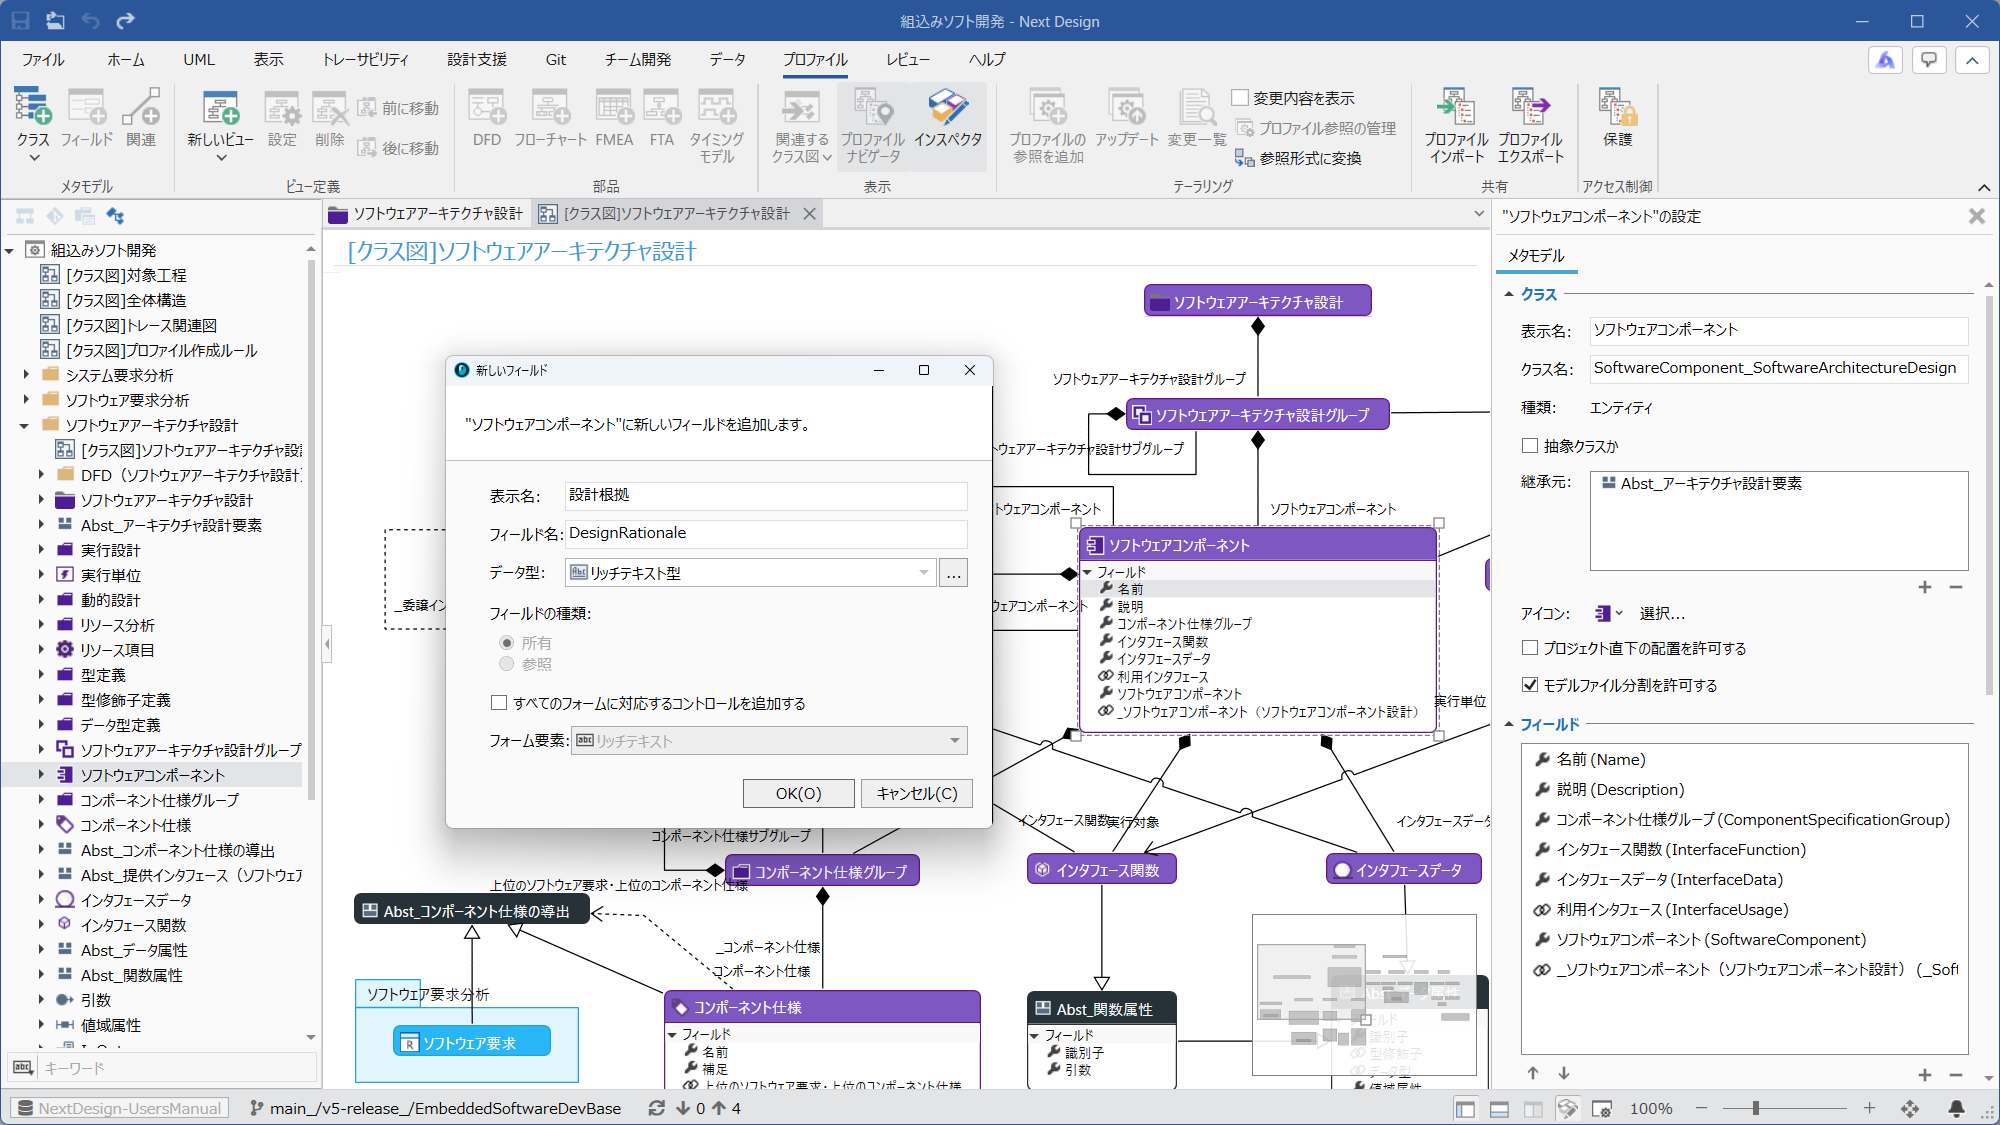
- Example: Add a rich text type [Design Basis] field to record the design basis, such as interface design, for each software component in software architecture design.
-
Switch to the Profile Navigator and select the relevant class (e.g., [SoftwareComponent]) from the relevant process (e.g., [SoftwareArchitectureDesign]).
-
Open the class diagram for each process (e.g., [[Class Diagram] Software Architecture Design]) from the ribbon tab [Profile] > [View] > [Related Class Diagrams].
-
Add a field to hold design information (e.g., [Design Rationale]) to the relevant class (e.g., [SoftwareComponent]).
- Use rich text type so that images can also be pasted.
- Add controls for all forms: Off
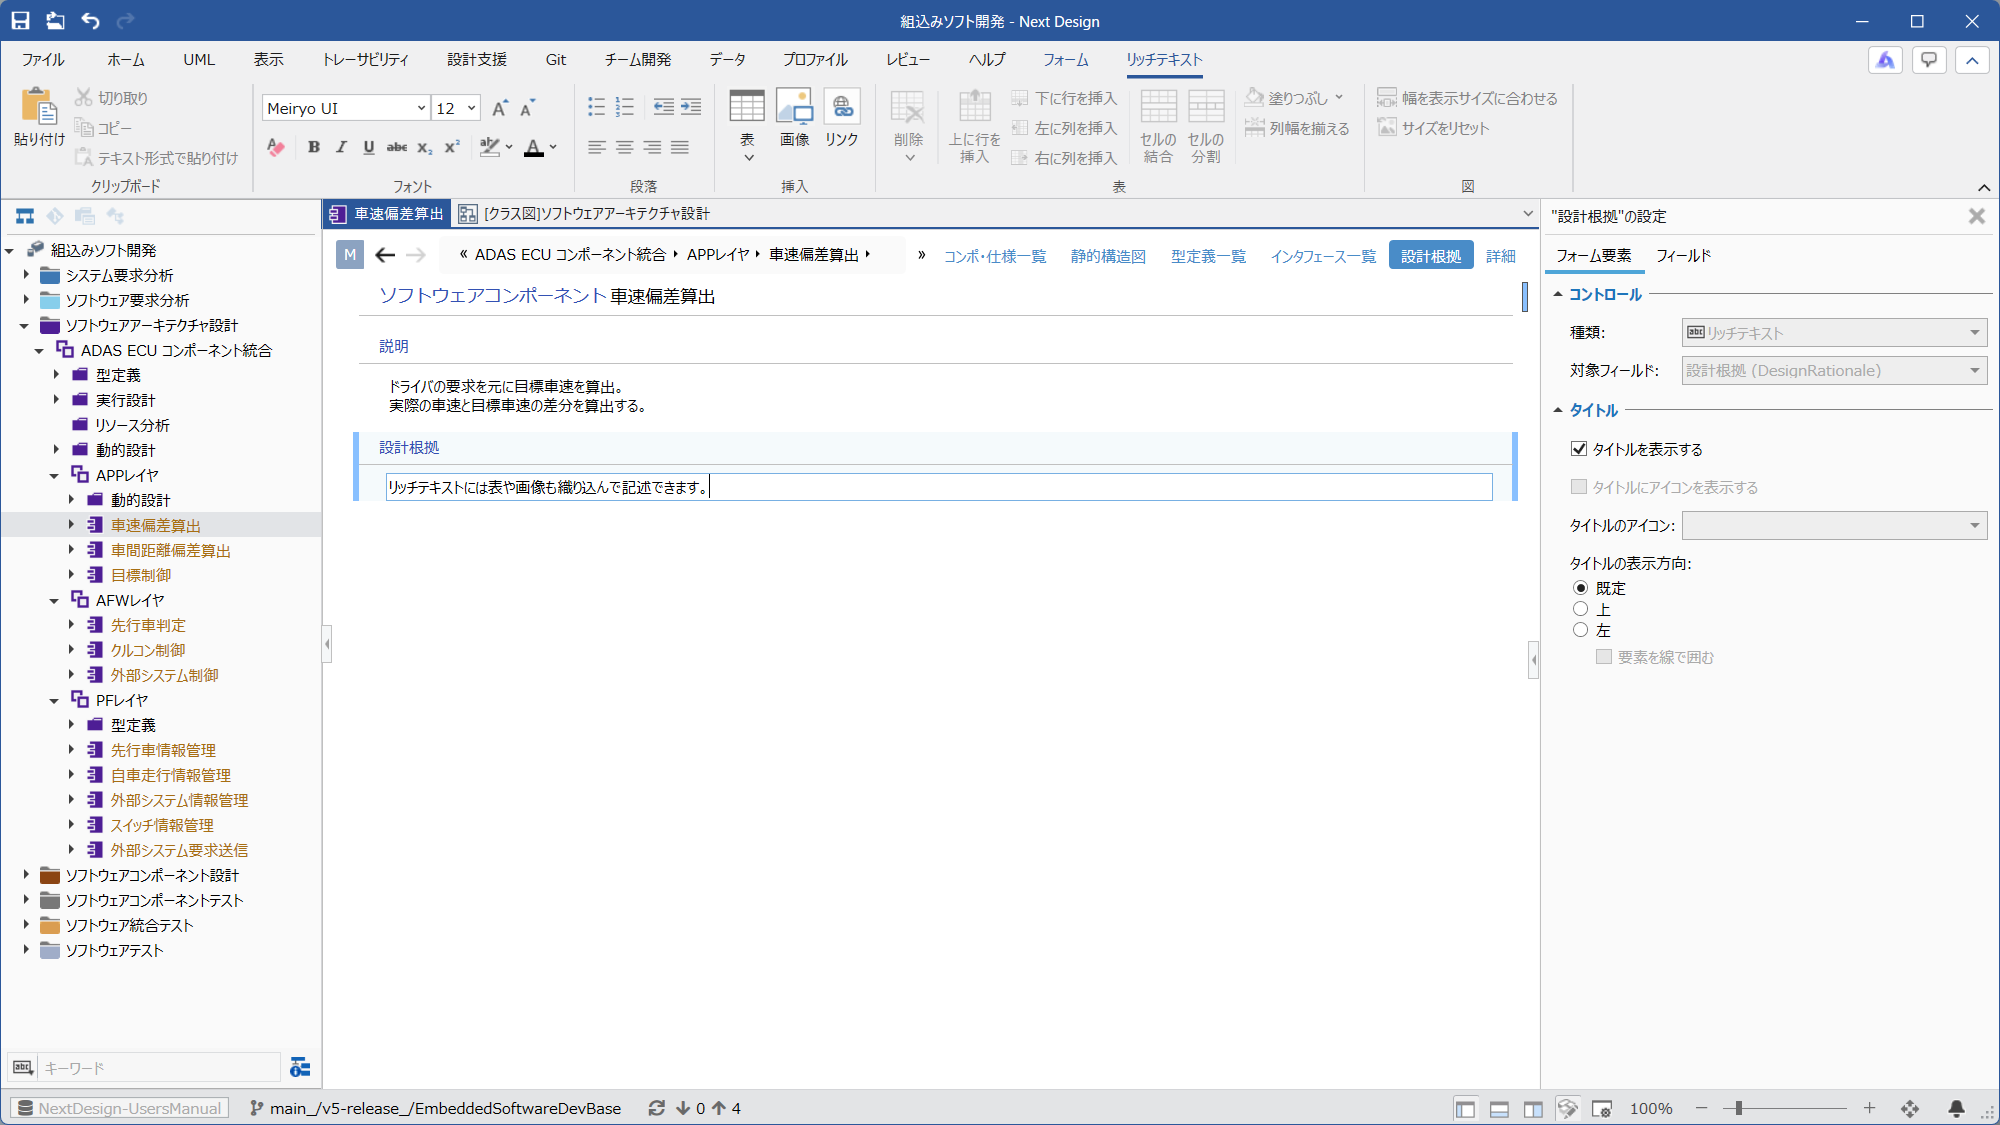
- Return to the Model Navigator and open the model for the relevant class (e.g., [Vehicle Speed Deviation Calculation]).
- Add a new form view (e.g., [Design Rationale]) to the relevant class for editing design information, and add the field you just added (e.g., [Design Rationale]) to the view.
- Adjust the view order by clicking the [Profile] > [View Definition] > [Move Previous]/[Move Next] buttons on the ribbon tab.
Screen image of adding a field to a metamodel class
Screen image of the field added to the view
Adding a custom class to hold related information
This section explains how to add a custom class to hold related information using the following example.
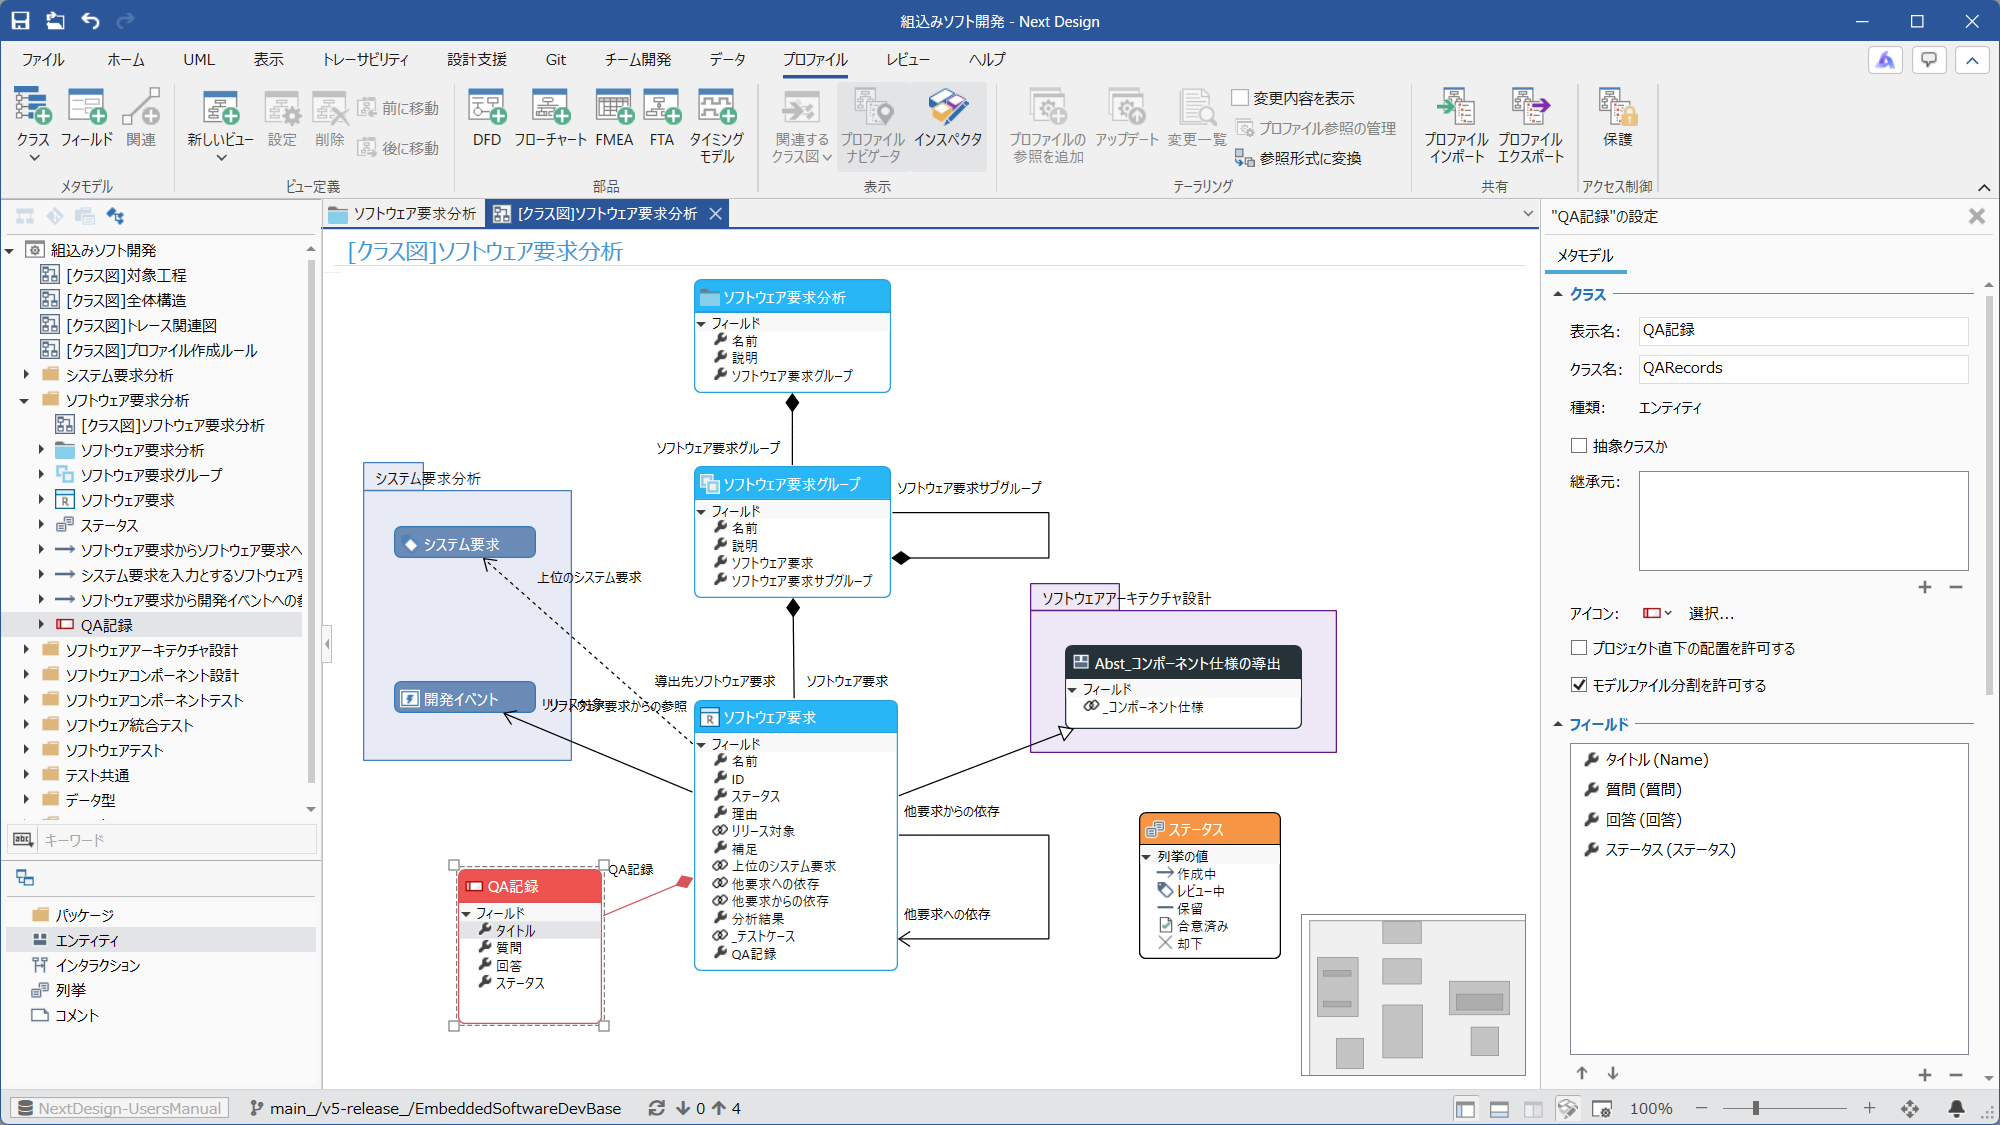
- Example: Add a custom [QA Record] class to record QA information ([Title], [Question], [Answer], [Status], etc.) for unclear points regarding the requirements for each software requirement in software requirements analysis.
-
Switch to the Profile Navigator and select the target class (e.g., [Software requirements]) from the relevant process (e.g., [SoftwareRequirementAnalysis]).
-
Open the class diagram for each process (e.g., [[Class Diagram] Software Requirements Analysis]) from the ribbon tab [Profile] > [View] > [Related Class Diagrams].
-
Add a custom class (e.g., [QA Record]) to the class diagram and add an ownership relationship from the target class (e.g., [Software requirements]) to the custom class (e.g., [QA Record]).
-
Add the necessary fields (e.g., [Title], [Question], [Answer], [Status], etc.) to the custom class (e.g., [QA Record]).
-
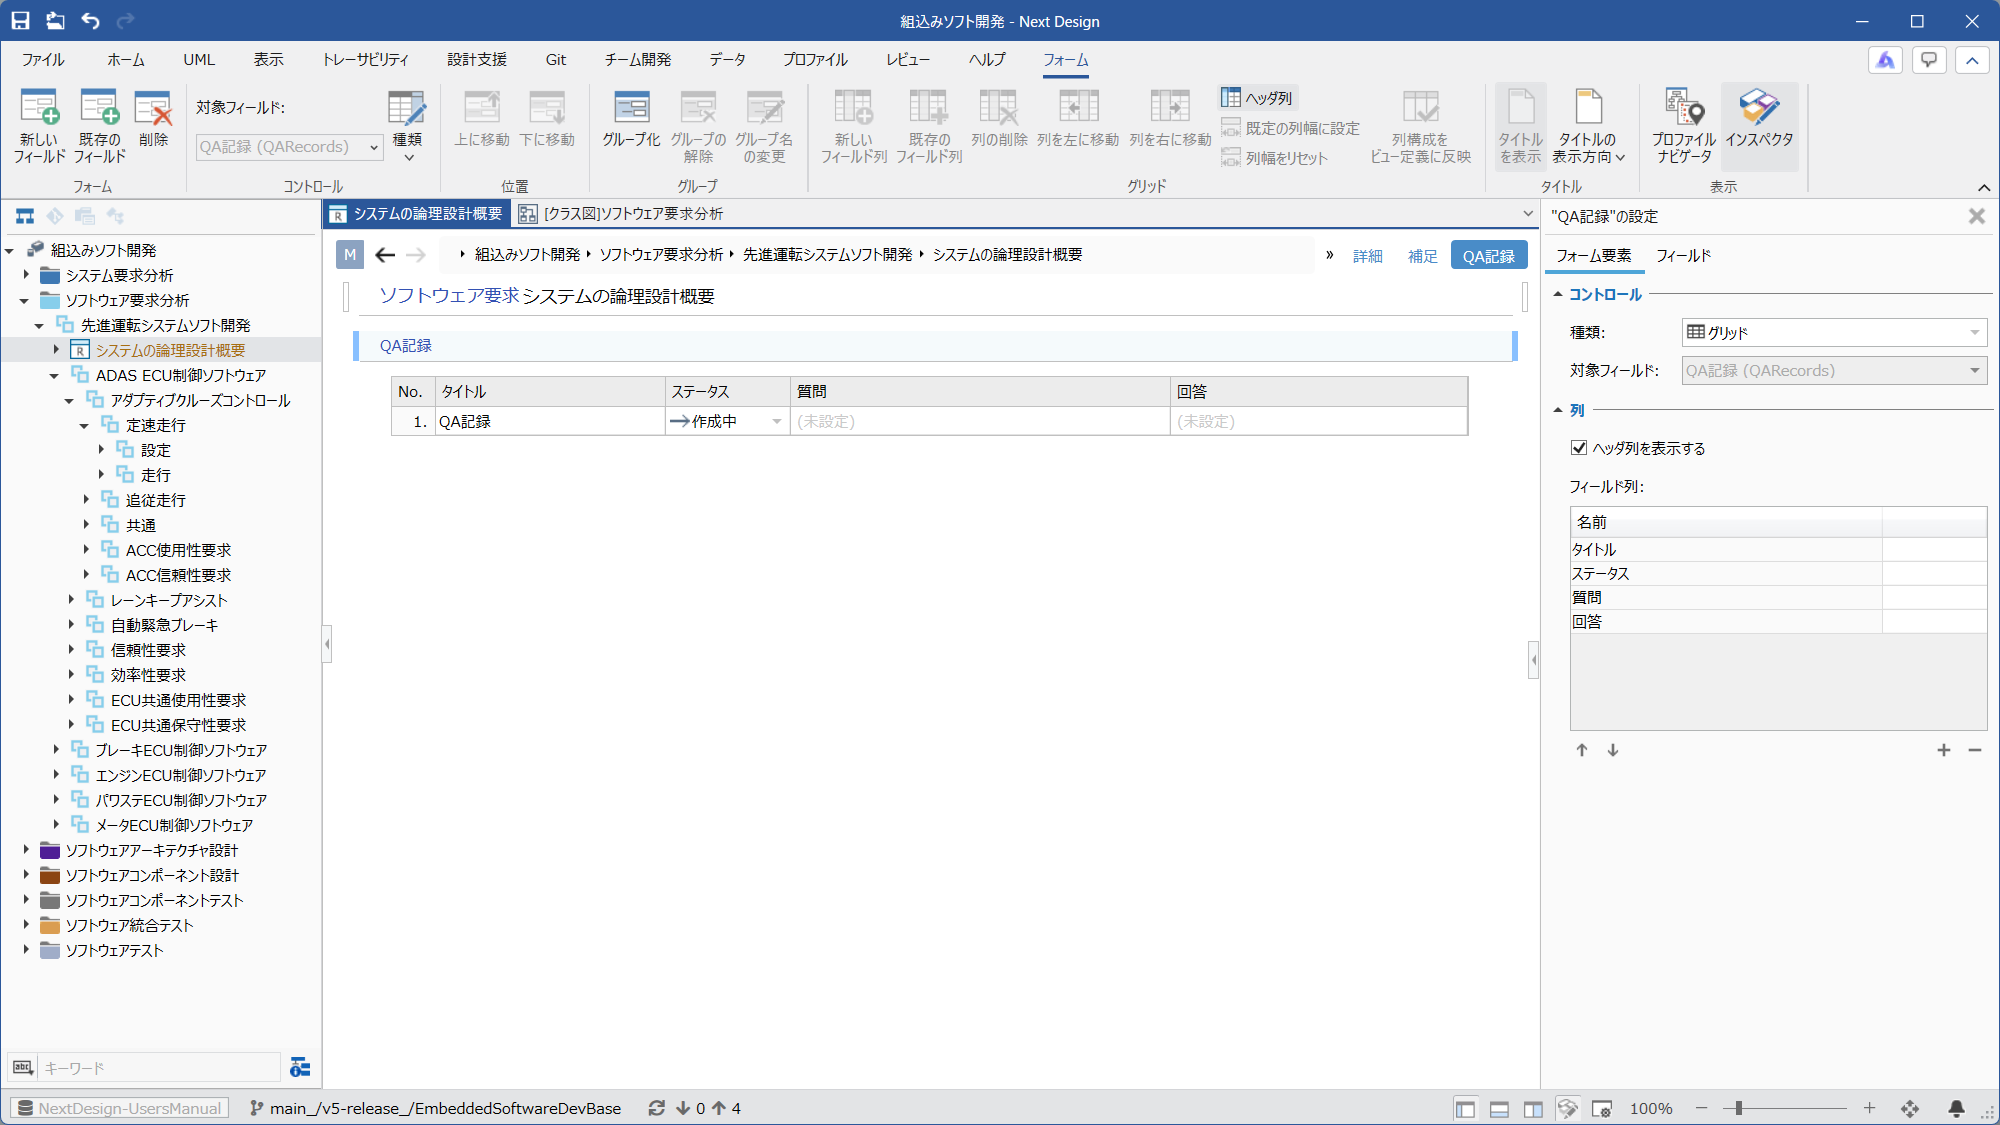
Return to the Model Navigator and add a new view (e.g., Type [Document Form], Name [QA Record]) to edit the information of the custom class in the model of the relevant class (e.g., [System Logical Design Overview]).
-
Add the relevant fields (e.g., [QA Record]) in a grid format so that you can edit the model of the custom class on that view, and add the necessary fields (e.g., [Title], [Status], [Question], [Answer]) to the grid columns.
Screen Image of Added Class
Screen Image of Added View
:::More Advanced Customization of info
-
You can define your own derived classes by inheriting the classes provided in this package, or import and integrate your own profiles.
If necessary, you can duplicate view definitions from the base class to the derived class, or optimize the relationships between classes that overlap due to inheritance. -
We also offer support services for defining profiles tailored to your needs. For details, please refer to "Information on Implementation Support Services".
:::