Form View Definition
Overview
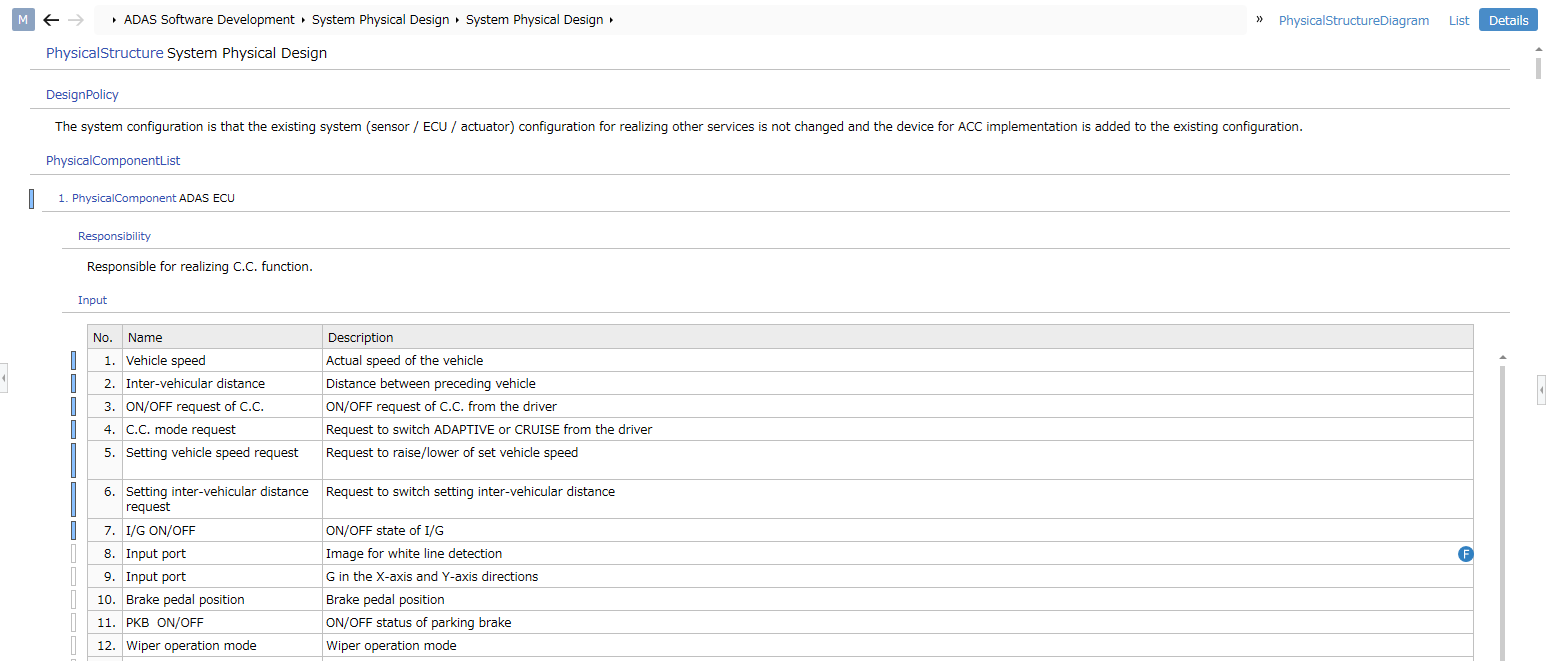
Next Design allows you to define a view for viewing and editing model details, similar to a traditional design document, by placing model fields in a form.
You can place all the fields you want to view and edit in a single form, or you can define multiple forms and place only the fields you need.
In addition to fields that store values, forms can also contain fields that store related models (hereinafter referred to as related fields). Related fields placed in a form can be viewed and edited in a numbered list or grid format.
When placing many fields on a single form, you can group multiple fields to express semantic cohesion or allow each group to be collapsed.
The following explains how to define a form-based view in the following order:
- Arranging existing fields
- Arranging related models in list format
- Arranging related models in grid format
- Changing the display format of related models
- Changing the field order
- Hiding placed fields
- Grouping fields
Arranging existing fields
Arranging existing fields
To place existing fields defined in an entity on a form, follow these steps:
- Click a field already placed on the form to select it and specify its placement.
- Open the New Control dialog box by doing one of the following:
- From the ribbon, click Form > Form > Add Existing Fields.
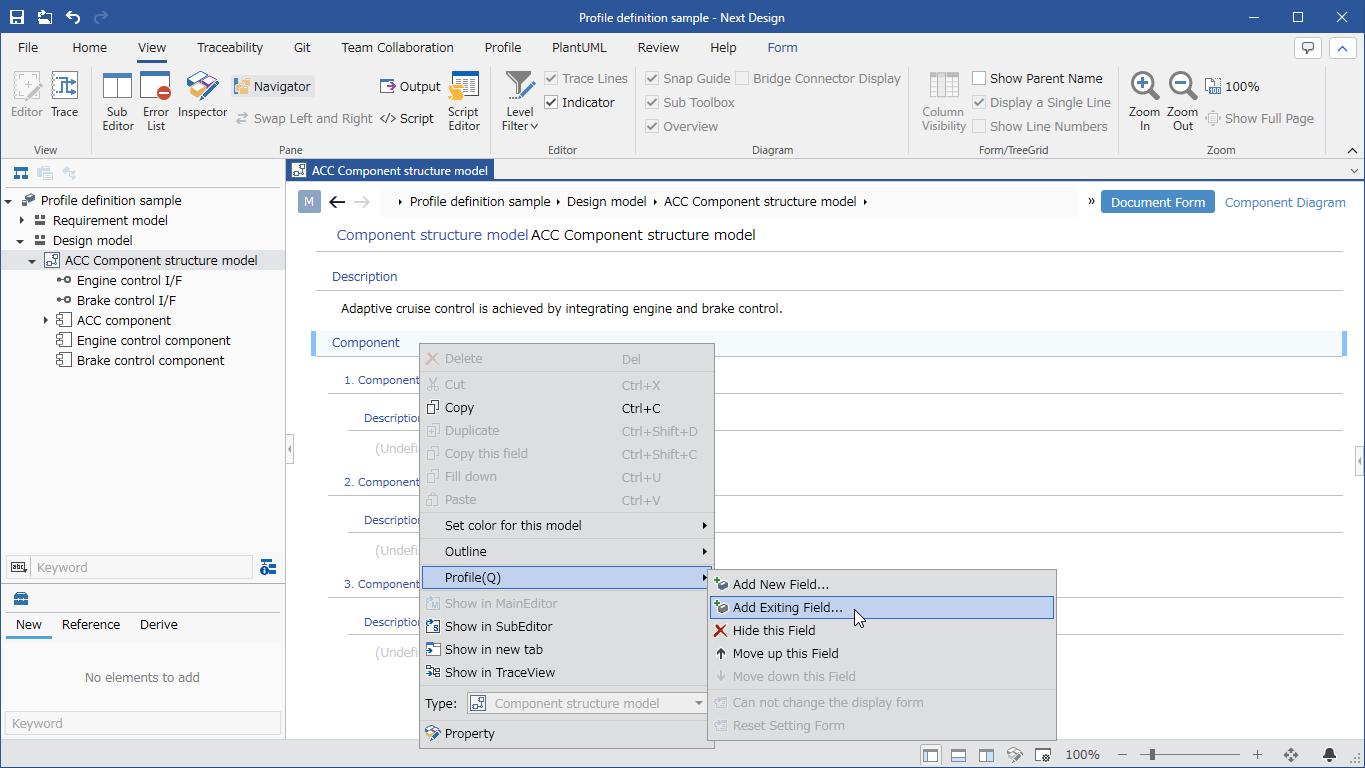
- Click [Profile] > [Add Exiting Field] from the context menu.
- In the [New Control] dialog, select the field you want to place from the [Fields] options.
- Next, select the UI format for editing from the [Form Element] options.
- Click the [OK] button in the dialog to place the selected field on the form, with the field name displayed as the title.
If no fields are placed on the form, follow the steps below.
- Click the model name at the top of the form to select it.
- On the ribbon, click [Profile] > [Form] > [Add Existing Fields] to open the [New Control] dialog.
- Select and place fields as described above.
Changing the Display Format of Placed Fields
To change the title display direction of placed fields to the left to make the form more compact, follow these steps:
- To change the title display direction, do one of the following:
- On the ribbon, click Form > Title > Title Display Direction and select Left.
- In the Inspector's Form Element tab, select Title > Title Display Direction and select Left.
To change the format of placed fields in a form to a two-column table with title and value, follow these steps:
- Change the title display direction to left as described in the previous step.
- In the Inspector's Form Element tab, check the Title > Title Display Direction > Surround an element with a line checkbox.
Arranging Related Models in List Format
Arranging Related Models in List Format
To arrange models related to an entity in a form as a sequentially numbered list, follow these steps:
- As with "Locate an Existing Field," click a field already placed on the form to select it and specify the location of the related model.
- Open the New Control dialog box by doing one of the following:
- Click Form > Form > Add Existing Fields from the ribbon.
- Click Profile > Add Exiting Field from the context menu.
- In the New Control dialog box, select the field containing the related model from the Fields list.
- Next, select List from the Form Element list.
- Click the OK button in the dialog box. The name of the selected field will appear as the title, and the related model will be placed under it with a consecutive number.
Placing Existing Fields from Related Models
To add existing fields defined in a related model to each related model displayed in list format, follow the steps below, similar to the "Placing Existing Fields" procedure described above.
- Click the related model where you want to locate the field, or a displayed related model field, to specify the placement location.
- Open the New Control dialog box by doing one of the following:
- Click Form > Form > Add Existing Fields from the ribbon.
- Click Profile > Add Exiting Field from the context menu.
- From here, the existing field of the related model will be placed on the form using the same procedure as "Locate an Existing Field."
Arranging Related Models Hierarchically
To further arrange related models hierarchically by tracing the relationships between models from related models displayed in list format, follow the same steps as in "Arranging Related Models in List Format" above.
- To specify the placement location, click to select a related model or field already placed on the form.
- Do one of the following to open the New Control dialog box:
- Click Form > Form > Add Existing Fields from the ribbon.
- Click Profile > Add Exiting Field from the context menu.
- From here, using the same procedure as "Arranging Related Models in List Format," models related to the related model already placed on the form will be placed consecutively under the related model.
Arranging Related Models in Grid Format
Arranging Related Models in Grid Format
To arrange models related to an entity in grid format on a form, follow these steps:
- As with "Placing Related Models in a List," click a field already placed on the form to specify the location of the related model.
- Do one of the following to open the [New Control] dialog:
- Click [Form] > [Form] > [Add Existing Fields] from the ribbon.
- Click [Profile] > [Add Exiting Field] from the context menu.
- In the [New Control] dialog, select the field containing the related model from the [Fields] options.
- Next, select [Grid] from the [Form Element] options.
- Click the [OK] button in the dialog. The name of the selected field will appear as the title, and the related model will be placed in a grid format under it.
Changing Grid Columns
To change the columns displayed in a grid placed on a form, follow these steps:
- Open the Add New Column dialog box by doing one of the following:
- Select a cell in the grid and click Form > Grid > Add Existing Field Column on the ribbon.
- Right-click the grid header row and click Add Existing Field Column from the context menu.
- In the Add New Column dialog box, select the field you want to add as a column from the Fields options, and select the UI format for editing from the Form Element options.
- Click the OK button in the dialog box to add the selected field to the far right of the grid column.
- To change the order of grid columns, do one of the following:
- Select any cell in the column you want to move and click [Form] > [Grid] > [Move Column Left] or [Move Column Right] on the ribbon.
- Drag and drop the grid column header to move the column position.
- To delete and hide a column from the grid, do one of the following:
- Select any cell in the column you want to delete and click [Form] > [Grid] > [Delete Column] on the ribbon.
- Right-click the grid column header and click [Delete] from the context menu.
- To change the grid column configuration, there must be at least one related model.
- If the related model is empty, add a temporary model and then change the column configuration.
Changing Default Column Width
To change the default column width for each grid column placed on a form, or to reset a temporarily changed column width to the default, follow these steps:
- Select a cell in the grid column whose default column width you want to change.
- Drag and drop the border of the grid column header to adjust the column width, then click Form > Grid > Set Default Column Width on the ribbon.
- The column width is saved in the view definition, and the default column width will be displayed when you reopen the project.
- To reset a column width to the default after temporarily changing it, select a cell in the grid column whose width you want to reset, and click Form > Grid > Reset Column Width on the ribbon.
- The default column width must be set for each column.
- The rightmost column of the grid expands or contracts based on the width of the editor view, so the default column width cannot be changed.
Changing the Display Format of Related Models
Changing the Display Format of Related Models
To change the display format of related models placed in a form, follow these steps:
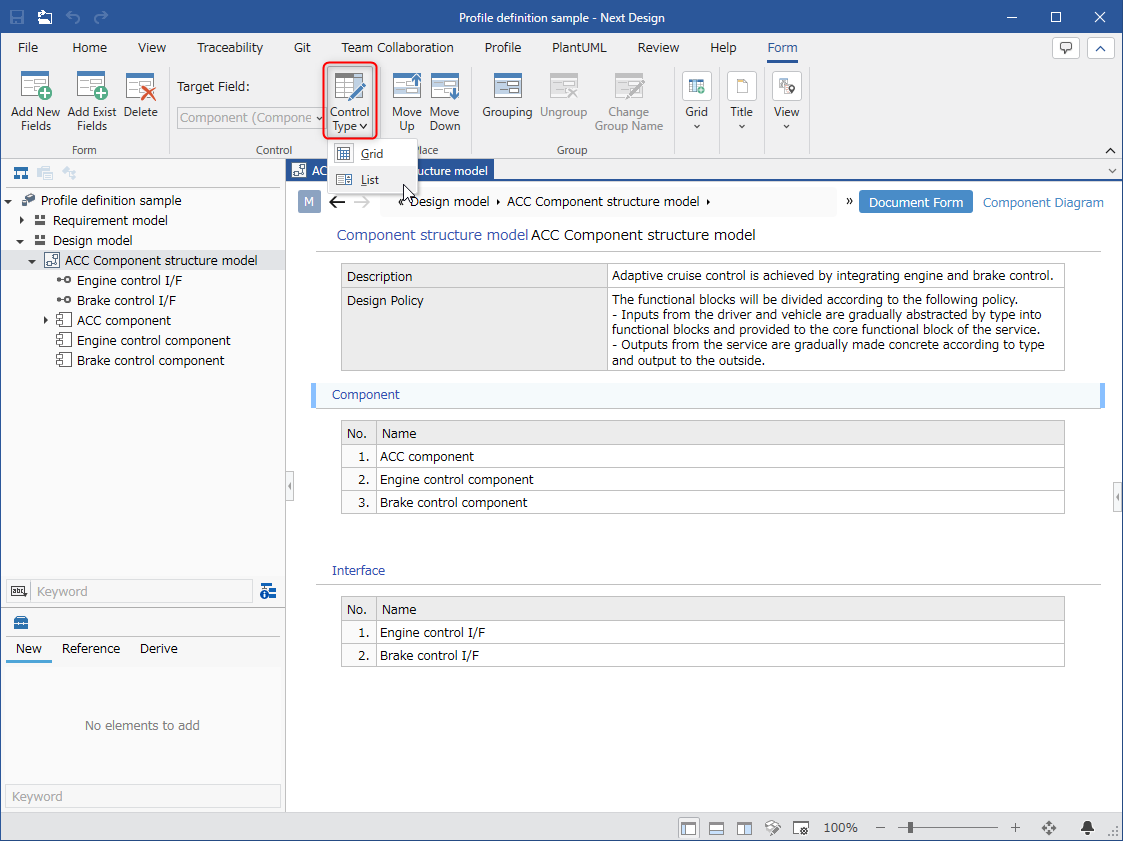
- Click to select the related model whose display format you want to change.
- On the ribbon, click [Form] > [Control] > [Change Shape Type] and select [Grid], [List], or [Model Reference Control(*1)].
*1: [Model Reference Control] is available for reference related models.
Changing Field Order
Changing Field Order
To change the order of fields in a form, follow these steps:
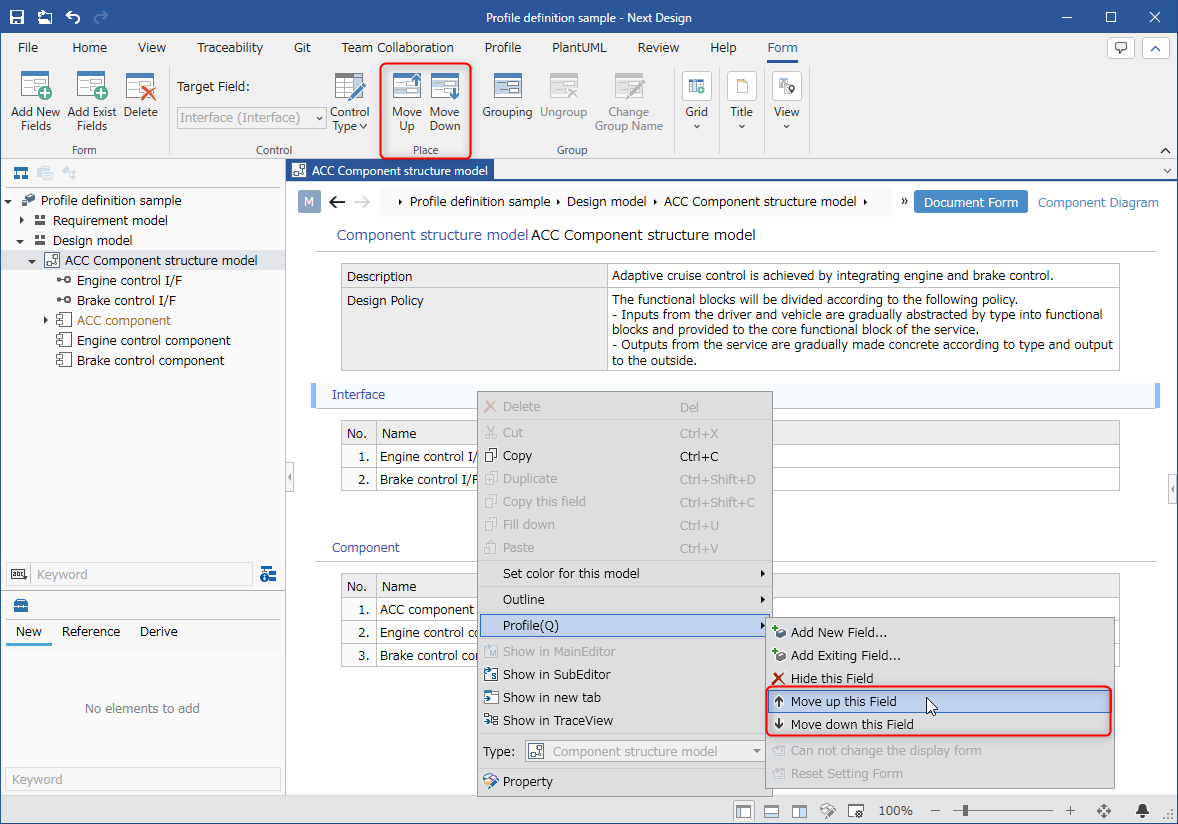
- Click the title of the field you want to change to select it.
- Do one of the following:
- From the ribbon, click [Form] > [Place] > [Move Up] or [Move Down] to change the order.
- From the context menu, click [Profile] > [Move Up] or [Move Down].
- The order of related models, displayed consecutively, can be changed by selecting the model and dragging and dropping it.
Hiding Placed Fields
Hiding Placed Fields
To remove and hide a placed field from a form, follow these steps:
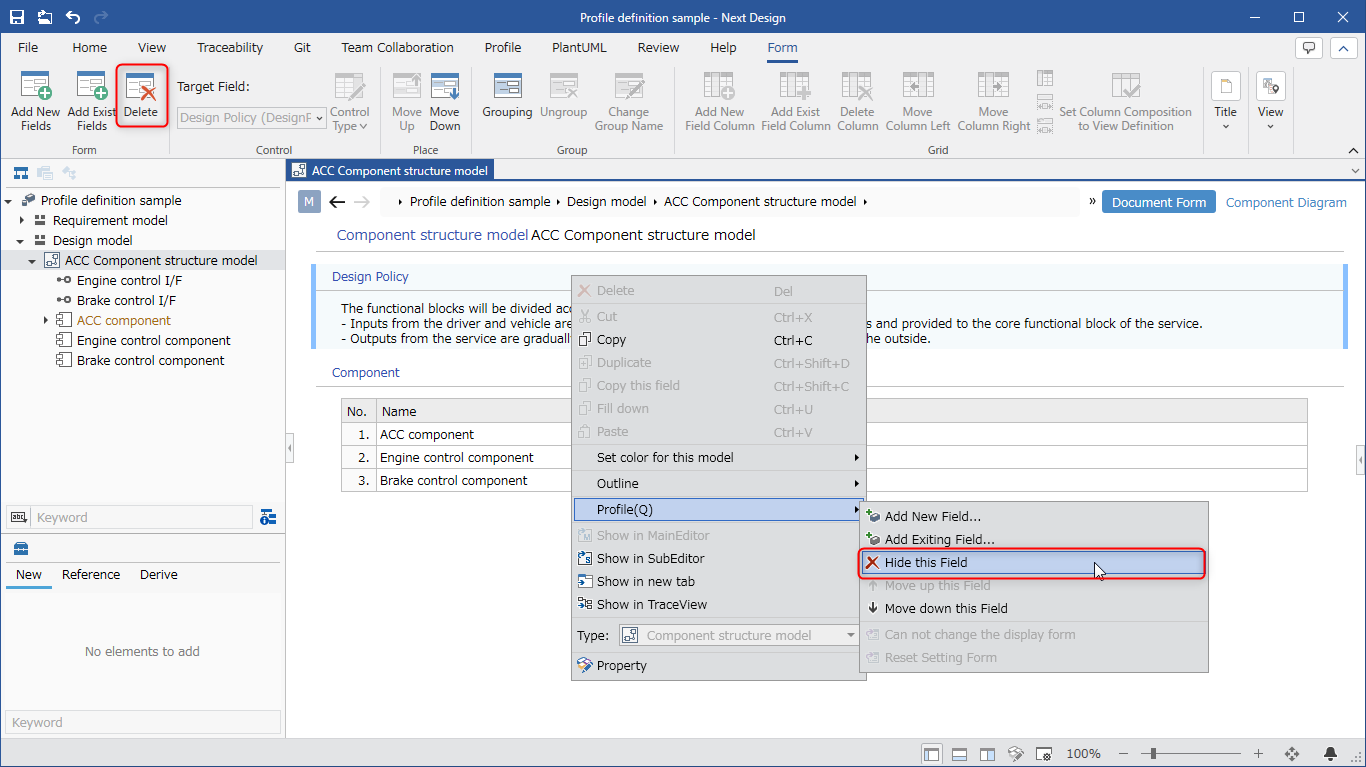
- Click the placed field on the form to select it.
- Do one of the following:
- Click Form > Form > Delete from the ribbon.
- Click Profile > Hide this Field from the context menu.
Grouping Fields
Grouping Fields
To group multiple placed fields on a form and give them a title, follow these steps:
- Hold down the ctrl key and click to select the fields you want to group.
- From the ribbon, click [Form] > [Group] > [Grouping].
- In the [Grouping] dialog, enter a [Display Name] and [Group Name] and click [OK].
- A group title will be added to the form, and the selected fields will be listed under the group. You can collapse or expand each group by clicking the left edge of the group title.
- To group multiple fields, the fields must be adjacent.
- If they are not adjacent, reorder them so that they are adjacent, as described above in "Changing the Field Order."
- Do not set group names beginning with "___". Doing so will result in the following behavior.
- The corresponding group is not displayed in the Profile Navigator.
- The differences for the corresponding group are not displayed in the Profile Reuse Changes dialog or Update Differences dialog.