Check model change differences
Overview
Next Design allows you to check model change differences by comparing with previous project files or previous revisions managed by configuration.
The steps for checking model change differences are explained in the following order.
- Select what to compare
- Check the differences
- Finish comparison
Select what to compare
There are several ways to compare projects:
- Compare with the project file before the change
- Compare with a previous revision
- Compare between any revisions
The method for selecting what to compare for each of the above is explained below.
Compare with a project file before changes
To compare the project file you are currently editing with a project file before changes that is saved as a separate file, follow the steps below.
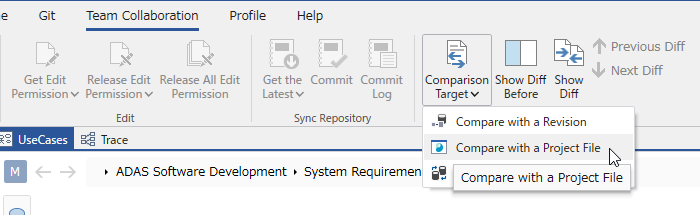
- From the ribbon, click [Team Collaboration] > [Difference] > [Comparison Target] and click [Compare with a Project File].
- In the [Select comparison project] dialog, select the project file to be compared and press the [Open] button.
- When the comparison target is selected, the differences are displayed in the Model Navigator and Model Editor.
Compare with a previous revision
To compare with a previous revision while editing a project registered in the configuration management repository, follow the steps below.
- From the ribbon, click [Team Collaboration] > [Difference] > [Comparison Target] and click [Compare with a Revision].
- In the [Log Messages] dialog, select the revision to compare and press the [OK] button.
- When the comparison target is selected, the differences are displayed in the Model Navigator and Model Editor.
Compare between any revisions
To compare two revisions that have already been committed for a project registered in the configuration management repository, follow the steps below.
- If you are using a configuration management repository from Next Design for the first time, register the configuration management repository in advance according to Linkage with configuration management system > Manage repositories to be used.
- From the ribbon, click [Team Collaboration] > [Difference] > [Comparison Target] and click [Compare Revisions].
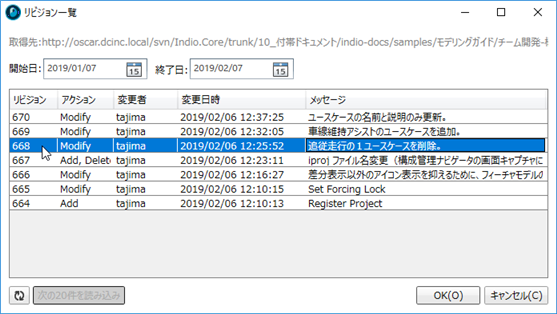
- In the [Repository Selection] dialog, select the repository in which the project to be compared is registered and press the [Next] button.
- From the folders of the configuration management repository displayed in the tree, select the folder in which the project to be compared is stored and press the [OK] button.
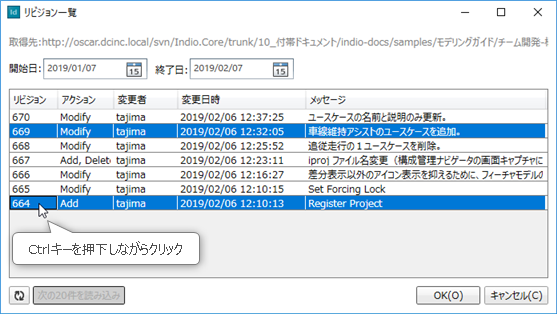
- From the list of revisions displayed in the grid, select the two revisions to compare while holding down the ctrl key, and then click the [OK] button.
- When the revisions to be compared are selected, the differences are displayed in the Model Navigator and Model Editor.
- When this function is executed, any open project files will be closed.
- The project to be compared is opened as a temporary read-only file and cannot be edited.
Confirm Differences
Confirm Differences in the Model Navigator
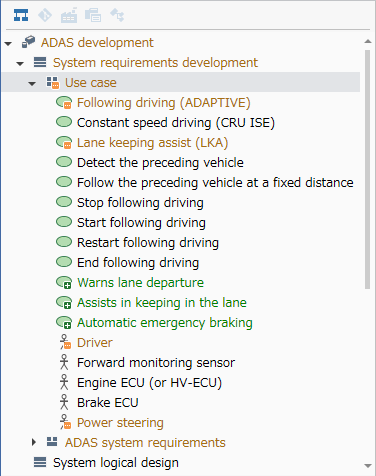
When you select the revisions to be compared, the model icons and label colors change in the Model Navigator to show the differences in the project.
| Icon | Label color | Meaning |
|---|---|---|
| Normal icon | Normal color | Unchanged model |
| Normal icon | Orange | Model with a lower model changed |
| Orange | Model that has been changed or child models have been added or deleted | |
| Green | Added model |
- When a related model is added or deleted, the parent model and the other model with a reference relationship are also displayed as changed and are marked with a change.
- Deleted models are not displayed in the Model Navigator. Instead, the parent model of the deleted model is displayed with a change mark, so you can check the deleted model from the change differences of the parent model.
- If a child model is hidden in the Model Navigator, the icon and label color of the parent model will not change even if there is a difference in the child model.
- Even if there is a difference in the storage folder path of the model file, it will not be displayed as a difference.
Check the change differences in the Model Editor
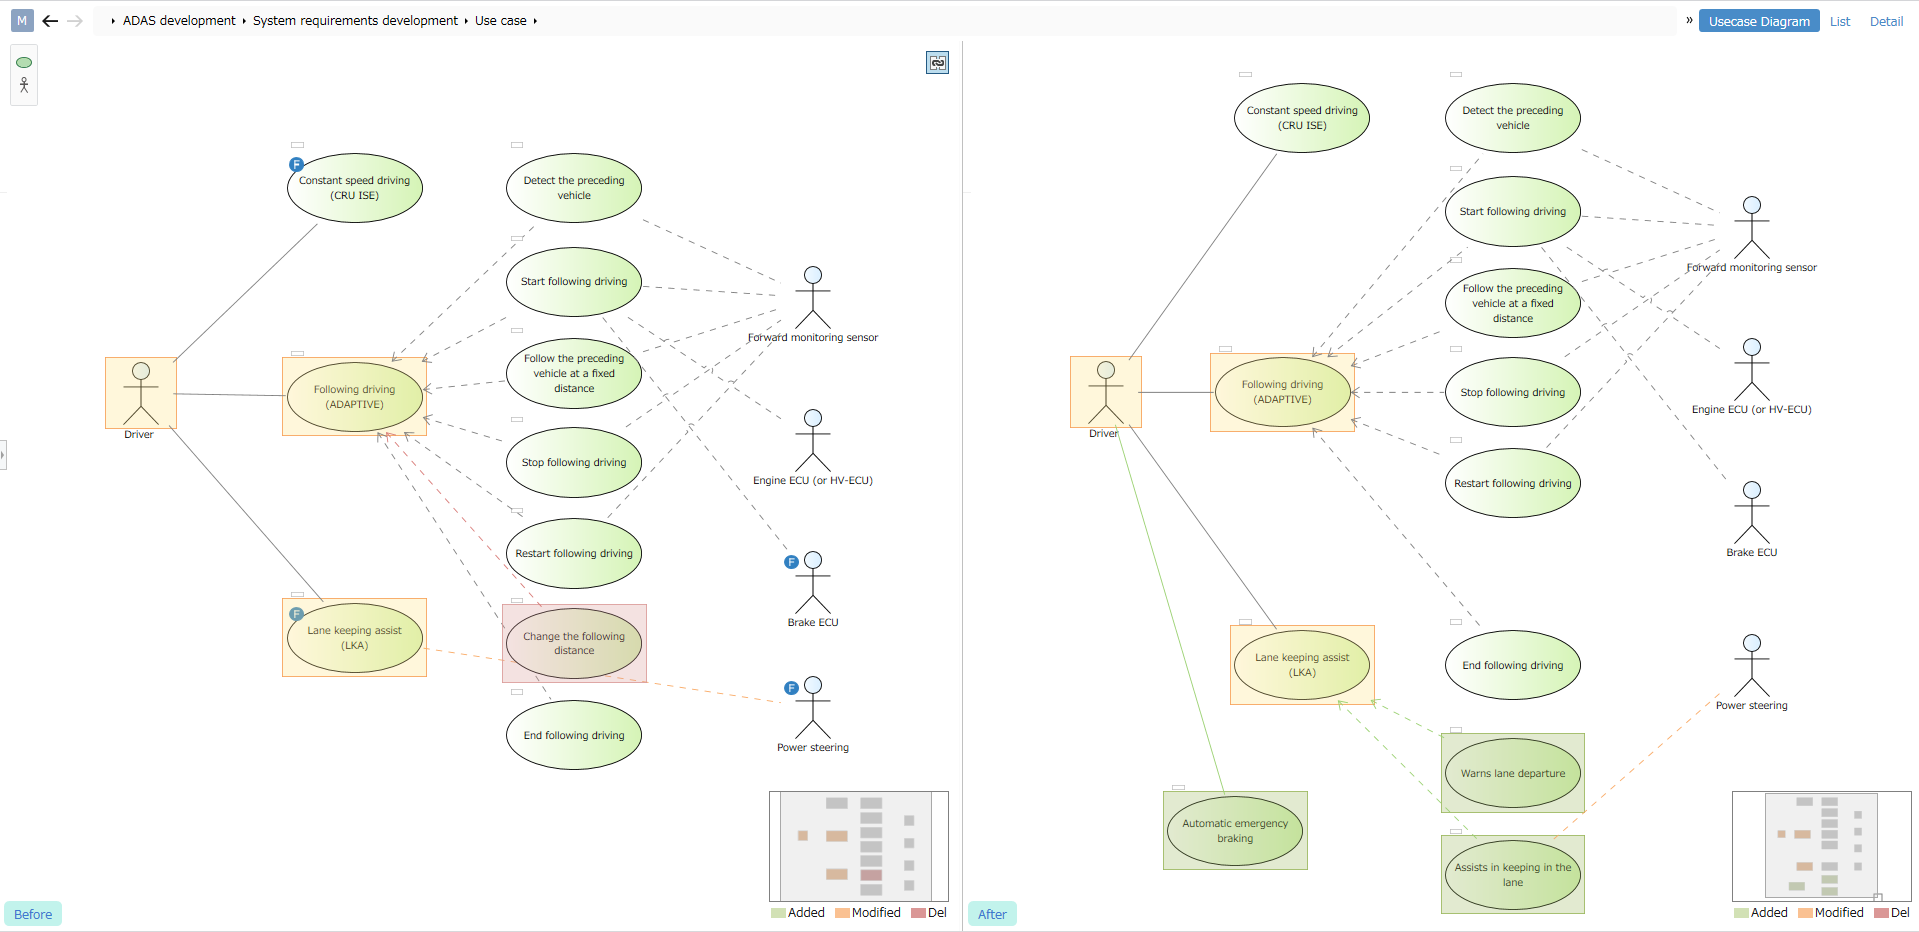
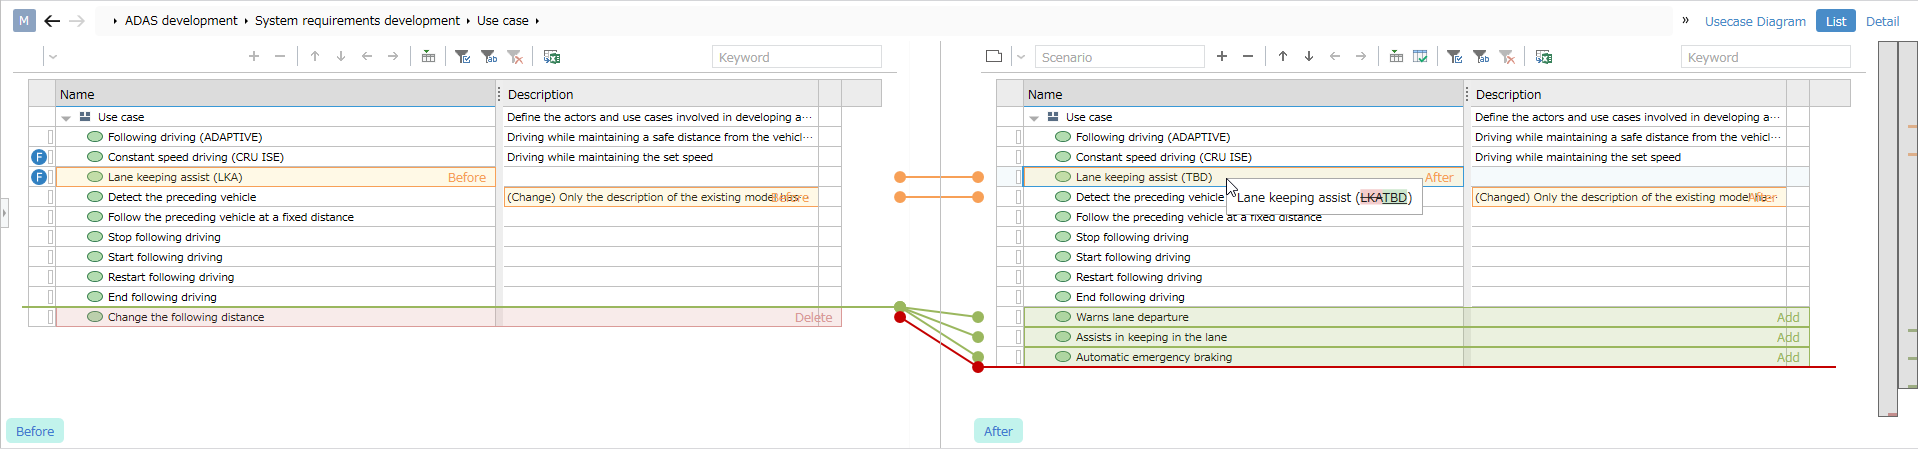
When you select the comparison target, the before and after models are displayed side by side in the Model Editor so that you can see the change differences, and the change differences are displayed in different colors.
- Example of difference display in diagram
- Example of difference display in other than diagram
- To temporarily switch the display/hide state of the model before the change, click [Team Collaboration] > [Difference] > [Show Diff Before] from the ribbon.
- To temporarily switch the display/hide state of the change difference, click [Team Collaboration] > [Difference] > [Show Diff] from the ribbon.
- Even if you display a model marked for change in the model navigator, the changes in that model may not be displayed. This is because property values and associations that are not displayed in the view may have been changed. In such a case, switch to another view to check, or display the Property tab in the Inspector to check the details of the model.
- To check the deleted model, display the parent model marked with a change and check the comparison target before the change side by side.
- If you are using the model reference control, even if there is a change in the referenced model, it will not be displayed as a difference. Check the difference in the referenced model to see if there is a difference.
- Even if there is a difference in the storage folder path of the model file, it will not be displayed as a difference.
Check the change difference in the configuration editor
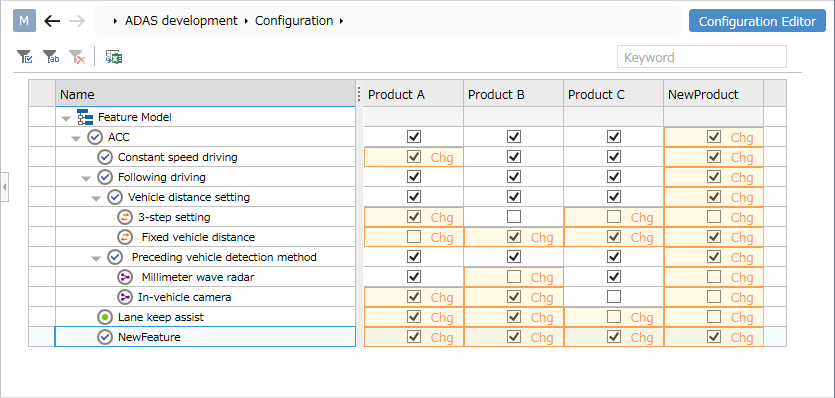
When you select the comparison target, the change is displayed in color so that you can see the change difference in the configuration editor.
- Example of difference display in the configuration editor
End comparing
To end the change difference comparison, follow the steps below.
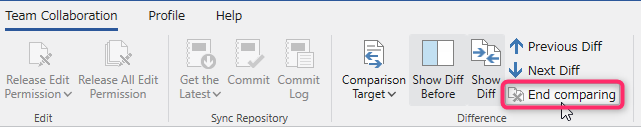
- From the ribbon, click [Team Collaboration] > [Difference] > [End comparing].
- This will clear the difference display and return the comparison targets to unselected.