Switching and saving traceability check targets
Overview
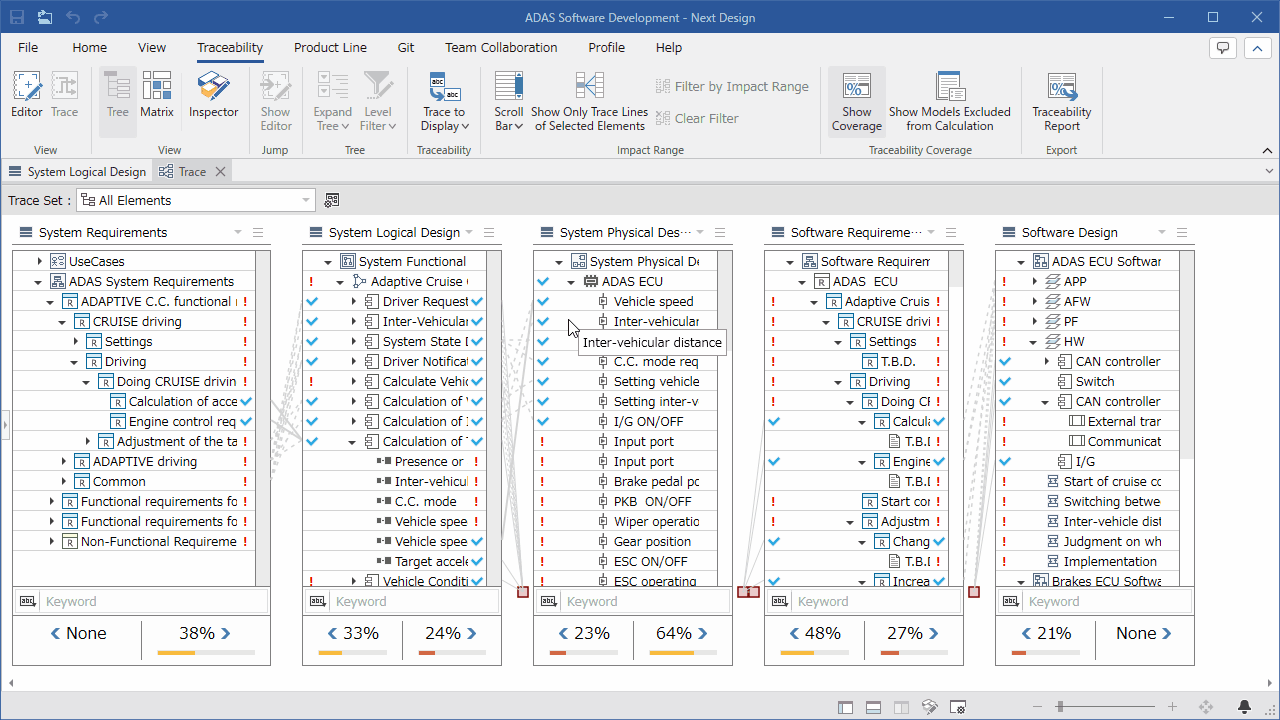
Next Design's trace view allows you to save multiple models and trace line information to be displayed in the trace view according to the perspective of traceability check, and you can switch the display at any time.
The order and presence of models and trace lines displayed in the trace view are called Trace View Settings.
The following describes how to edit and use trace setting information in the following order.
- Switching the model order
- Saving the model order
- Specifying the model to be checked
- Specifying the trace line to be checked
- Exporting trace setting information
- Importing trace setting information
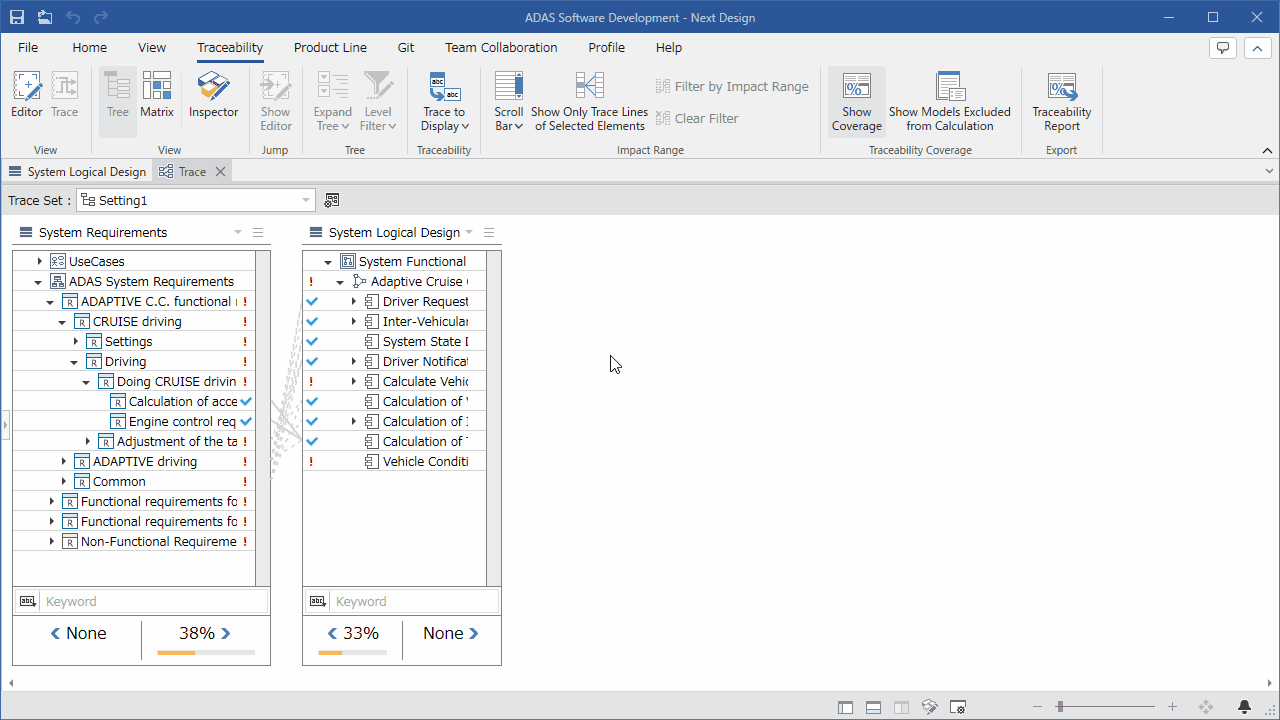
Switching the model order
To add trace setting information with a different name and be able to switch between them, follow the steps below.
- Click the [Edit trace view setting information] icon on the toolbar to display the [Trace View Setting] dialog.
- In that dialog, select the destination to add trace setting information, press the [Add] button, and enter a name in the [Trace Setting] dialog.
- Next, press the [Add] button, select the model to display in the lane, and add it to the [Trace Series] list.
- Press the [OK] button in the [Trace Setting] dialog to add trace setting information with the entered name to the [Trace View Settings] list.
- Press the [OK] button in the [Trace View Setting] dialog to save the trace setting information with the entered name, and you can switch it in the [Trace Set] pull-down list on the toolbar.
- When you change the configuration of the model displayed in the lane in the trace view, the trace setting information of the displayed target is automatically updated.
- You can select whether to add trace setting information to the project or to the user.
Trace setting information for the user is stored in the
{project file name}.nuserfile in the same folder as the project file. For details on how to handle the.nuserfile, see below. - [Reference > Partially loading model files > Saving user settings for projects and precautions](../../../docs/reference/partials-load#Saving user settings for projects and precautions)
- If you do not add at least one model to the [Trace Series] list in the [Trace Setting] dialog, you will not be able to change settings such as adding lanes in the trace view.
Save the model order
To name and save trace setting information that holds the model order, follow the steps below.
- Click the [Edit trace view settings] icon on the toolbar at the top of the trace view to display the [Trace View Setting] dialog.
- Click the [Edit] button in the [Trace View Setting] dialog to display the [Trace Setting] dialog.
- Enter a name in the [Trace Setting] dialog and click the [OK] button to update the [Trace View Settings] list.
- Click the [OK] button in the [Trace View Setting] dialog to save the model arrangement and make it selectable from the [Trace Set] pull-down list on the toolbar.
Specify the model to be checked
To specify only the model you want to check and display it in the lane, follow the steps below.
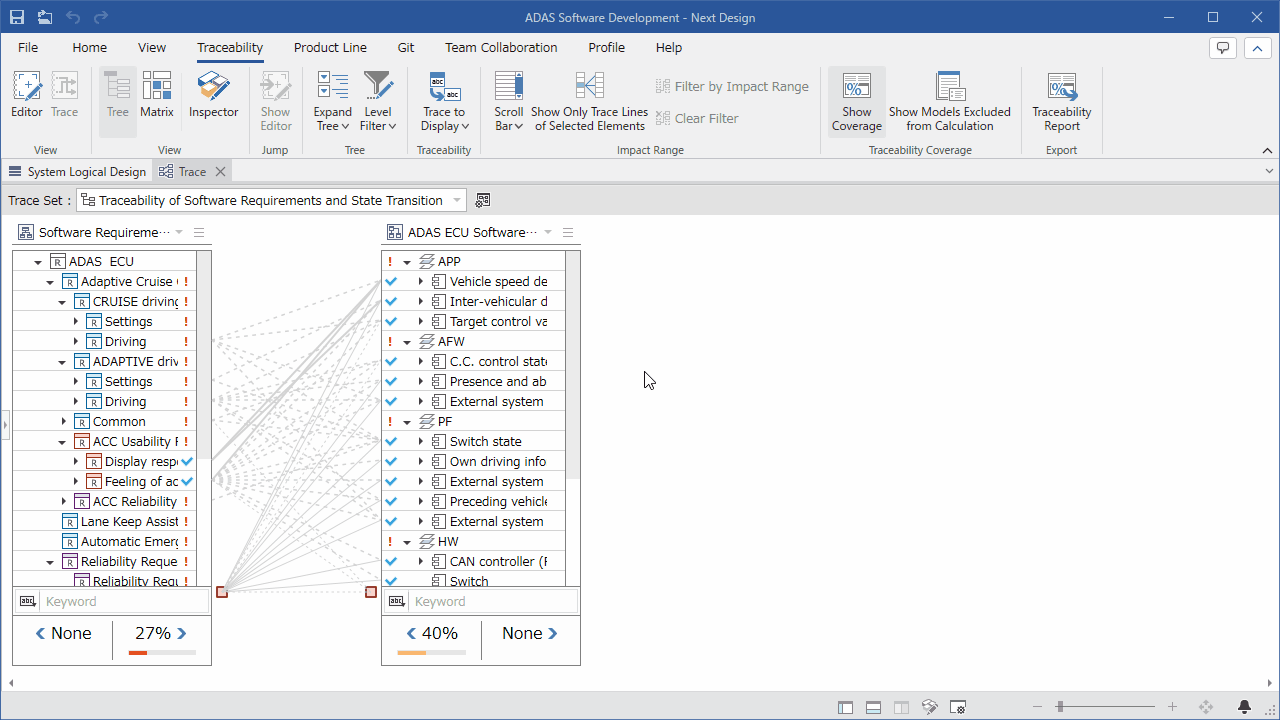
- Execute the [Filter Tree...] command from the menu button at the top right of each lane.
- A dialog will appear, and the models displayed in the lane will be displayed in a tree view. Check the checkboxes of the models you want to display.
- When you press the [OK] button, only the checked models will be displayed on the lane.
Specify the trace line to be checked
To specify only the trace line you want to check and display it between the lanes, follow the steps below.
- The following relationships can be specified as the target of checking trace lines.
- Derived relations
- Reference relations
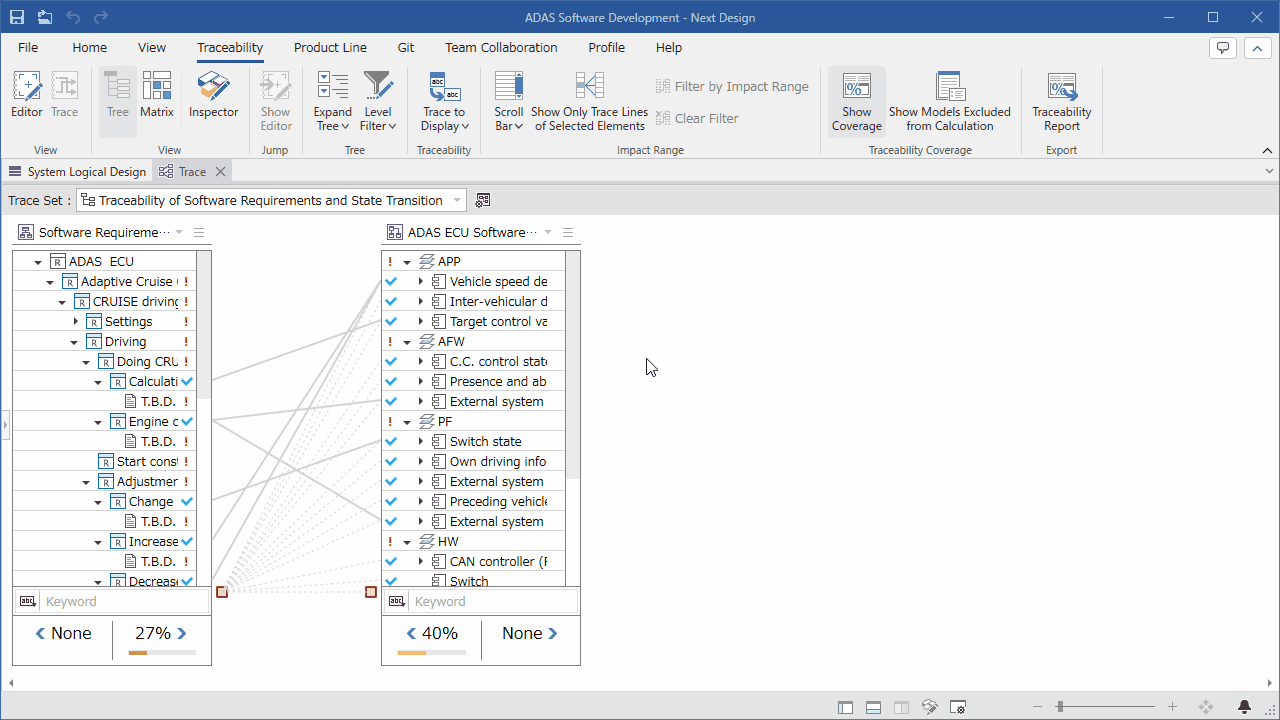
- Hover the mouse over the area between the lanes, and the [Filter displayed relations] button will appear at the top of the area between the lanes. Press this button.
- A dialog box will appear, displaying the relations between the models displayed in each lane. Check the checkboxes of the relations you want to display as trace lines.
- Click the [OK] button, and only the trace lines of the checked relations will be displayed between the lanes.
Export trace setting information
To export trace setting information, follow the steps below.

- Click the [Edit trace view setting information] icon on the toolbar at the top of the trace view to display the [Trace View Setting] dialog.
- Select the trace setting information to export and press the [Export] button to display the [Export Trace Setting] dialog.
- Specify the file save destination and name and press the [Save] button to export the trace setting information as a .tracesettings file.
Import trace setting information
To import trace setting information, follow the steps below.
- Click the [Edit trace view setting information] icon on the toolbar at the top of the trace view to display the [Trace View Setting] dialog.
- Select the destination to import the trace setting information and press the [Import] button to display the [Import Trace Setting] dialog.
- Specify the trace setting information to import (.tracesettings file) and press the [Open] button to import the trace setting information.