Profile Modularization
Overview
Next Design allows you to modularize profiles and reuse them in other projects. Modularization means setting detailed information such as version and description for a profile and converting it into a format that can be reused in other projects. Profiles can also be packaged and distributed together with extensions, etc.
This section explains profile modularization.
- Setting detailed information for a profile
- Publishing release notes for a profile
- Exporting a profile
- Packaging a profile
Setting detailed information for a profile
You can set detailed information such as version and description for a profile. Setting detailed information makes it easier to identify the desired profile when reusing modularized profiles.
The detailed information that can be set is as follows:
| Item Name | Description |
|---|---|
| [Display Name] | The name of the profile displayed in Next Design. |
| [Name] | The name that identifies the profile. |
| [Version] | This is the profile version. |
| [Category] | This is the name used to group profiles for easier identification when a profile is selected. |
| [Description] | This is a description of the profile's content and intended use. |
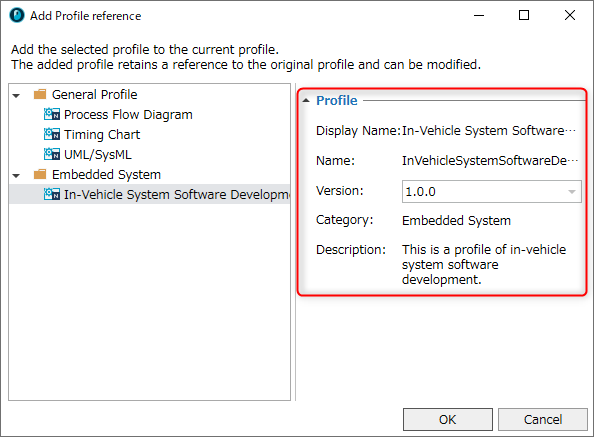
When a profile is selected, the configured details will be displayed as follows:
To configure the profile details, follow these steps:
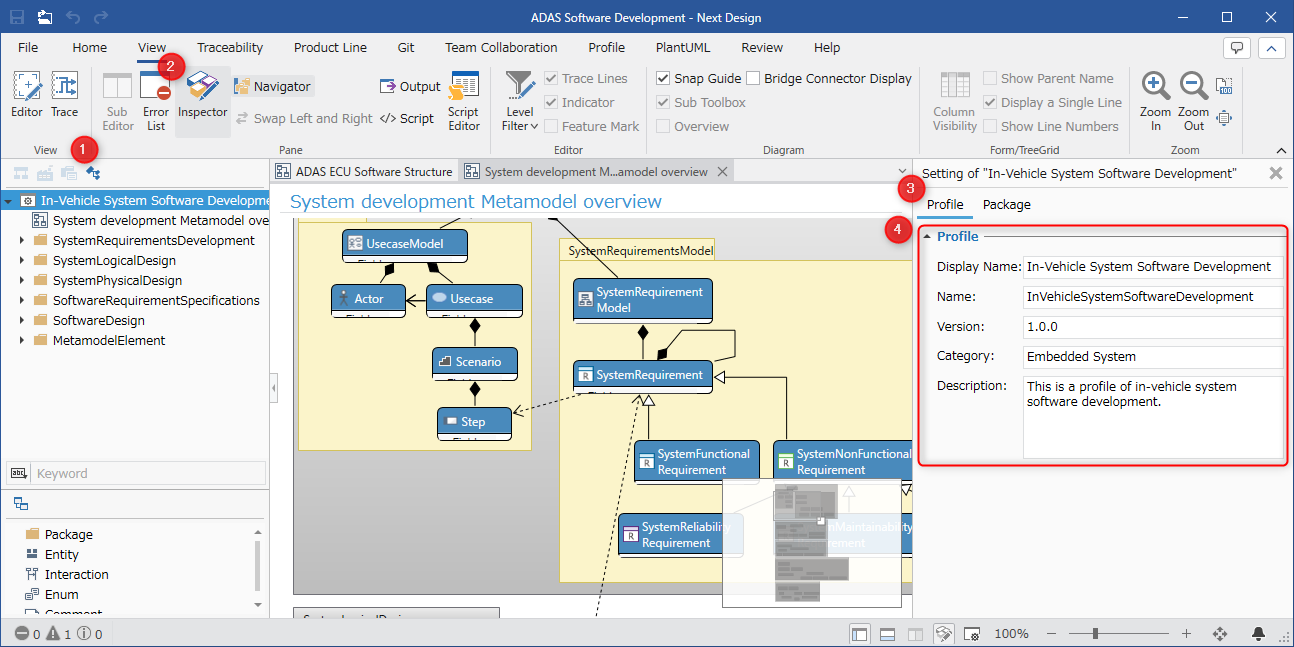
- Switch to [Profile Navigator] using the selector at the top of the navigator.
- Select the root element and display the inspector.
- Select [Profile] in the tab at the top of the inspector.
- Configure each item of the details.
Configure each item according to the explanation of the input items below.
| Item Name | Input Item Description |
|---|---|
| [Display Name] | This is a required input field. You can use any string. (*1) |
| [Name] | This is a required input field. You can use any string. (1) However, it cannot contain any of the following characters, or spaces. '.', '$', '@', ';', '(', ' )', '', '+', '[', ']', '?', '\', '^', '{', '}', '|', '-', '/', '%' |
| [Version] | Please use numbers and dots (.) according to the semantic versioning format. Note that minor versions and patch versions can be omitted. (Example) "1.0", "1" If not set, it will behave as "1.0". Semantic versioning uses the format "Major Version.Minor Version.Patch Version". |
| [Category] | You can use any string. If not set, it will be displayed in the "(No Category)" group. If you set different categories for each version in the same profile, it will be displayed in the category set for the latest version. |
| [Description] | You can use any string. Line breaks are also possible within the text. |
- *1: If you change [Display Name] and [Name] in the Profile tab, the same items in the Package tab will also be changed. Please be aware of this if you are using API:IProfile.RootPackage.
- If you change the name of the root element in the Profile Navigator, [Display Name] and [Name] in the Profile tab and the same items in the Package tab will also be changed.
- The [Name] in the Profile tab can also be changed from the profile name on the Start page. If you change it from the Start page, the [Name] in the Package tab will also be changed.
Publishing Profile Release Notes
By storing release notes together with the profile, you can view the release notes when selecting a profile. By including the reasons and background for changes in the release notes, you can use them to determine whether the profile needs to be re-incorporated and to check the impact on the designed model.
The method for storing release notes is as follows:
- There are two methods for publishing profiles, but the procedure is the same.
- Specify the location for storing the profile
- Install the package
- Create release notes with one of the following filenames:
- {profile name}.releasenote.*
- releasenote.*
- Store the created release notes in the same folder as the profile. (For packages, store them in the same location as the profile when creating the package.)
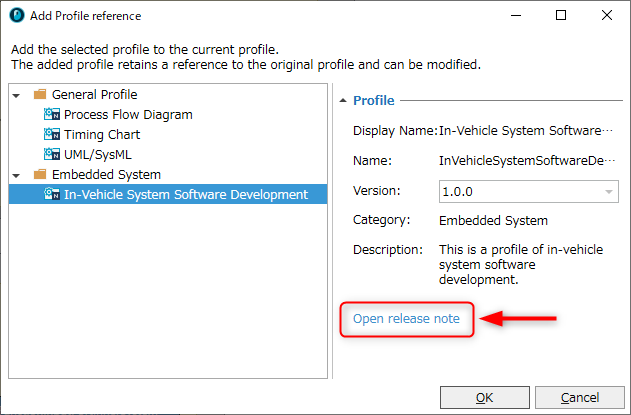
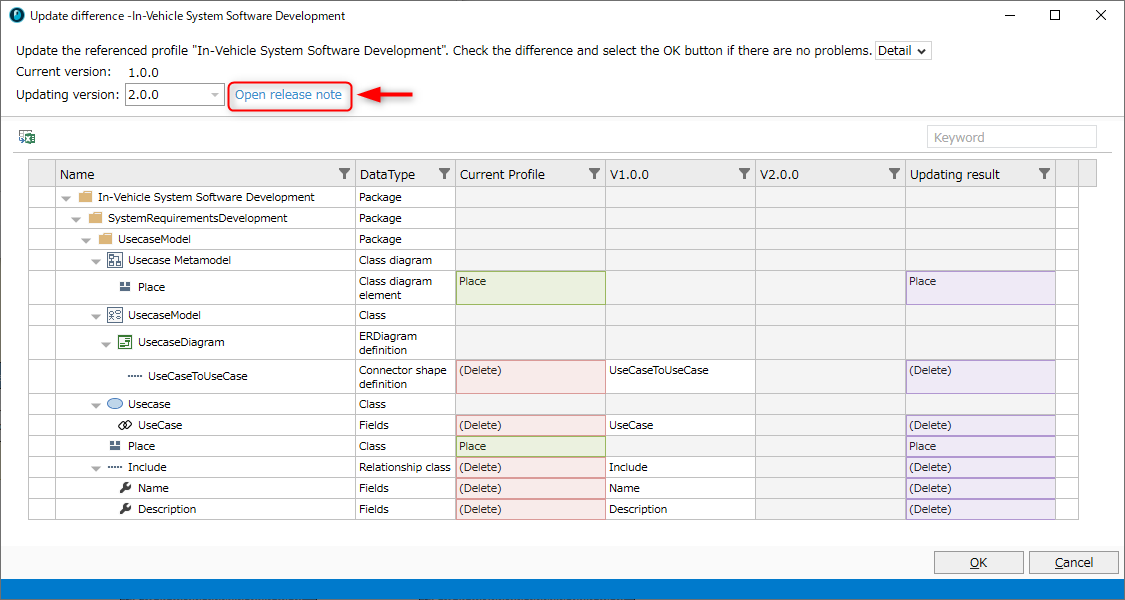
The stored release notes can be viewed from the following screen.
- The profile list dialog displayed when creating a new project, adding a profile reference, or converting a profile to a reference format.
- The update difference dialog displayed when checking profile differences after an update during "Profile Reuse" operation.
Exporting Profiles
Export your profile so that it can be reused in other projects.
To export a profile from the project you are currently editing, follow these steps:
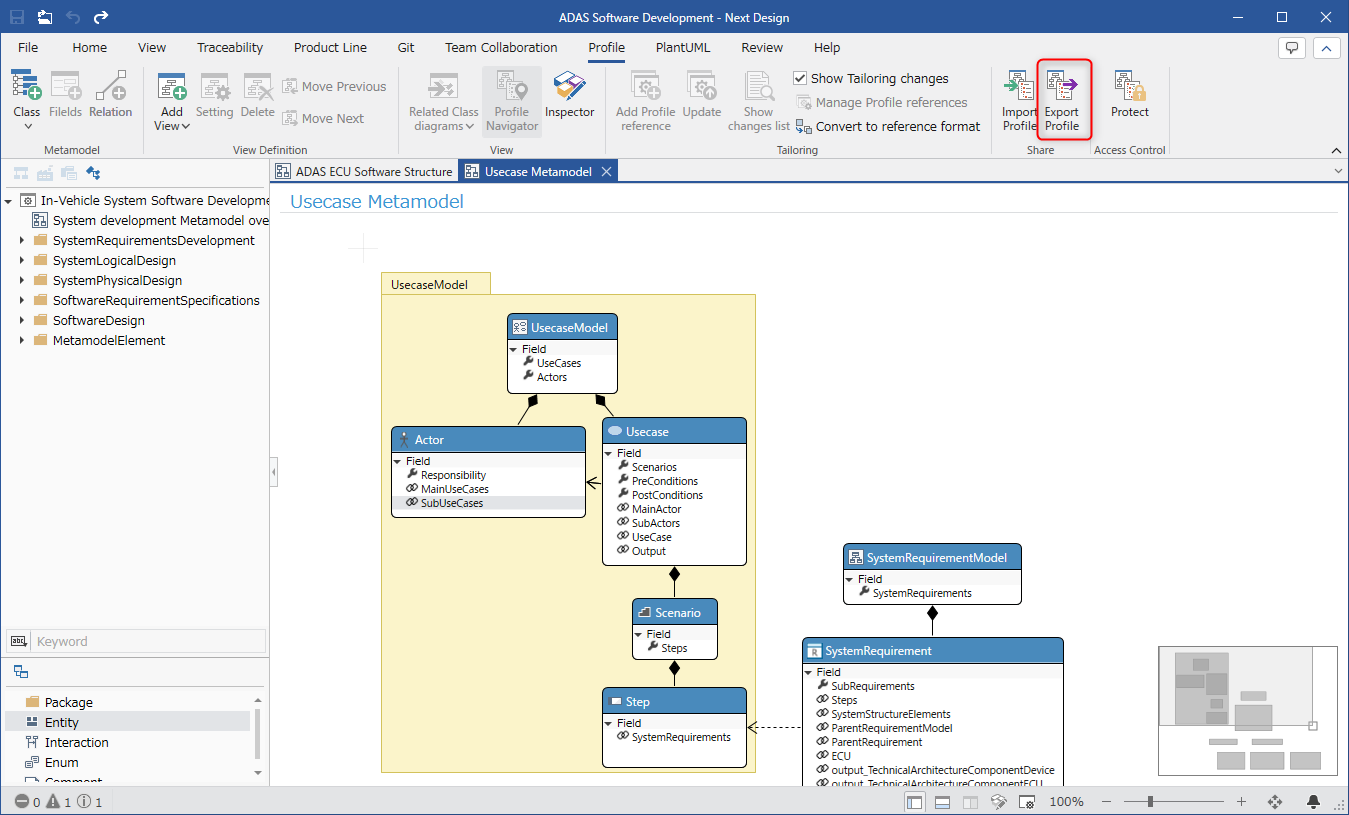
- Do one of the following:
- Click [Profile] > [Share] > [Export Profile] on the ribbon.
- Select [File] > [Export] > [Profile Export] on the ribbon and click the [Generate] button.
- In the [Profile Export] dialog, specify the file save location and name.
- Clicking the [Save] button exports the profile to a .nprof file.
Packaging the Profile
You can package the profile using the following steps:
- Refer to Quick Start > Common > Distribution with Package Function > Building a Package in the Extension Development Manual to create a package including the profile.