Assignment of features to the design model
Overview
Next Design allows you to identify design model variables for features by assigning features to the design model.
The steps for assigning features to the design model are described below in the following order:
- Associating features with model components
- Check feature association status
- Disassociate Features
Associating Features with Model Components
Associating using the feature palette
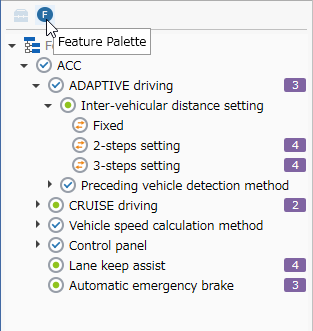
When you open the model editor, you can see the toolbox below the model navigator. If you select [Feature Palette] in the selector at the top of the toolbox, The features defined in the feature model are displayed in a tree on the feature palette.
There are three ways to associate features with model components using the Feature Palette:
- Drag & drop operation
- Operation via the context menu [Associate with selection element on editor]
- Operations via ribbon [Product Line] > [Model] > [Assign Feature]
I'll explain the steps in the order above.
Drag and drop operation
Follow the steps below to associate a feature with a model component by dragging and dropping from the feature palette.
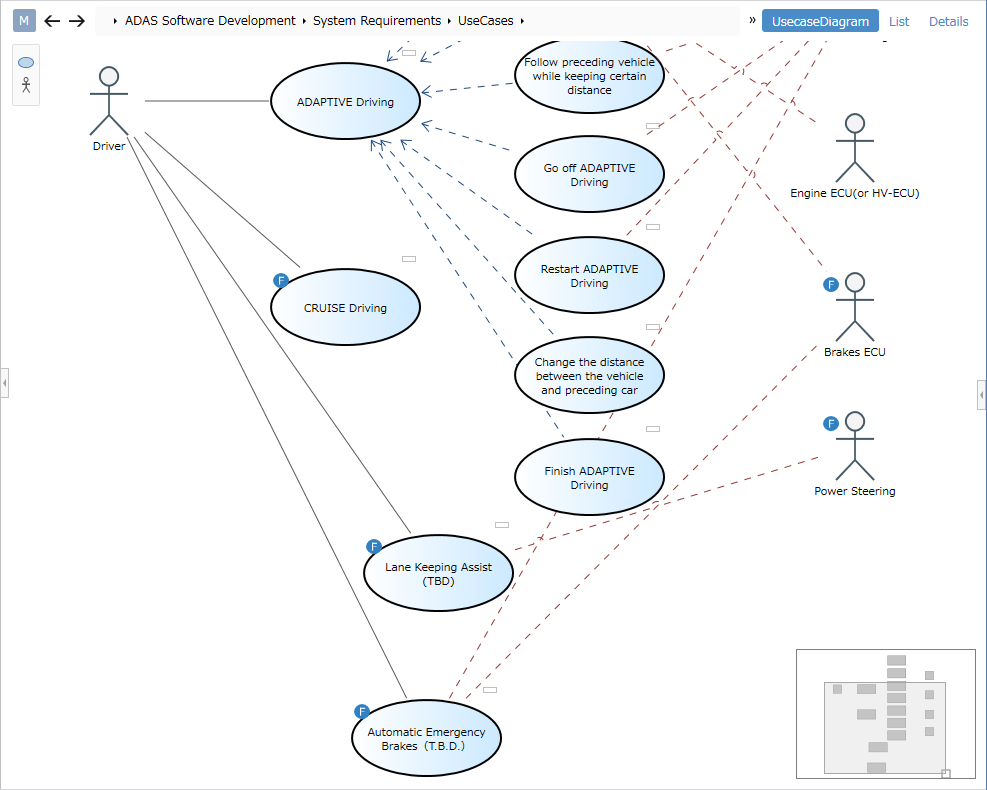
- Drag a feature from the feature palette and drop it on the associated component on the model editor.
- When a feature is associated with a model component, a blue feature mark is displayed on the upper left of the component.
Operation via context menu
To associate a feature with a model component using the Feature Palette context menu:
- Select the model component you want to associate on the model editor.
- Right-click a feature on the feature palette and click the context menu [Associate with selection element on editor].
- This method also allows multiple features and multiple model components to be associated together.
Ribbon Operation
To associate features to model components using the ribbon:
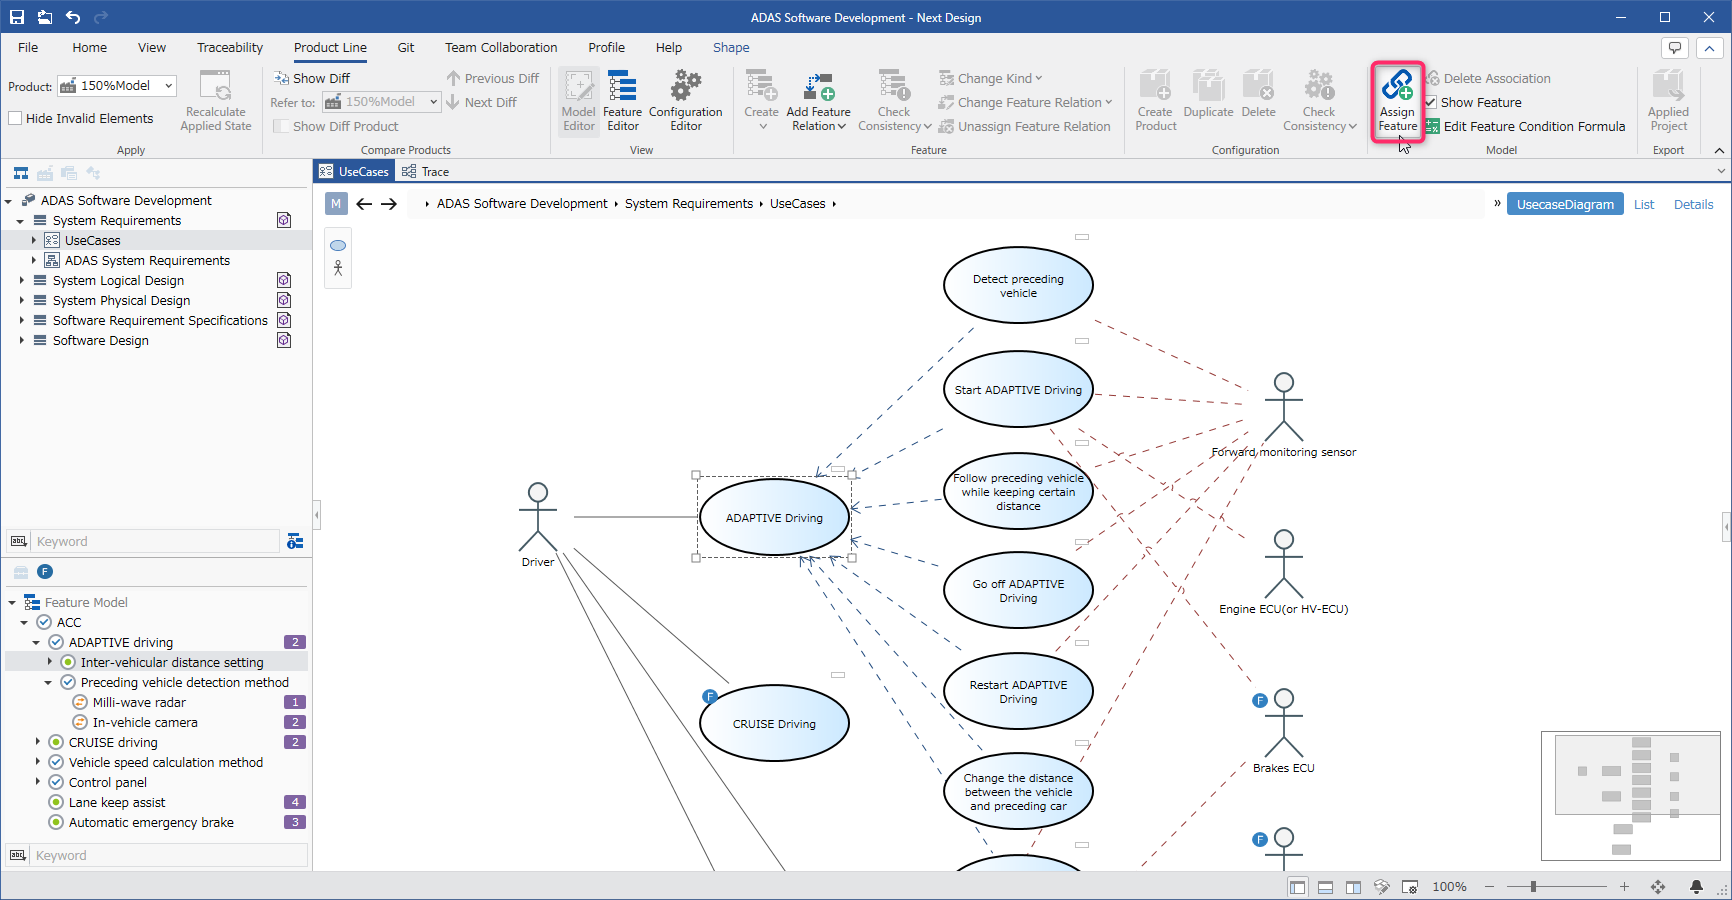
- Select a feature on the feature palette and a model component on the model editor.
- Click Product Line > Model > Assign Feature from the ribbon.
- This method also allows you to associate multiple features and multiple model components together.
- If multiple features are associated with the same model component using the above method, the model component will be enabled when all of those features are selected (added as an AND condition).
- You can check the details of the condition that the model component is valid in the feature conditional expression described later.
Associate using a feature expression
Association by feature expression
In the following cases, write a conditional expression for each model component to define the selection state of the features for which that element is valid.
- when the model component is valid when one of multiple features is selected
- when a model component is valid when a feature is not selected
This conditional expression is called a feature conditional expression.
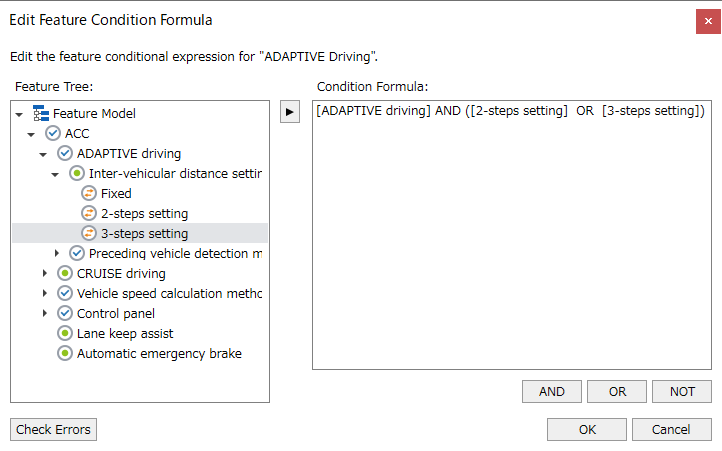
Confirm/edit feature conditional expression
Follow the steps below to check and edit feature conditional expressions.
- Open the [Edit Feature Condition Formula] dialog from the context menu [Edit Feature Condition Formula] of the model component.
- To add a new feature to the condition, select the feature from [Feature Tree] and click the Add button in the center.
- By editing the feature conditional expression in [Conditional expression], you can also change
ANDcondition toORcondition, logical inversion withNOT, and prioritization with parentheses( ). - Click the [Check Error] button to check whether the conditional expression can be evaluated correctly.
- Click the [OK] button to close the dialog.
Check feature association status
See which features and model components have associations
Features with Associations
The feature palette displays the number of associated model components to the right of the features associated with model components. This allows you to identify features that have associations with model components.
Model components with associations
In the model editor, a blue feature mark appears in the upper left corner of the model component associated with the feature. This allows you to identify model components that are enabled/disabled depending on the product. Details of valid conditions can be found in Feature Conditional Expressions.
- Feature marks on the model editor can be toggled between show/hide by the following operations.
- Ribbon [Product Line] > [Model] > [Show Feature]
- Ribbon [View] > [Editor] > [Feature Mark]
Jump between associated features and model components
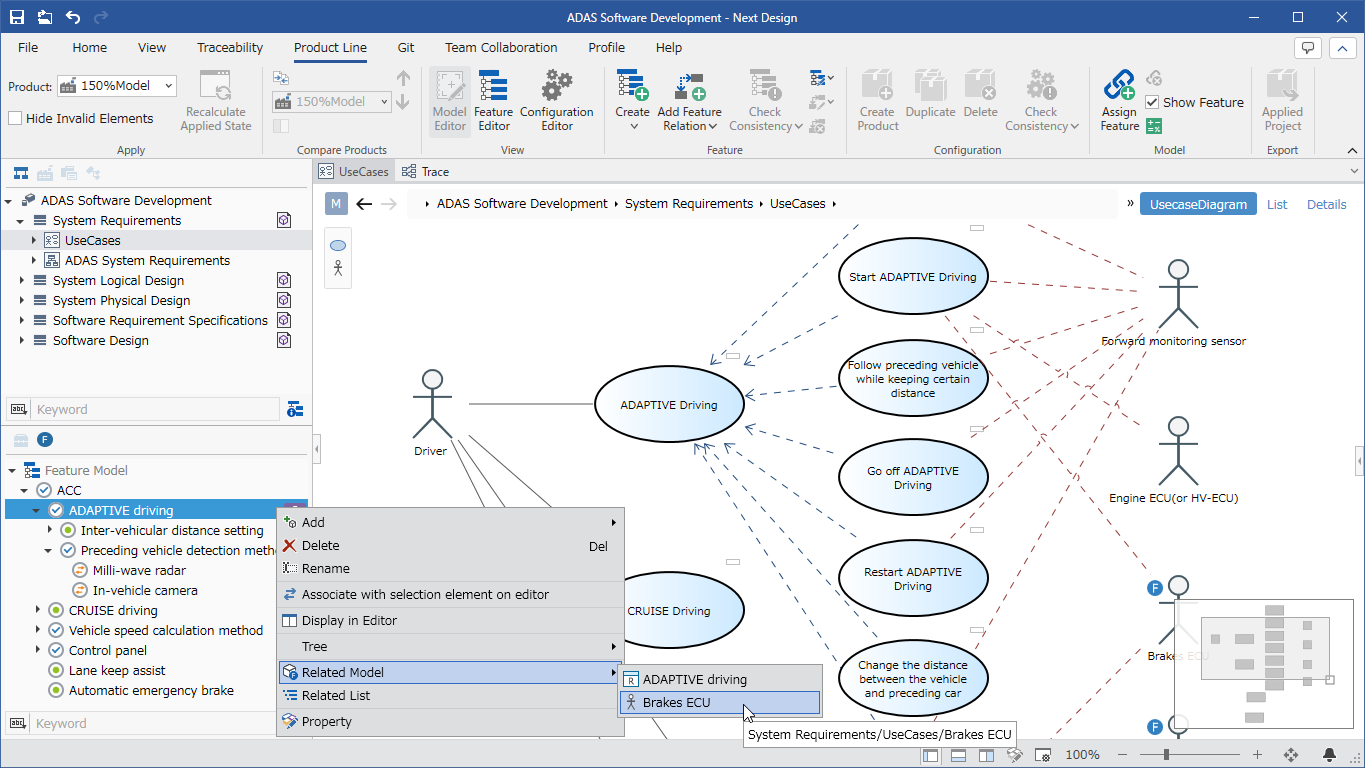
Jump from Features to Model Components
To see the model components associated with a feature, do the following:
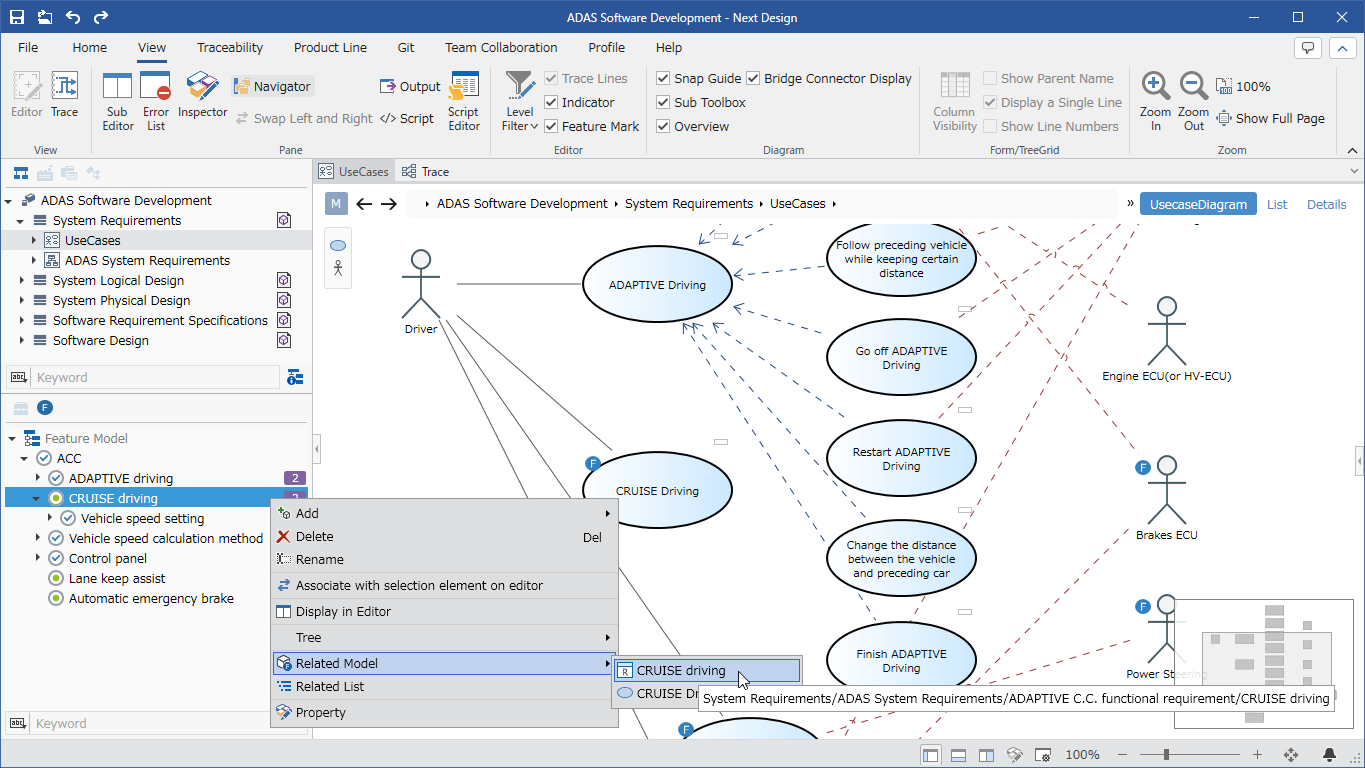
- Right-click the feature on the feature palette, and click the model component from the context menu [Related Model].
- Click to display the model editor and select the corresponding model component on the model editor.
You can also check and jump to model components associated with features in the following steps.
- Click the context menu [Related List] for the feature on the feature palette.
- An association list pop-up appears, showing a tree view of the model components associated with the feature.
- Click the icon displayed at the right end of the tree-displayed element to display the corresponding model component in the main editor (left editor) or sub-editor (right editor).
Jump from model component to feature
To see the features associated with model components, do the following:
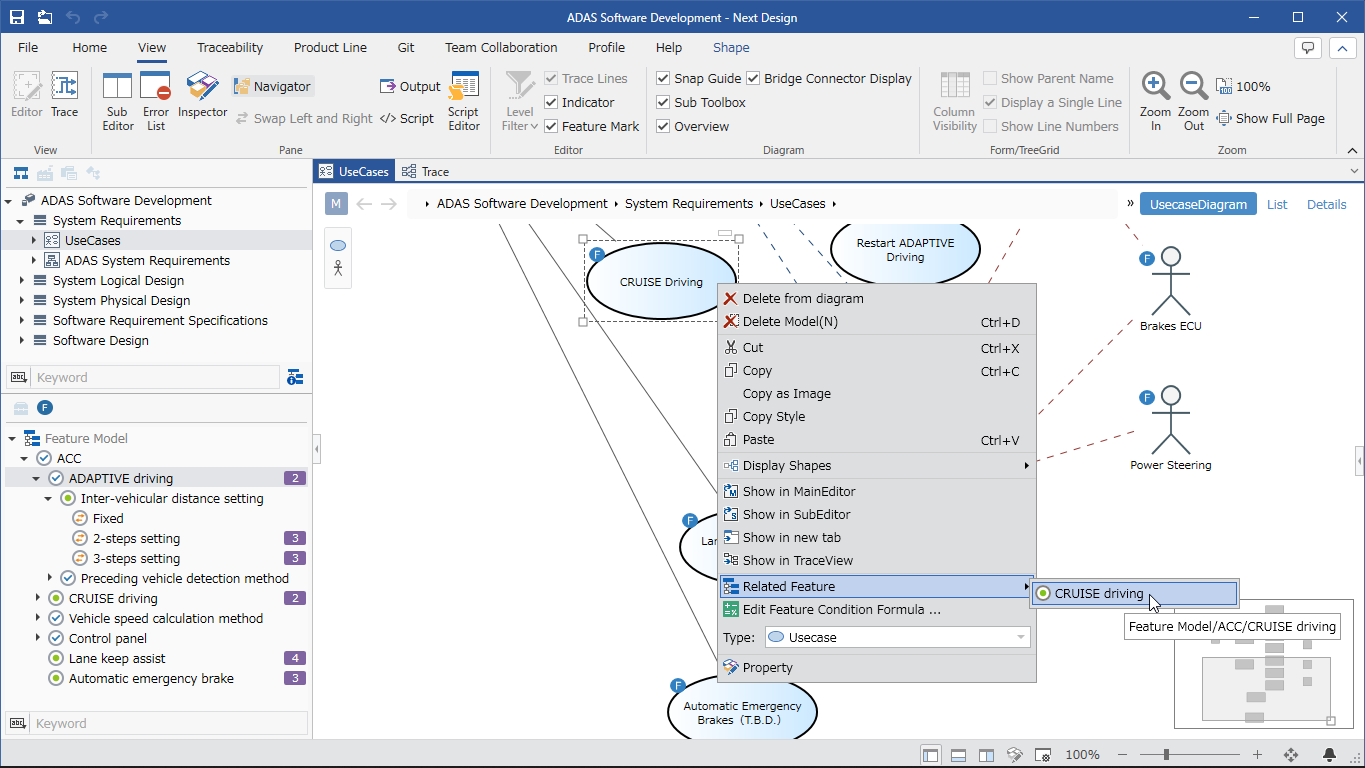
- Right-click the model component on the model editor, and click the feature from the context menu [Related Features].
- Click to display the corresponding feature on the feature palette.
Jump to feature model
Jump from Feature Palette to Feature Model
To jump from the feature palette to the feature model and get a bird's-eye view of the position of the feature, follow the steps below.
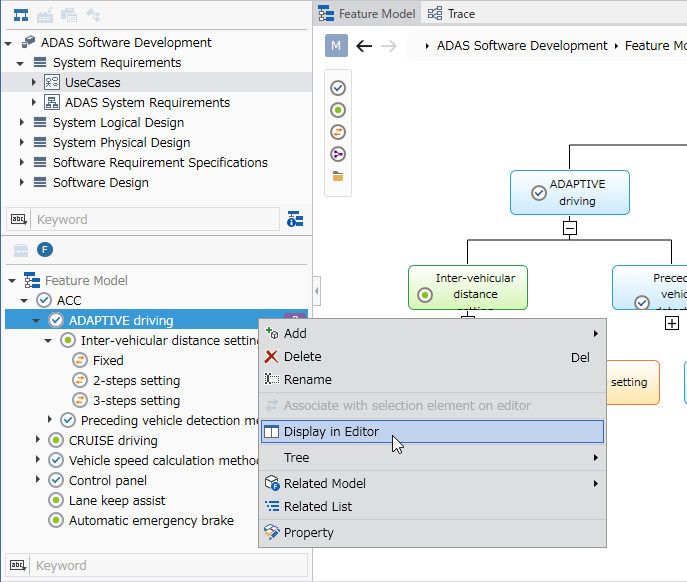
- Click the context menu [Show in Editor] of the feature on the feature palette.
- Click to select the corresponding feature on the feature editor.
Disassociate features
Disassociate using the feature association list
To release individual associations while checking associations between features and model components, follow the steps below from the feature association list popup.

- Click the context menu [Related List] for the feature on the feature palette to display An association list pop-up appears with a tree view of the model components associated with the feature.
- The associated model component is displayed at the end of the tree, and clicking the [Remove Association] icon displayed at the right end of the element The association with the corresponding element is canceled.
- Click the [Delete All Relationships] button at the bottom right of the Related List pop-up to All model components associated with the feature of interest are disassociated.
Disassociating Features Using the Ribbon
To remove features associated with model components in bulk, use the following procedure from the model editor.
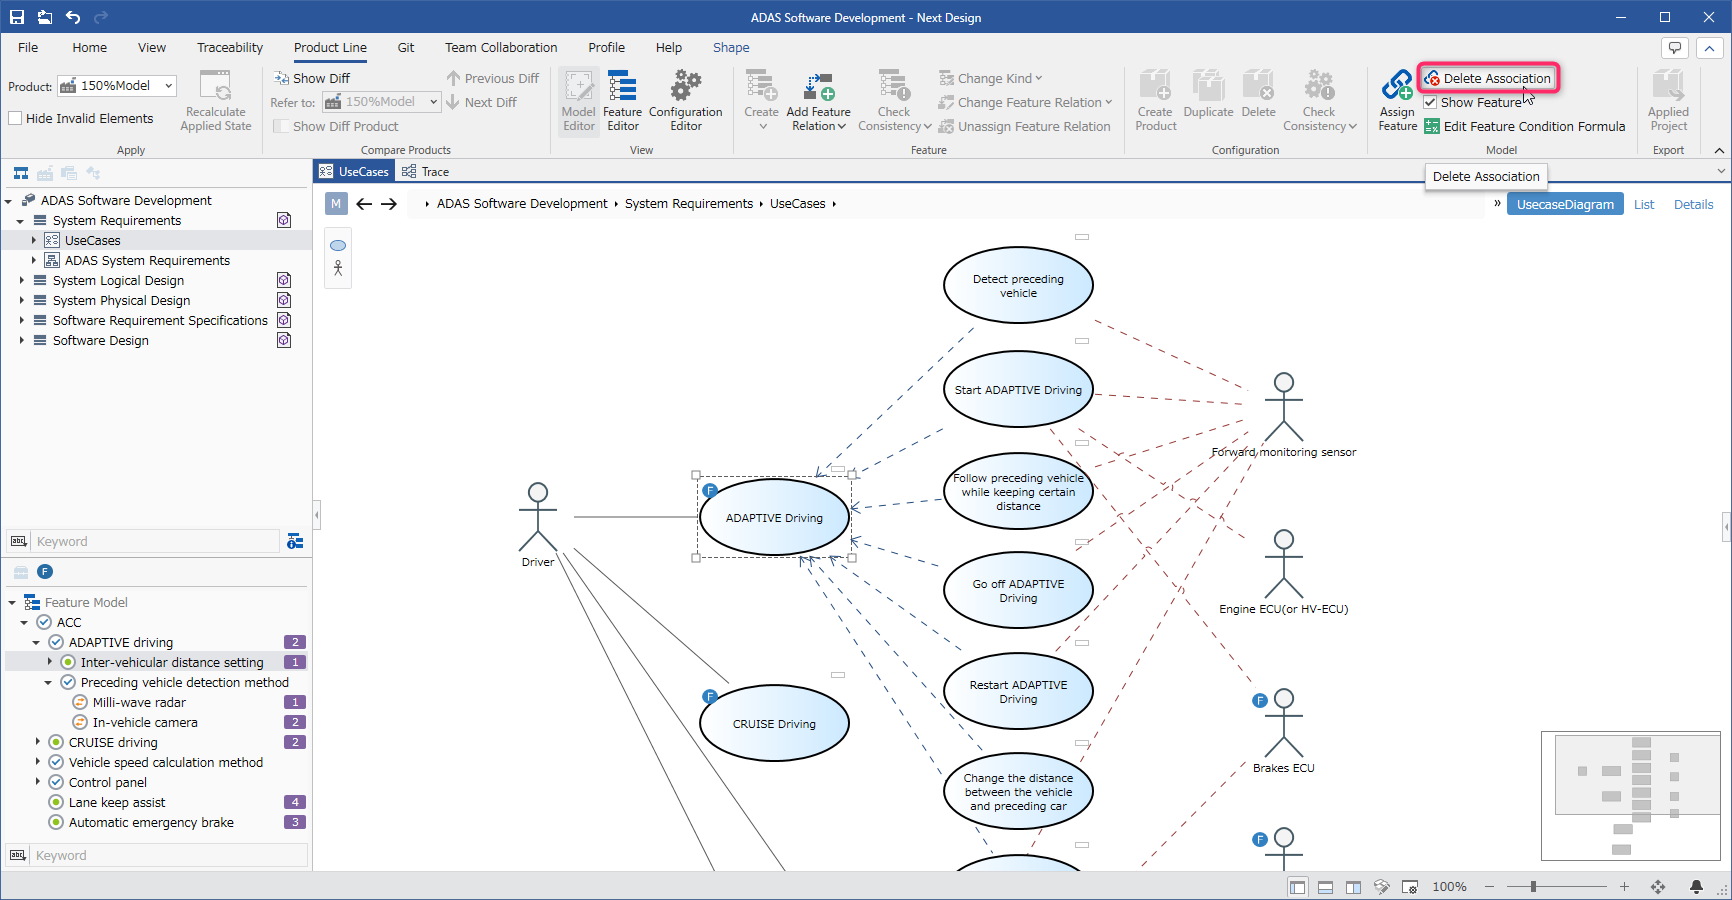
- Select the model component to be disassociated from the feature on the model editor.
- Click Product Line > Model > Delete Association from the ribbon.
- The feature mark displayed on the upper left of the model component disappears, and the feature conditional expression is also cleared.