Product configuration
Overview
In Next Design, you can define the target products for product line development and determine the variability of each product by selecting the features available for each product. This series of tasks is called Configuration.
The following describes the steps to configure the target products for product line development in the following order:
- Configure the product
- Select features for each product
- Check the consistency of the feature selection state
Configure the product
Switch to the configuration editor
To start product configuration, follow the steps below from the project screen.
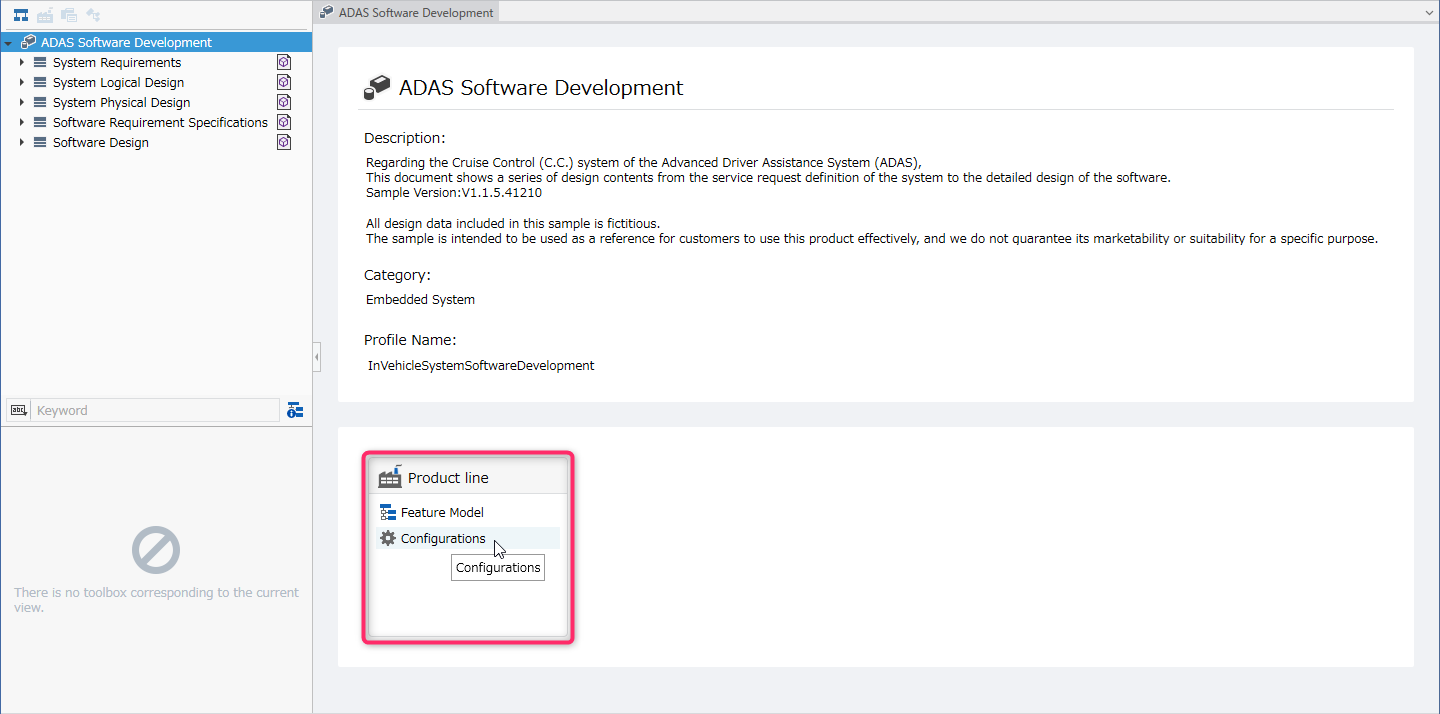
- Switch to the configuration editor by doing one of the following:
- Click [Product Line] > [Configuration] displayed in the product line on the project screen.
- Click [Product Line] > [View] > [Configuration Editor] from the ribbon.
- Select [Product line navigator] in the selector at the top of the navigation, and select [Configuration] directly under the project in the product line navigator.
Add a product
Immediately after starting product line development, the target product is empty. To add a target product for product line development, follow the steps below from the product line navigator.
- In the Product Line Navigator, click [Add] > [Product] from the context menu of [Configuration]. A new product is added under [Configuration] and displayed on the right side of the configuration editor.
- To change the order of products, drag and drop the column title.
- The procedure for changing the product name is explained in the following procedure.
Edit Product Details
To edit the name and details of a product, follow the steps below.
- Select a product in the Product Line Navigator.
- Display the product's detailed view and edit it.
Duplicate a product
To duplicate the same configuration settings as an existing product as another product, follow the steps below from the Product Line Navigator.
-
In the Product Line Navigator, select the existing product to be duplicated from the products directly under [Configuration].
-
Click [Product Line] > [Configuration] > [Clone] from the ribbon, and the duplicated product will be added after the existing product.
-
Click [Product Line] > [View] > [Configuration Editor] from the ribbon to return to the configuration editor, and the duplicated product will be displayed on the far right.
-
Edit the name and other details of the duplicated product according to the instructions in "Editing product details" above.
Delete a product
To delete an existing product, follow the steps below from the Product Line Navigator.
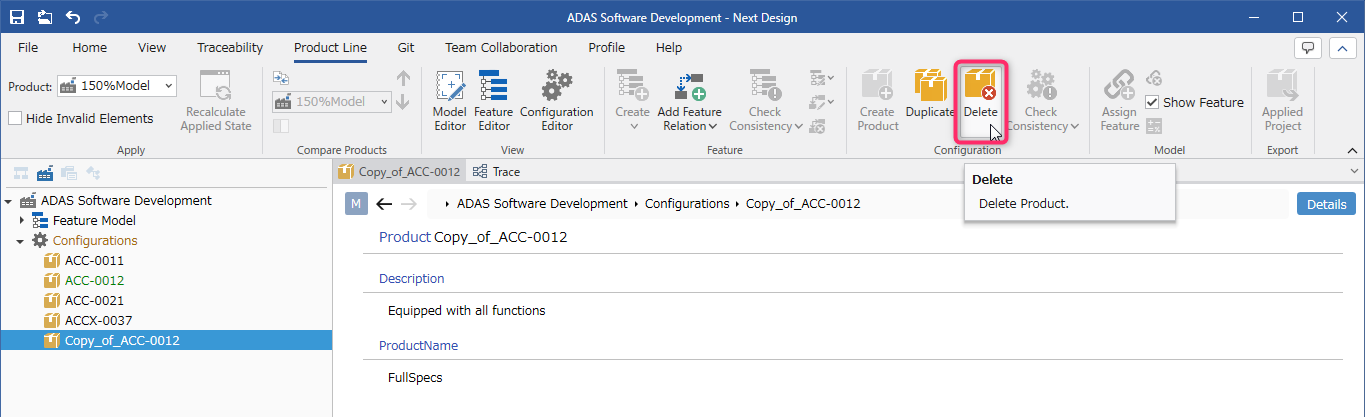
- In the Product Line Navigator, select the product you want to delete from the products directly under [Configuration].
- Do one of the following to delete the product.
- Click [Product Line] > [Configuration] > [Delete] on the ribbon.
- Click [Delete] from the context menu.
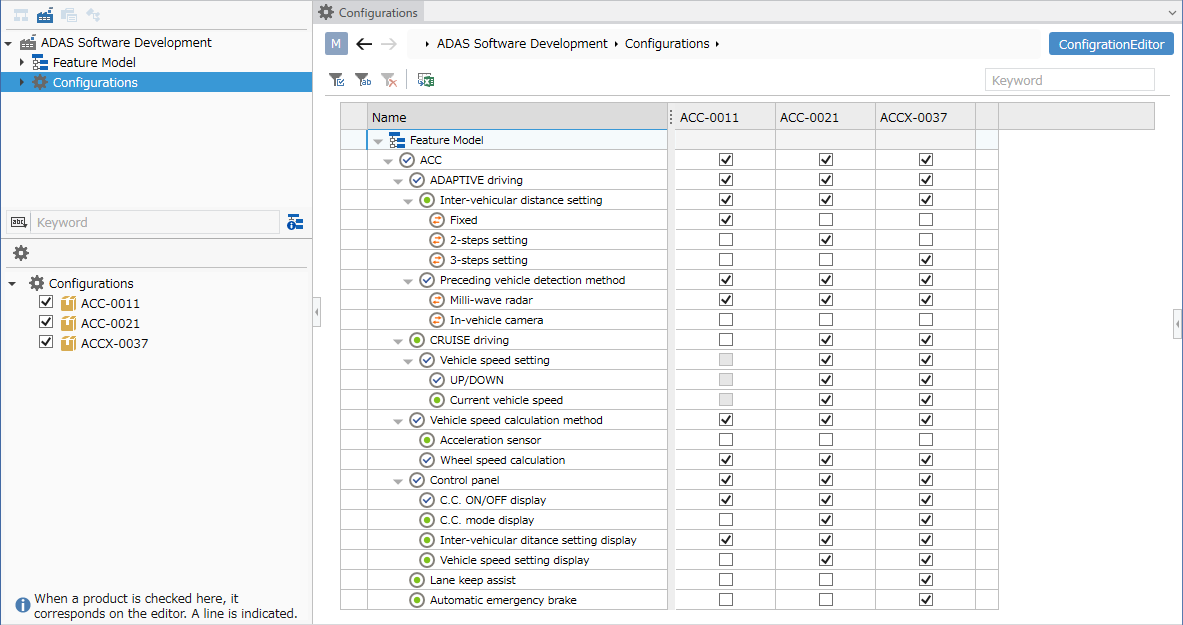
Select features for each product
Select features
To select valid features for each product, follow the steps below.
- In the Product Line Navigator, select [Configuration] directly under the project to switch to the configuration editor.
- Check and select the valid features for each product.
- The following features are selected in the initial state of the product.
- Required features
- Features with the property [Initial selection] checked
- For confirmation and change of the feature property [Initial selection], refer to the following description.
Product Line Development > Feature Model Definition > Define the Feature Model Structure Set the initial selection state of features
- If you unselect a parent feature and select it again, the selection state of descendant features will be reset to the initial state.
- When you select a parent feature, review the selection state of descendant features as well.
- Please note that you can change the selection state even for required features.
Narrowing down the products to be displayed
To narrow down the products to be displayed in the configuration editor, follow the steps below.
- Hide some products using one of the following methods.
- Right-click on the product column title and execute the [Hide this Column] command from the context menu.
- Uncheck the products you want to hide in [Product Selector] under the Product Line Navigator.
- To show the hidden products again, check the products you want to show again in [Product Selector].
To fix the product column to the left so that it is always displayed, follow the steps below.
- Drag and drop the product column titles to change their order so that the products you want to always display are lined up on the left side.
- Right-click the Product column title and execute the Fix to this Column command from the context menu.
- To unfix a column, right-click the Name column title and execute the Fix to this Column command from the context menu.
Check the consistency of the feature selection state
Check consistency
To check the consistency of the feature selection state, follow the steps below.
- Click [View] > [Pane] > [Error List] on the ribbon to display the error list.
- Click [Product Line] > [Configuration] > [Check Consistency] on the ribbon.
- If there are errors, they will be displayed in the error list and also in the configuration editor.
- Use the error messages as a reference to correct the feature selection state.
- After making the corrections, perform the consistency check again to confirm that the errors have been resolved.
Cancel the error display
To cancel the error display, follow the steps below.
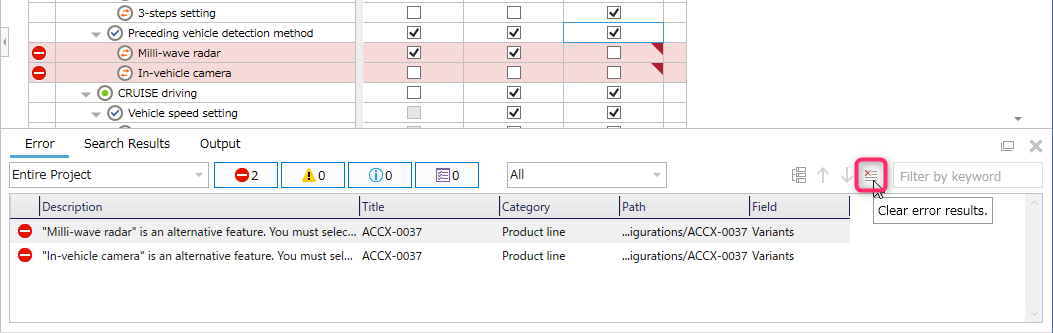
- Do one of the following:
- From the ribbon, click [Product Line] > [Configuration] > [Check Consistency], and then click [Clear Error].
- Click the [Clear Error Contents] button on the toolbar of the error list.
- The configuration editor can add notes to cells.
- To add a note, see Modeling > Edit Model > Edit Tree Grid > Add Note to Cell.
- The configuration editor can be exported in Excel format.
- To export in Excel format, see Modeling > Edit Model > Edit Tree Grid > Export in Excel Format.