Branch and Merge
Overview
Supports branch and merge operations.
The branch and merge procedures are explained in the following order.
- Switching branches
- Creating a branch
- Publishing a branch
- Merging a branch
- Deleting a branch
Switching branches
To switch branches, follow the steps below.
-
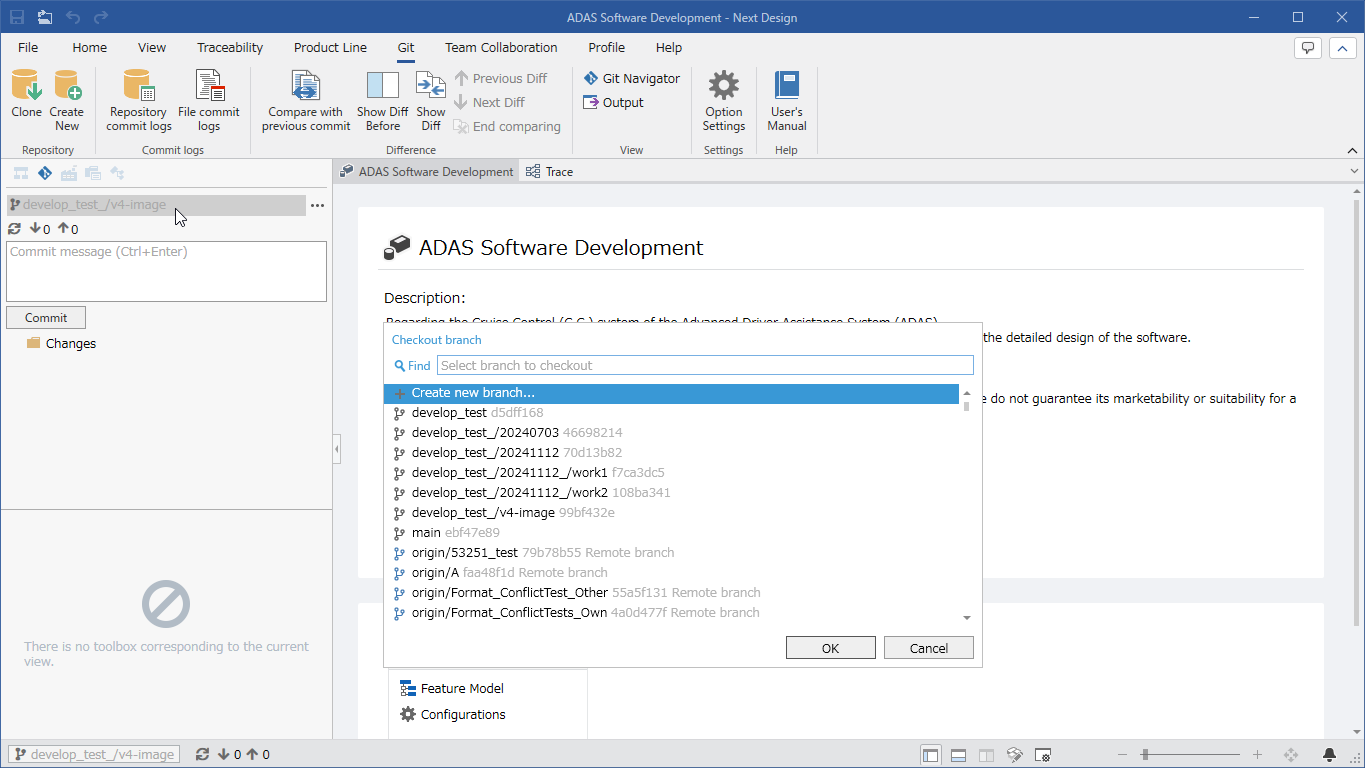
Click the current branch name displayed at the top of the Git Navigator.
-
The [Switch Branch] dialog box will appear, so select the branch name you want to switch to and click the [OK] button.
-
The branch will be switched to the selected branch, and the switched branch name will be displayed at the top of the Git Navigator.
NDGit allows you to switch between the following types of branches.
| Icon | Type |
|---|---|
| Local branch | |
| Remote branch |
- If the remote branch you want to switch to is not displayed in the [Switch branch] dialog, update your repository to the latest version and try switching again.
Create a branch
To create a new local branch, follow these steps:
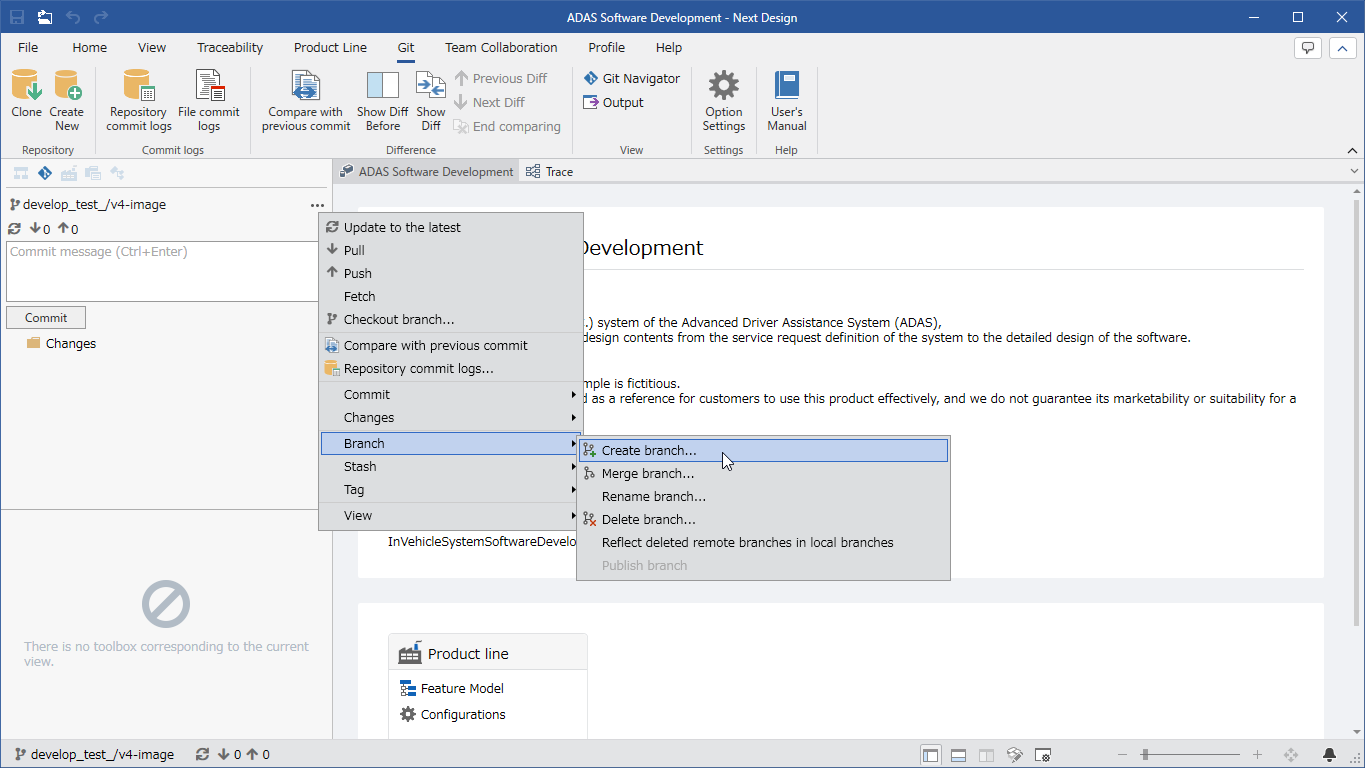
- Switch to the branch that will be the base branch for the branch you want to create. (More info here)
- Click the current branch name displayed at the top of the Git Navigator.
- The [Switch Branch] dialog will appear, so select [Create a new branch] and click the [OK] button.
- The [Enter the branch name you want to create] dialog will appear, so enter the branch name you want to create and confirm.
- A branch will be created with the entered branch name and you will be switched to that branch.
- A branch cannot be created if the following conditions are met.
- A branch with the same name already exists
- A folder with the same name exists at the same level
- Example: Branch: aaa/bbb cannot be created when branch: aaa exists.
Publish a branch
To publish a local branch to a remote repository, follow the steps below.
-
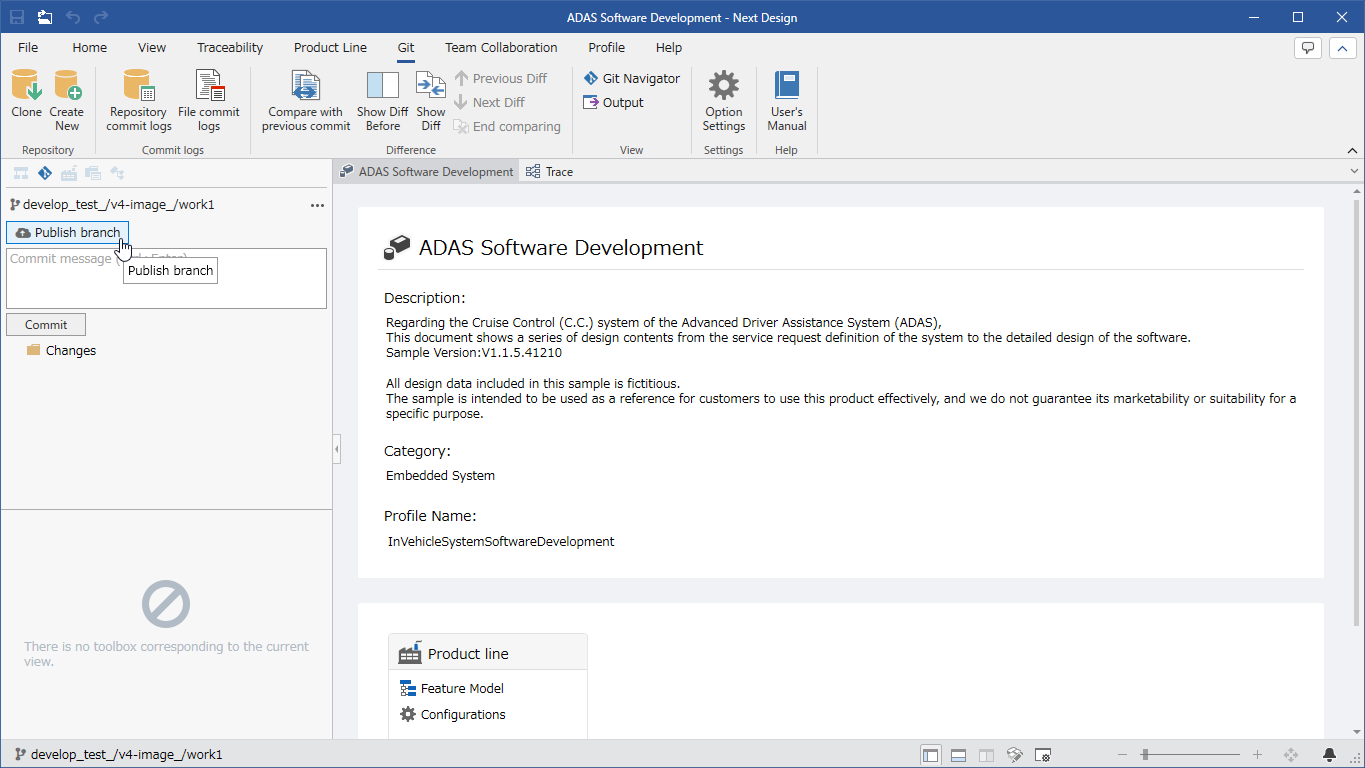
Switch to the local branch you want to publish. (More details)
-
The [Publish branch] button will appear in the Git Navigator, so click that button.
-
The local branch will be published to the remote repository.
Merge a branch
To merge a branch, follow these steps:
-
Switch to the branch that will be the starting point of the merge. (More details)
-
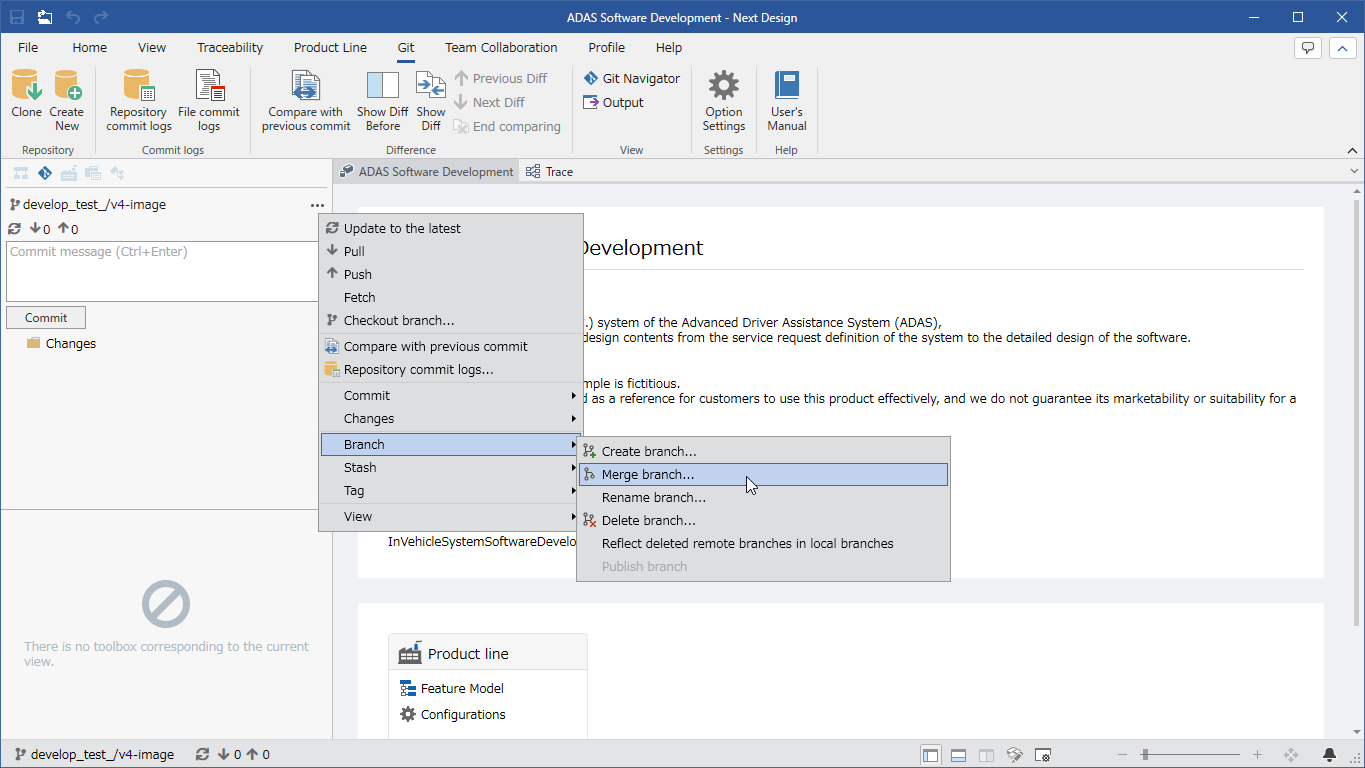
Click the three dots at the top of the Git Navigator.
-
A menu will open, so click the [Branch] > [Merge branch] button.
-
The [Merge branch into{current branch name}] dialog box will appear. Select the branch you want to merge and click the [OK] button.
-
The branch merge will start, and the branches will be merged after a certain amount of time has passed.
- If a conflict occurs, refer to Resolve conflicts to resolve the conflict.
- To stop the merge, click the [Abort merge] button next to the [Commit] button on the Git Navigator.
Apart from conflicts, a merge can cause inconsistencies in design information.
There is a function that automatically checks for inconsistencies and aborts the commit so that you do not commit when there are inconsistencies.
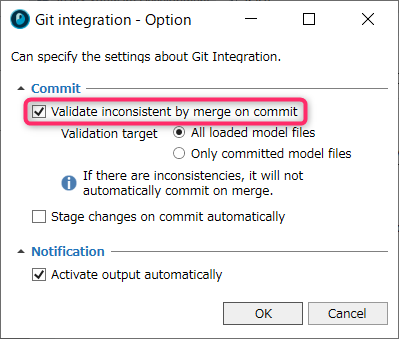
Follow the steps below to turn on the NDGit option [Check for merge inconsistencies on commit].
Operation Procedure
-
Click [Git] > [Setting] > [Option Settings] on the ribbon.
-
The [Option Settings] dialog box will appear, so turn on [Verify merge inconsistencies on commit].
-
Click the [OK] button to close the dialog box.
- For information on NDGit option settings, see Packages > NDGit > UI Description > Dialogs/Popups > Dialogs > Option Settings Dialog.
Delete a branch
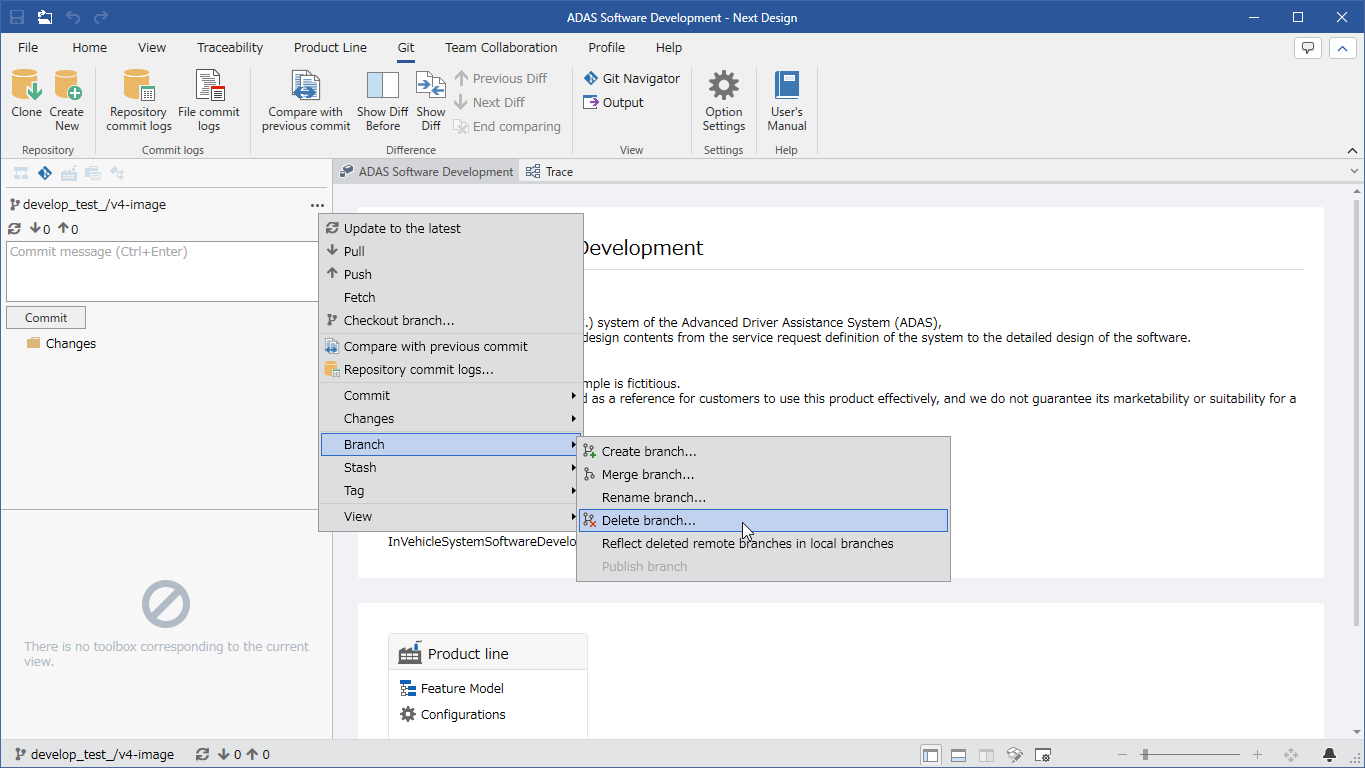
To delete a local branch, follow these steps:
-
Switch to a branch other than the branch you want to delete. (More details)
-
Click the three dots at the top of the Git Navigator.
-
A menu will open, so click the [Branch] > [Delete branch] button.
-
The [Please select the branch you want to delete] dialog will appear, so select the branch you want to delete and click the [OK] button.
-
The selected branch will be deleted and will no longer be displayed in the branch list.
- NDGit does not allow you to delete remote branches. If you want to delete a remote branch, please use another Git client.